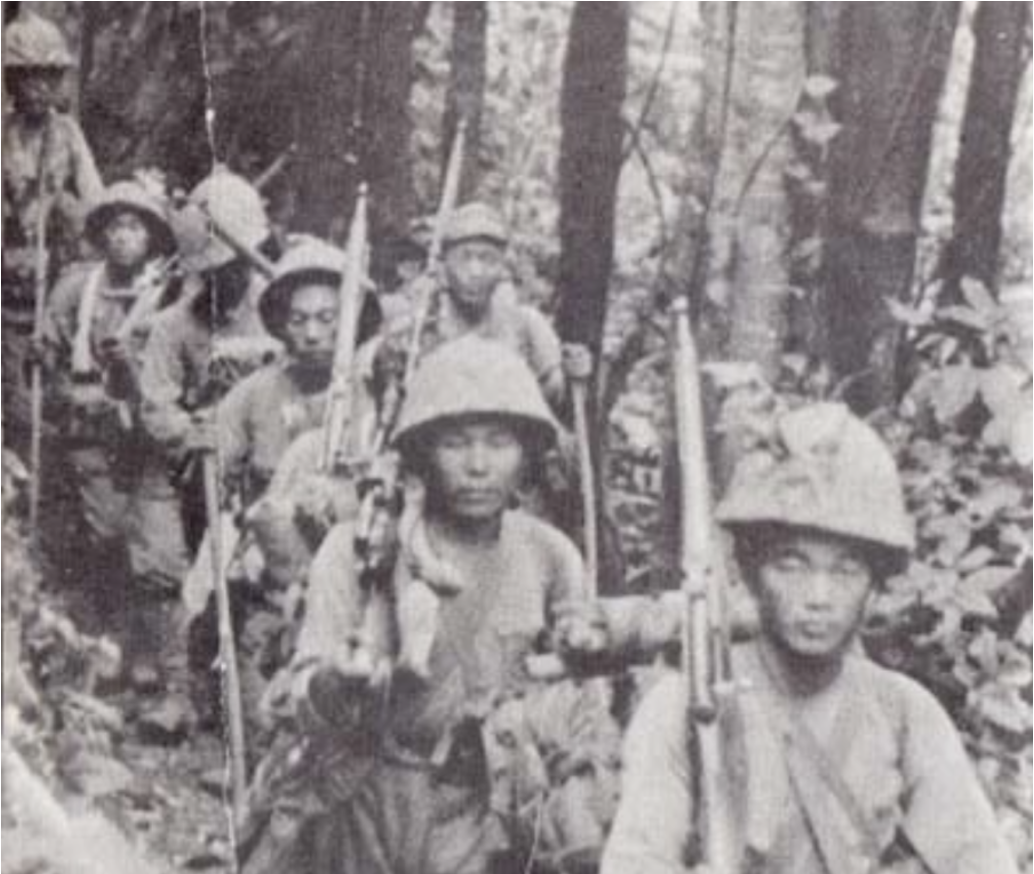
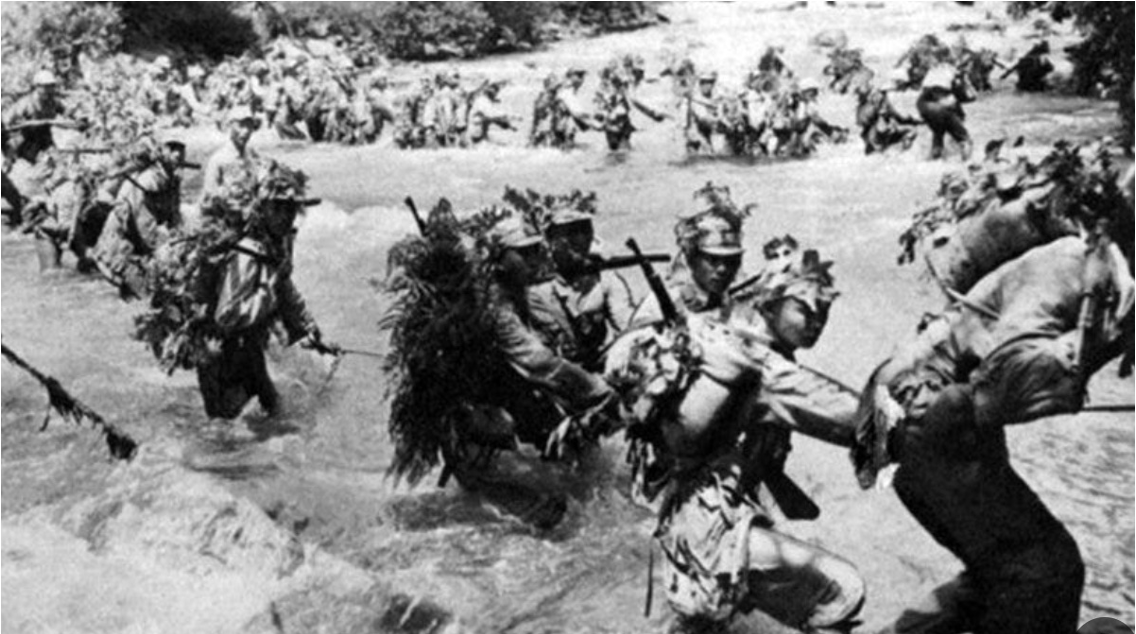
“I shall never forget the date of 15 March 1944. This was the dry season and the great Chindwin River was now so shallow that we were able to walk across to spearhead 31 Division’s rapid advance to attack the British and Indian forces beyond the Arakan Mountains and capture Kohima in India’s Manipur State. At that time we thought only of victory, never of defeat.” (5)
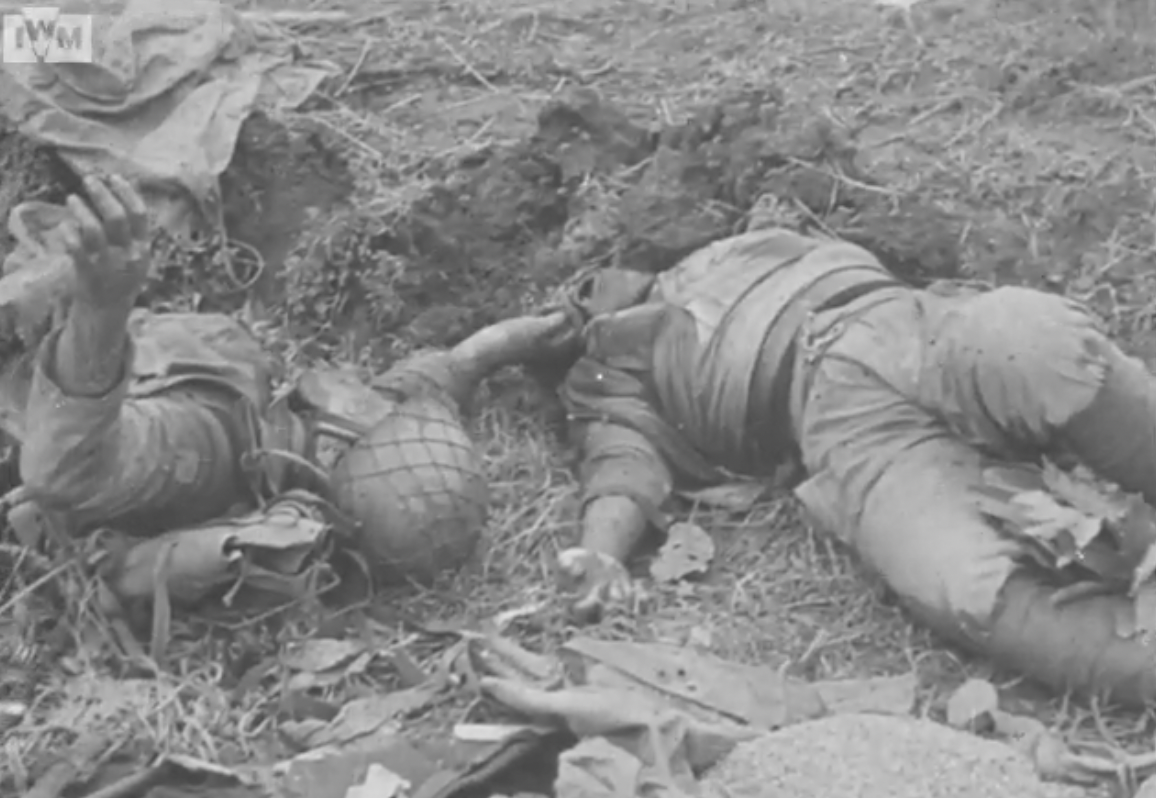
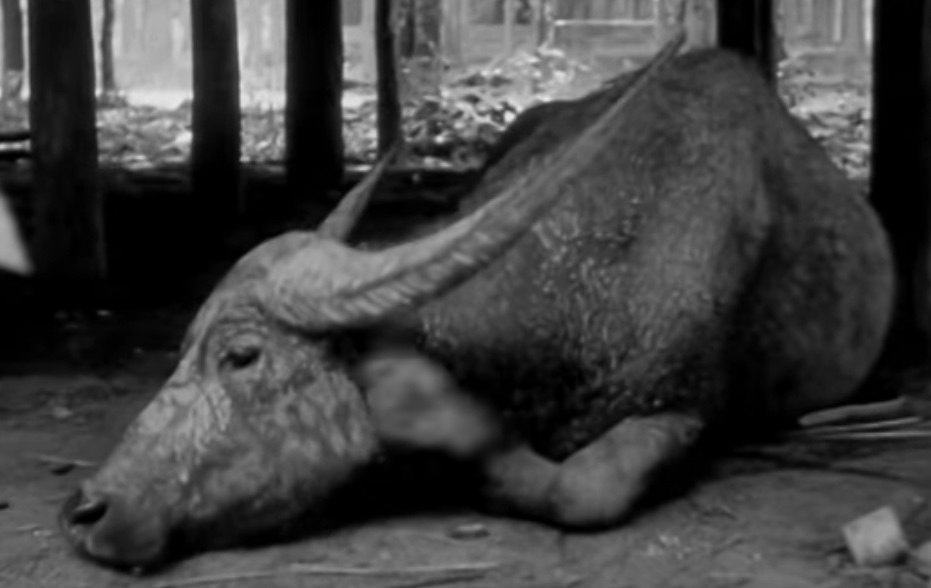
The survivors of 31 Division who made it back to the Chindwin in July found a very different scene. The river was swollen by the monsoon rain. All the crossing points were chaotic & the starving, exhausted soldiers had to wait to be ferried to the other side. British planes attacked regularly & corpses accumulated along the banks.
As soon as the planes departed, vultures descended from the trees to feast.
“At the river-crossing point, having tired of queuing for the boat for three days or more, many soldiers ventured to cross the river using a rope strung across it.
Those who managed to reach the middle of the river found that their weight & the looseness of the rope combined to lower them into the river. The strong current prevented them from holding on to the rope; they were swept away & eventually drowned. This scene was repeated again & again.
Although everybody saw exactly what happened, why did so many follow suit? And nobody tried to stop them. Every single one of them was driven to lunacy.” (5)
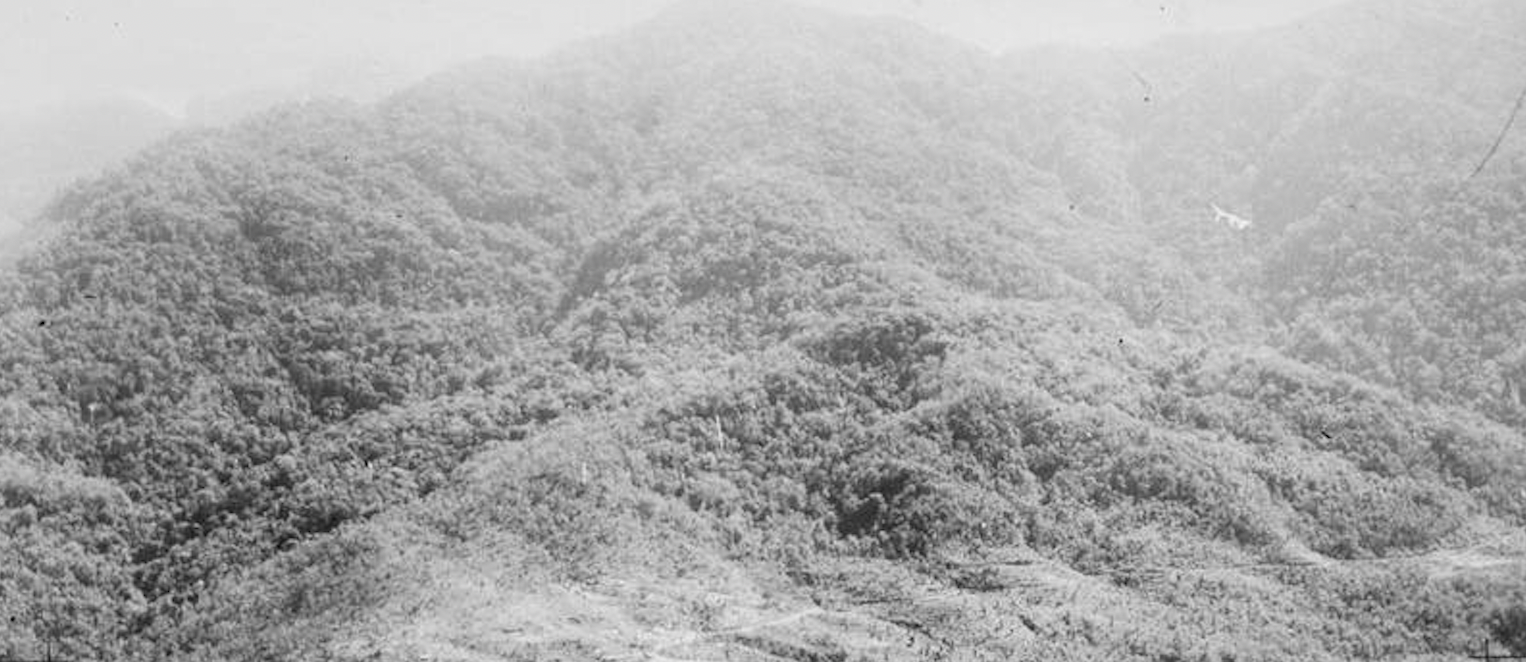
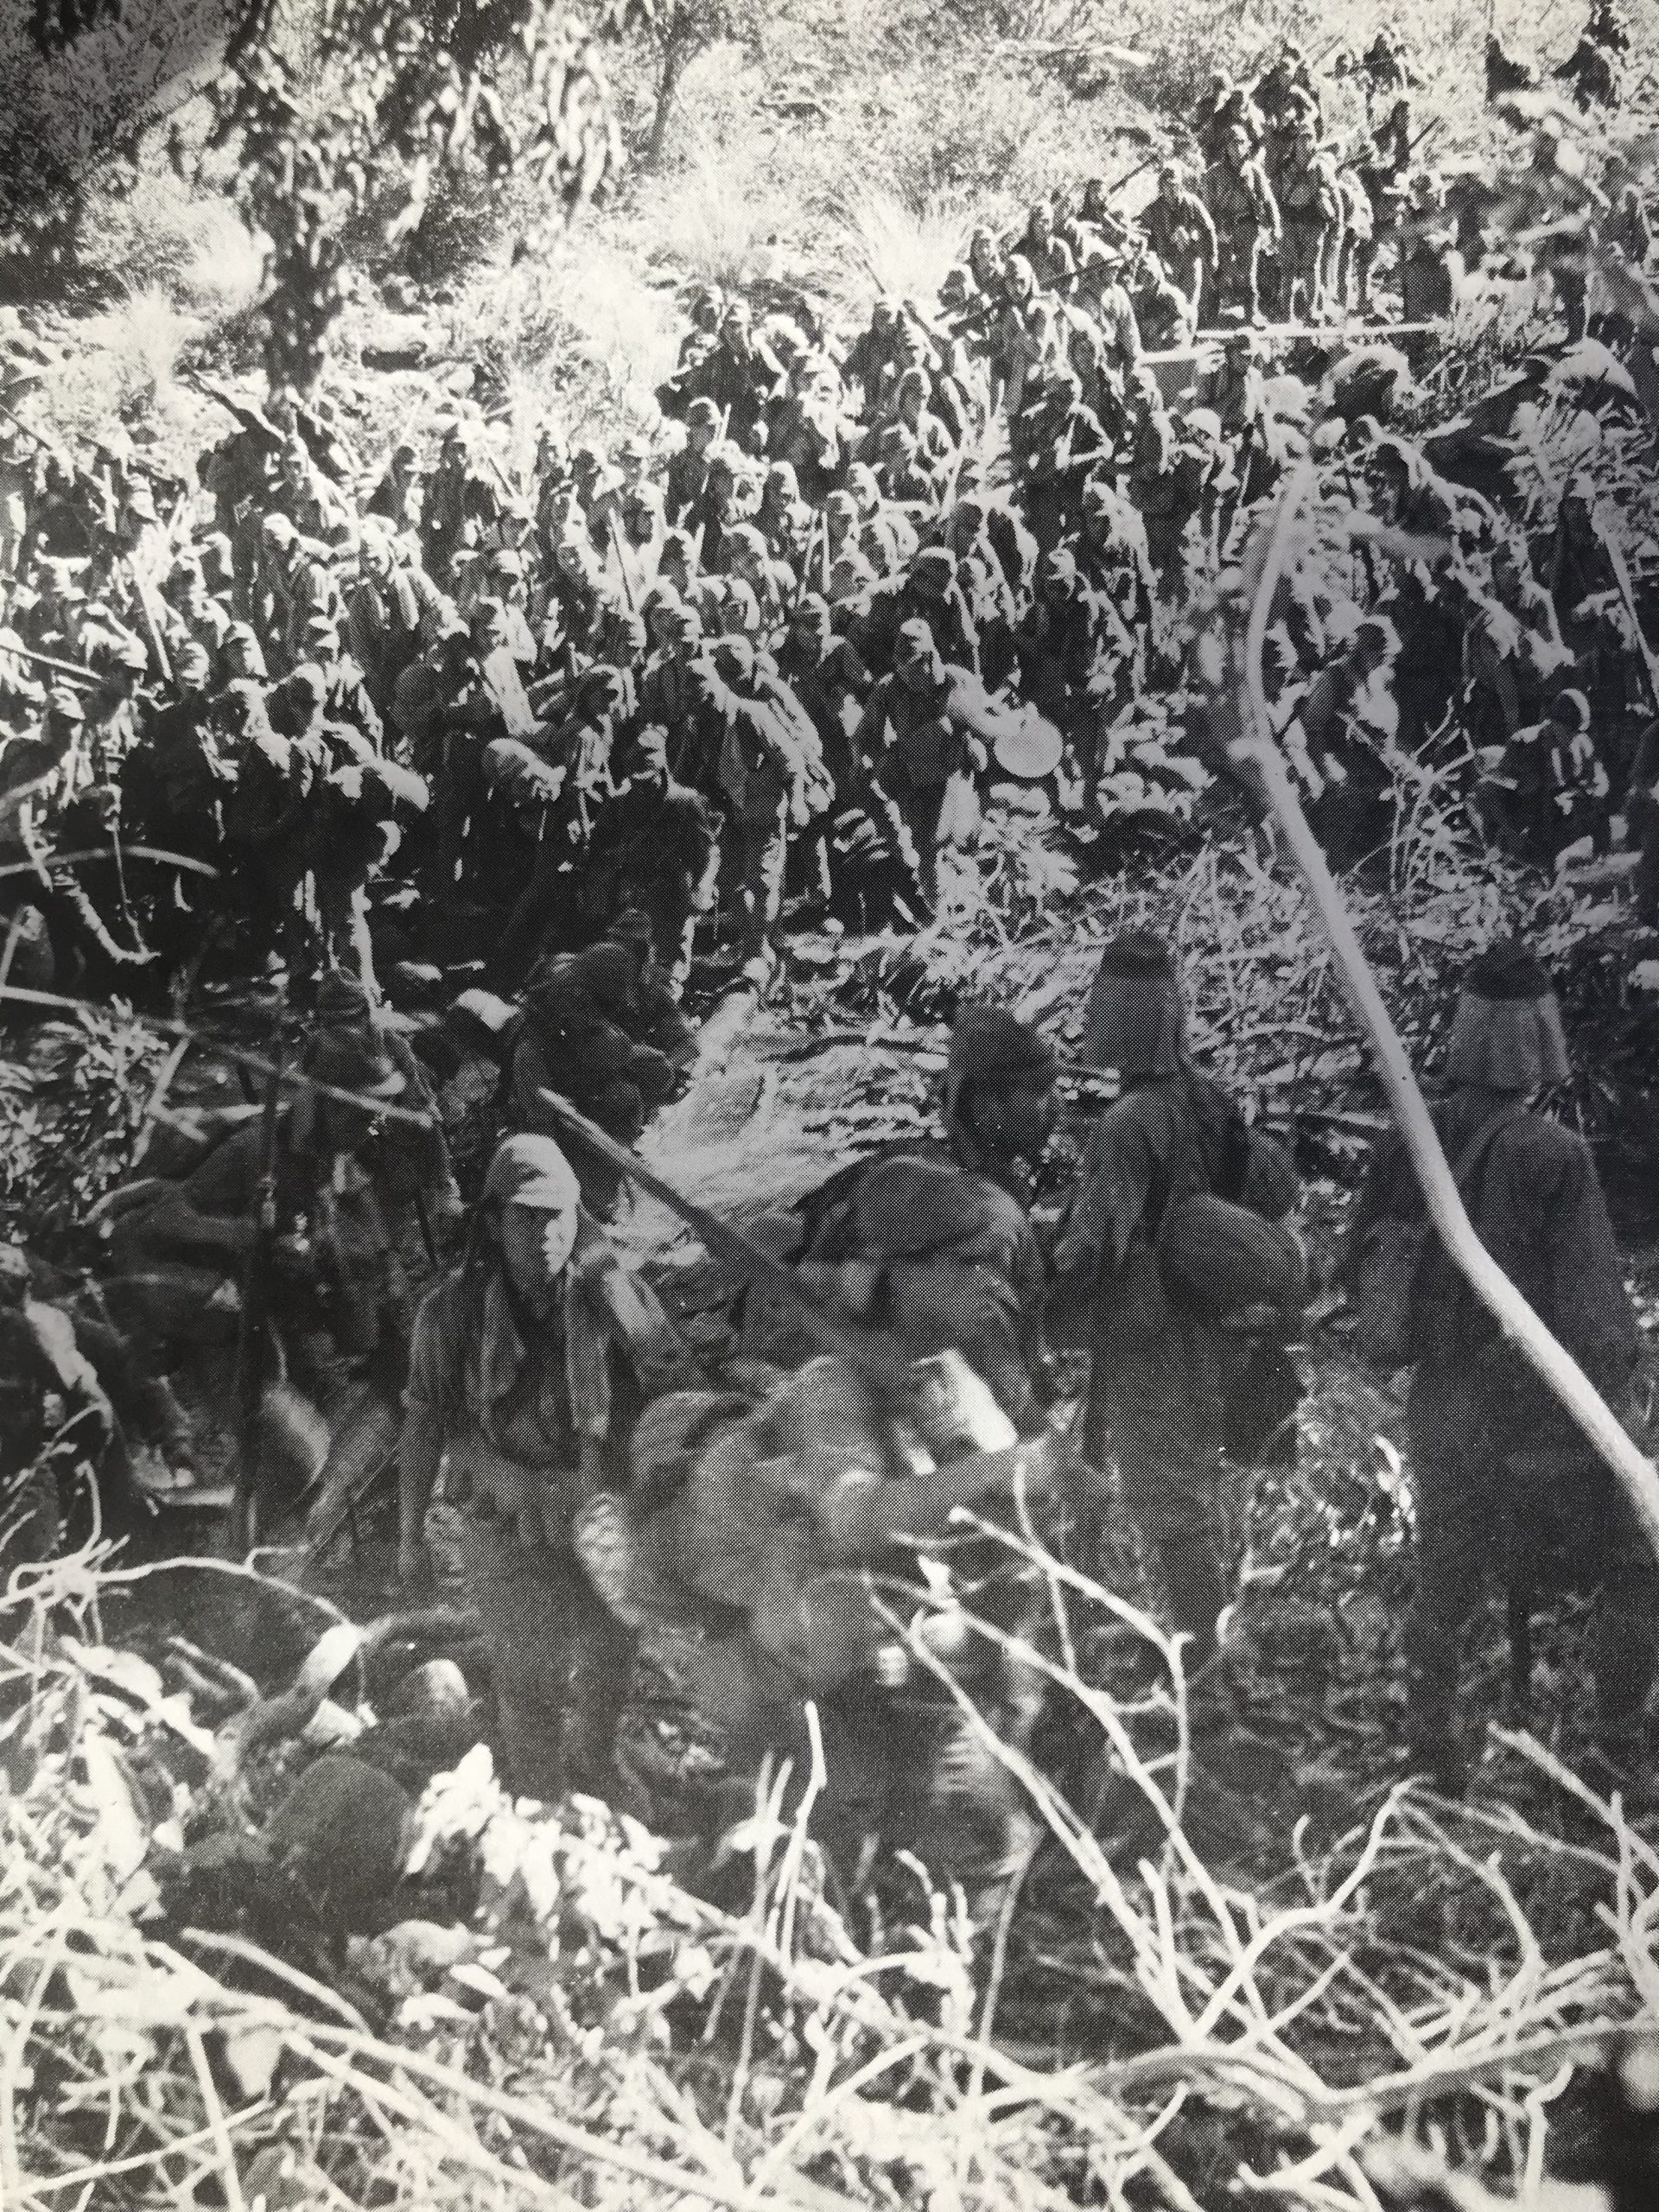
“Our path to safety lay beyond the Arakan Mountains covered in dense jungle. In the rain, with no place to sit, we took short spells of sleep standing on our feet. The bodies of our comrades who had struggled along the track before us lay all around, rain-sodden & giving off the stench of decomposition. The bones of some bodies were exposed. Even with the support of our sticks, we fell amongst the corpses again & again as we stumbled on rocks & tree roots, made bare by the rain, & attempted one more step, then one more step in our exhaustion.” (3)
“Those struggling along this road were almost all in their twenties, yet they stooped like old men. The sight was one of total misery. Nobody could have believed that these men had once possessed the strength to survive a series of intense battles.
I could not imagine that this was a man who had fought successfully in battles in Hong Kong & Singapore. He looked to be deep in thought; in fact, having been exposed to the monsoon, he had reached the limit of mental exhaustion & was merely gazing intently at the water trickling down to his feet. Though I prayed he would make it to the river-crossing point, he passed away at the roadside only a short distance from it.” (5)
“During the retreat, my unit came across a field hospital in the jungle. The condition of the hospital was absolutely appalling. Hundreds of sick & wounded soldiers were lying on the ground, under the trees on both sides of the road.
We recognised our sergeant, who had an injured arm following a severe battle. I had anticipated that, provided he was treated quickly, he would recover completely & return to us. In fact, the skin from the elbow up to his neck was coloured purple & was infested with maggots. It was obvious that he would not survive. Although he looked blank, he realised who we were & gave us a faint smile – but he could not speak.
A barefoot army nurse came into a section of the field hospital, took a syringe from his rucksack & gave injections to those on the verge of death. They would all be dead in about seven seconds. The nurse said that he was carrying out orders, clearly trying to convince himself that he was morally right in freeing them from pain. Having completed his task, he turned his back on us & moved on.” (5)
“‘I feel much better today, I’ll move on now; you can catch me up later.’ After saying this, the soldier went off alone.
We came across him dead. He had committed suicide in the middle of the road. Since he knew that we would walk past, he must have been hoping that we would attend to his body. As he had still been able to walk, we all felt dismayed at his decision. However, knowing his nature, he probably did not want to become a burden to his unit. In tears, some of our young soldiers held on to him. He was married with children & was good-natured & amicable; even more so when he had been physically healthy & strong. Having witnessed what had happened while resting, a sick soldier told us that he saw the man pull the trigger of his rifle with his big toe.” (5)
“‘Isn’t he a member of your unit, lying dead over there?’ a soldier from another unit asked us. He was; there was no doubt about it. He was lying under a portable tent, the four corners of which were tied to branches of trees.
Suffering from malnutrition & diarrhoea while fighting at the front, he had been sent back behind the lines; one of the luckier ones at that time.
I assumed that, on reaching this point, he had sensed his imminent demise, put up his tent & waited to die beneath it. In his rucksack there was a postcard, a toothbrush, toothpaste & a pipe made of ivory.
Before we buried him next to others of our unit, I managed to cut off one of his fingers to send to his family. It was not at all easy & bloodless pieces of flesh fell off. Just then, the moon appeared in the sky. As it shone down on his face, he seemed to be smiling slightly. Having had to die alone, he would be buried by his close friends. We felt that his smile showed his appreciation.” (5)
“In our position at the very rear of the retreating troops, I saw many exhausted men unable to keep up with their units & their comrades too weary to help them. It became a routine that a soldier who was emaciated & crippled, with no hope of recovery, was given a grenade & persuaded, without words, to sort himself out. Taking one’s life seemed the only way out. Soldiers who had no chance of recovery were increasingly pressured to take this path.
We called the road the ‘Human Remains Highway’. It was a vision of hell.
This soldier gave his money to his mates & light-heartedly told them to buy something to eat when they got away from the front. After a while, he crawled to the foot of a tree, holding a grenade. Without any sign of hesitation, he activated the grenade & ended his life. Some of his mates who had witnessed the incident cut off a part of his body & left.” (5)
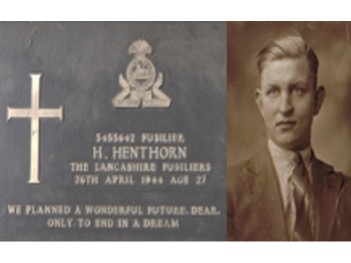
The Japanese custom was to cremate soldiers killed in battle & return the remains to their homeland. This was not often possible in WW2, so instead comrades would cut off a dead man’s fingers & try to return them to their families for burial in Japan.
Allied soldiers searching the packs of fallen soldiers would be horrified to discover severed fingers. Such discoveries fueled rumours of torture and/or cannibalism.
“During the retreat, everyone appeared wounded or sick with beri-beri, malaria & dysentery (often all three at the same time, as I was) & we had no remaining food & medical supplies. We left men scattered along the tracks. We had no time to bury the dead soldiers.
As an officer, I was looked after by my orderly. He was also sick, but not as bad as me. We tried to walk at least 15 miles a day to keep ahead of the enemy. We were taught that we had to kill ourselves with hand grenades rather than be captured. One of my officer colleagues did just this even before the retreat, as he was so sick he did not want his orderly to be burdened further. I would have done this if I had no way to escape.” (11)
July 16. Too weak to fight
On July 16, the Indian pursuit of the defeated Japanese was called off. The total collapse of the defeated army was now certain, with all heavy equipment abandoned & paths littered with corpses.
The victors themselves were badly in need of the chance to recover. Major John Shipster of 33 Brigade, 7 Indian Division, recalled that the
“… rigours of the march had put a great strain on men & mules, most of whom were tired, weak & sick. The health of the Brigade was beginning to deteriorate rapidly & 1st Queen’s were almost too weak to fight. The Gurkhas, with their amazing stamina, still remained remarkably fit. The mules were also in a poor state, for disease was rife among them & a number had died. Plans had been based on reaching Ukhrul & little margin remained. Many men were too weak to digest or retain their food & chronic diarrhoea was rife. For days on end, many officers & men lived on a diet of rum & hot tinned milk, which was all they could manage.” (3)
Far to the east, the Chindits of 23 Long Range Penetration Brigade toiled up & down mountain ridges in the monsoon rain, trying to cut off the Japanese escape to the river Chindwin. Their gruelling trek was described by Lieutenant Philip Brownless of 44 Column:
“The weary column of men & mules plodded down & then up the slippery mountain tracks, waded through torrents, trudged for miles through thick mud. It was here that some begain to suspect the extent of the defeat being inflicted on the Japanese army. An occasional corpse or the carcass of a dead pack pony had been a fairly common sight, but here the column was marching over corpses, corpses sunk into the mud, with a helmet or a piece of equipment or a limb showing, & past an almost continuous line of dead pack animals This continuous line of dead stretched for twenty to thirty miles.
The extreme misery of the march is impossible to describe. The men staggered through the mud & up the slopes, borne down by the weight of their great packs. All were tortured by exhaustion because all were sick. Many were marching with temperatures & tick typhus had begun to break out. We had been sodden for weeks, were covered in mud & we stank. Hollow-eyed, wasted, hungry, & yet incapable of eating more than a minute meal, we talked of nothing else but food.” (3)
But by mid-July, the Chindit columns were withdrawn to Imphal & Kohima, from where they could be trucked to hospitals & rehabilitation centres in Dimapur, to try to recover their shattered health. In many cases, this proved to be impossible.
July 14. A sorry sight
20 Indian Division pursued the retreating remnants of 15 & 31 Divisions, intent on destroying them. They set ambushes to intercept scattered groups of escaping Japanese. One cluster limped into a trap on July 14, losing ten men killed and three captured. The following day, thirteen were killed and four more captured.
The capture of Japanese troops was unusual. Of the 65,000 who invaded India, only 600 were taken prisoner. Most chose suicide as more honourable than surrender. Soldiers who could not keep up during the retreat would routinely be handed a grenade with which to kill themselves.
Sometimes they embraced a comrade with the grenade between them, sharing their final moments.
Those captured during the retreat were mostly too weak to resist, due to starvation & wounds or disease. Lieutenant Peter Toole of 20 Field Company recorded the excitement when news spread amongst his men that a Japanese had been caught:
“One day, word came that a prisoner had been taken. This capture was rare & we had not until now seen a live Jap. The soldier was a sorry sight, small, in tatters, emaciated, scared stiff & bowing left, right & centre, being escorted to the rear”. (3)
Their never having seen a live Japanese reflects their being an artillery unit, which would engage the enemy from afar.
Although some felt sorry for the wretched specimens they captured, others behaved brutally, perhaps in retribution for fallen comrades. Earlier in the campaign, a wounded Japanese prisoner sent by truck from Kohima was shot dead by his guard en route to the Hospital in Dimapur.
July 13. Most loving memory
Grave of Major Charles Swainson MC, 1923-1944, 2 Royal Norfolk Regiment. Rest in Peace.
The bleached bones road
As the exhausted, emaciated survivors of Japanese 15 & 31 Divisions dragged themselves towards the frontier, they passed countless corpses in various stages of decay. They came to refer to the path as the ‘bleached bones road’. Private Masaoki Okoshi recalled
“There were dead bodies everywhere. All along the road as we travelled back. They all collapsed & died by the roadside.” (3)
A moment of shock & revulsion never left Senior Private Manabu Wada:
“In my thirst, I looked for clean water as I struggled to catch up with the division’s remnants. Filling my cupped hands, I was about to drink when I saw maggots floating in them & in disgust I threw it down. It was then that I found it was a stream where ten or more soldiers had come for water. Thousands upon thousands of maggots crept out of the bodies & were carried away by the fast-flowing waters.” (3)
Private Zenta Makioka could not forget how desperately men struggled for sustenance:
“If you notice that some guy has rice, you kill him to get the rice & you eat it & stay alive. That was how it was. If you looked like you had rice, you’d get killed. So you couldn’t appear to be carrying any rice. Many people were killed that way.” (3)
July 8. Screams of the Japanese wounded
South East Asia Command (SEAC) produced a newspaper that was delivered to its troops to keep them informed of progress.
On July 8, the SEAC services newspaper reported that
“Japanese parties are still holding out in the northern outskirts of Ukhrul, resisting fiercely as our troops push forward from the south of the village. Japanese artillery & machine-guns are active. Five hundred Japanese entered from the north-west on Wednesday.” (11)
However, the Japanese were forced to abandon Ukhrul on July 10, leaving behind abandoned weapons & countless putrefying bodies.
Abandoned Japanese equipment
They were pursued by 20 Indian Infantry Division, which set road blocks & ambushes for the retreating survivors of 15 & 31 Divisions. The Japanese fought furiously to escape these traps.
Ken Cooper of 2nd Border Regiment, part of 20 Division, recalled
“On patrol near Ukhrul, amid tall, dripping jungle & dark menacing shadows, we heard the cries & screams of the Japanese wounded. In one clearing … there was a lotus pool, blasted by the monsoon torrent: it was full of Jap corpses rotting, emaciated yellow hands clutching at the empty sky.” (3)
Sympathy evaporated upon discovery of a dead British officer pinned to a tree using bayonets.
Gravestone of Lance Corporal Walter Young, 1908-1944, 506 Field Company Royal Engineers. Rest in Peace.
At Kohima we were starved & then crushed
When 31 Division began to withdraw from Kohima, the men tried to keep discipline & march in an orderly manner, but this effort eventually collapsed. Senior Private Manabu Wada of 3rd battalion 138 Infantry Regiment recorded
“At the beginning of the Imphal Operation, the regiment was 3,800 strong. When our general gave the order to withdraw we were reduced to just a few hundreds. Without shelter from the rains, with boots that had rotted & had to be bound with grass, we began to trudge along the deep mud paths carrying rifles without ammunition.
Icy rain fell mercilessly on us & we lived day & night drenched to the skin & pierced with cold. I remember how we longed for a place, any place at all, where we could take shelter & rest.
In the rain, with no place to sit, we took we took short spells of sleep standing on our feet. The bodies of our comrades who had struggled along the track before us lay all around, rain-sodden & giving off the stench of decmposition. The bones of some bodies were exposed. Even with the support of our sticks we fell amongst the corpses again & again as we stumbled on rocks & tree roots made bare by the rain & attempted one more step, then one more step in our exhaustion.” (5)
Caught up in the retreat, war correspondant Shizuo Maruyama recorded bitterly
“We had no ammunition, no clothes, no food, no guns … the men were barefoot & ragged & threw away everything except canes to help them walk. Their eyes blazed in their lean bodies … all they had to keep them going was grass & water. At Kohima we were starved & then crushed.” (3)
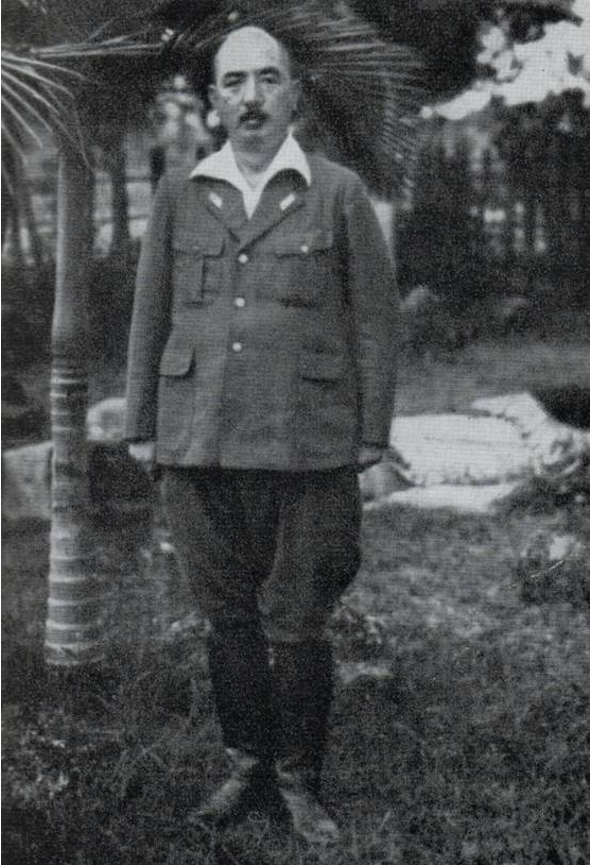
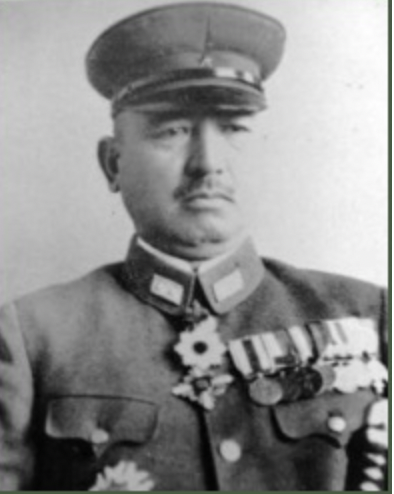
July 5. Lieutenant General Sato sacked
Lieutenant General Kotoku Sato
Lieutenant General Sato’s command of 31 Division was terminated on July 5, the day after his opponent’s command had been ended. His valedictory speech to his staff stated:
“It is clear that this operation was scheduled by the foolish desire of one man: Lieutenant General Mutaguchi, commander of the 15th Army. I do not intend to be censured by anyone. Our 31st Division has done its duty. For two months we defended our positions against strong enemy forces & not one of their men during that time passed down the Imphal Road.
Before God, I am not ashamed.
Now I must say good-bye to you. I remember the hard time we had at Kohima & how you helped me do my duty there. I thank you sincerely.
I ask the forgiveness of those who lie dead at Kohima because of my poor talent. Though my body is parted from them, I shall always remain with them in spirit. Nothing can separate those of us who were tried in the fire at Kohima. Now the moment has come when I cease to be your commander; but I hope we shall meet again at the Yasukuni Shrine. I pray for your health & happiness. Goodbye.” (11)
The Yasukuni Shrine is a Shinto shrine that commemorates those who died in the service of Japan.
Immediately after his speech, Sato left for 15 Army Headquarters in Maymo, Burma. He took with him a detailed critique of 15 Army’s inefficiency & justification of his own actions. On arrival, a court-martial began against him, but this was stopped by Tokyo when medical examination found him mentally unfit to stand trial. He was eventually transferred to the Reserve, initially in Java & later in Japan, where he survived the war.
In December 1944, Lieutenant General Renya Mutaguchi’s command of 15 Army was terminated. He survived the war in charge of a military academy in Japan.
Lieutenant General Renya Mutaguchi
July 4. Major General Grover sacked
Major General Grover (left), commander of 2 Division, confers with Lieutenant General Stopford (right), commander of 33 Corps.
Lieutenant General Montagu Stopford was Commander of 33 Corps, which included the British 2nd Infantry Division. Throughout the Battle of Kohima, Stopford had been frustrated by the time it took 2 Division to relieve the garrison, displace the Japanese & then open the road to Imphal. On July 4 1944, Stopford terminated the command of 2 Division by Major General John Grover, who was sent back to Britain to become Director of Army Welfare.
Major General Grover expressed his gratitude to the men of 2 Division & his pride in having commanded them.
Grover’s sacking caused surprise & anger amongst the British troops he had commanded. For example, John McCann of 1/8 Lancashire Fusiliers wrote that having just
“inflicted on the enemy a massive defeat … it is totally unjust that ‘The Powers That Be’ have separated from each other John Grover & his men”. (8)
The troops greatly resented the criticism of their performance that was implicit in sacking their commander. But Grover had made himself look foolish by declaring on his arrival at Kohima that his task would take only a matter of days. The caution with which he then proceeded provoked the snide accusation from 33 Corps staff that 2 Division was “frightened of shadows”. Doubtless the same staff would have been far more damning if Grover’s men had rushed incautiously into a Japanese trap. It is easy to criticise those in charge, especially with the benefit of hindsight.
Was Grover’s advance too slow? The Japanese road block at Zubza was 10 miles from Kohima & was stormed on April 14 by the Queen’s Own Cameron Highlanders. By April 16, 2 Division was at Jotsoma, just 2 miles from Kohima. On April 17, 1/1 Punjab could be seen from Kohima Ridge, just half a mile away, but the beleagured garrison was informed by radio that their relief was postponed because Major General Grover wanted time to concentrate his units. That night, the Japanese took Kuki Picquet, driving all the survivors back onto Garrison Hill, fully expecting to be overwhelmed by the next assault. No more attacks came that night & relief arrived the following morning. Under those desperate circumstances, the delay in relieving the garrison seems hard to comprehend by we who were not there, squinting through the fog of war.
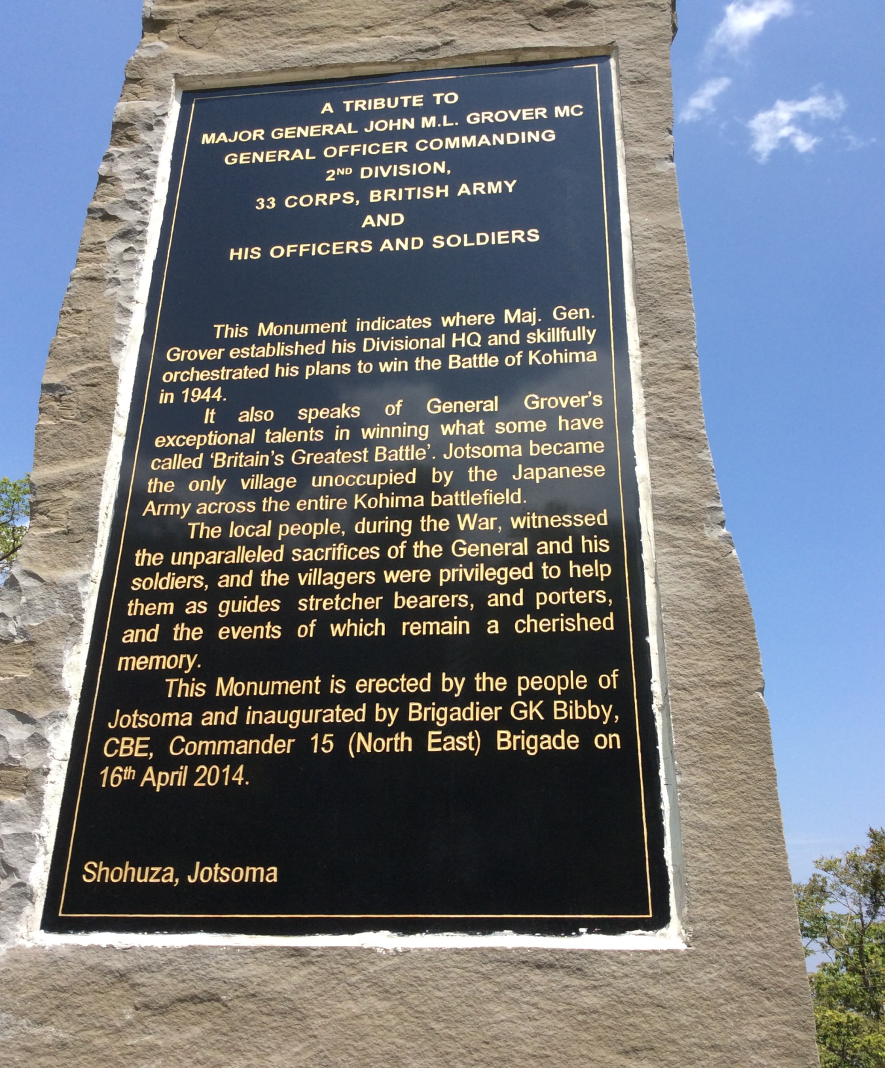
Inscription on The Grover Memorial
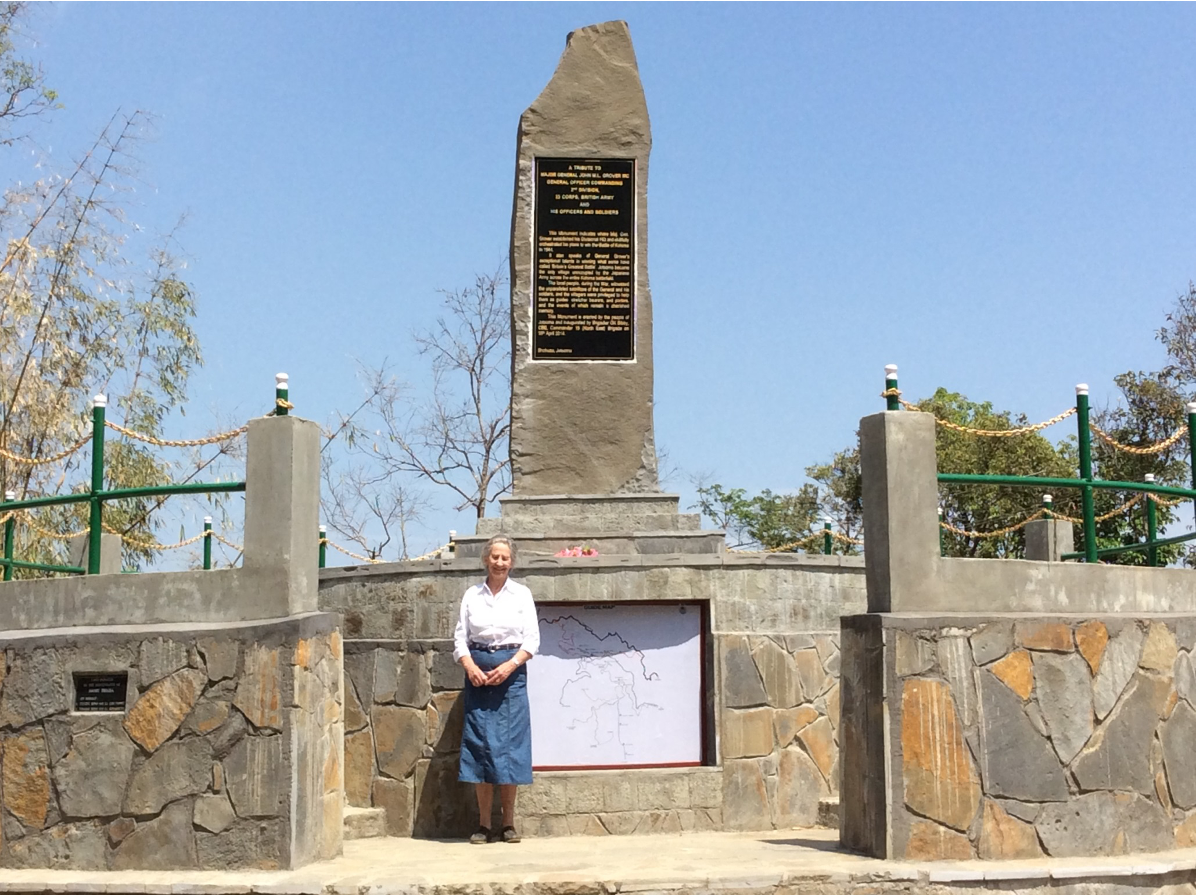
John Grover died in 1979, but in 2014, citizens of the Naga village at Jotsoma dedicated a monument to him, his officers and soldiers. The monument praises General Grover’s “exceptional talent” & how he “skillfully orchestrated his plans to win the Battle of Kohima in 1944”. The general’s daughter-in-law Mrs Celia Grover was present.
Mrs Celia Grover at the Grover Monument.
In 2024, Mrs Celia Grover visited the Kohima Museum on the day of the annual service of remembrance. She is pictured below, in front of the cabinet that contains Major General Grover’s war diary from the Battle of Kohima.
Mrs Celia Grover in the Kohima Museum
Gravestone of Private Lawrence Makepeace, 1915-1944, 1 Royal Berkshire Regiment. Rest in Peace.
The Nagas go home
Young Nagas displaced from their homes by the war.
Hundreds of the native Naga people were displaced by the war. As the armies moved away, they were able to return to their villages that had been caught in the battle zones. The poignant recollections of Neidelie, aged thirteen, have been recorded:
“We were elated at the thought of going back home. But on the way back, we saw many dead Japanese soldiers … After some time, I grew tired of counting & looking at the dead soldiers, all of whom looked alike now that they were bloated & decomposing by the roadside.
The group that we were travelling with was a large body of our villagers, so we buried the dead bodies when we came upon them on our way. But after some time, we gave up this effort because there were just too many dead Japanese for us to bury all … Dead bodies were strewn over the countryside & the stench from the bodies was more than anyone could bear.” (3)
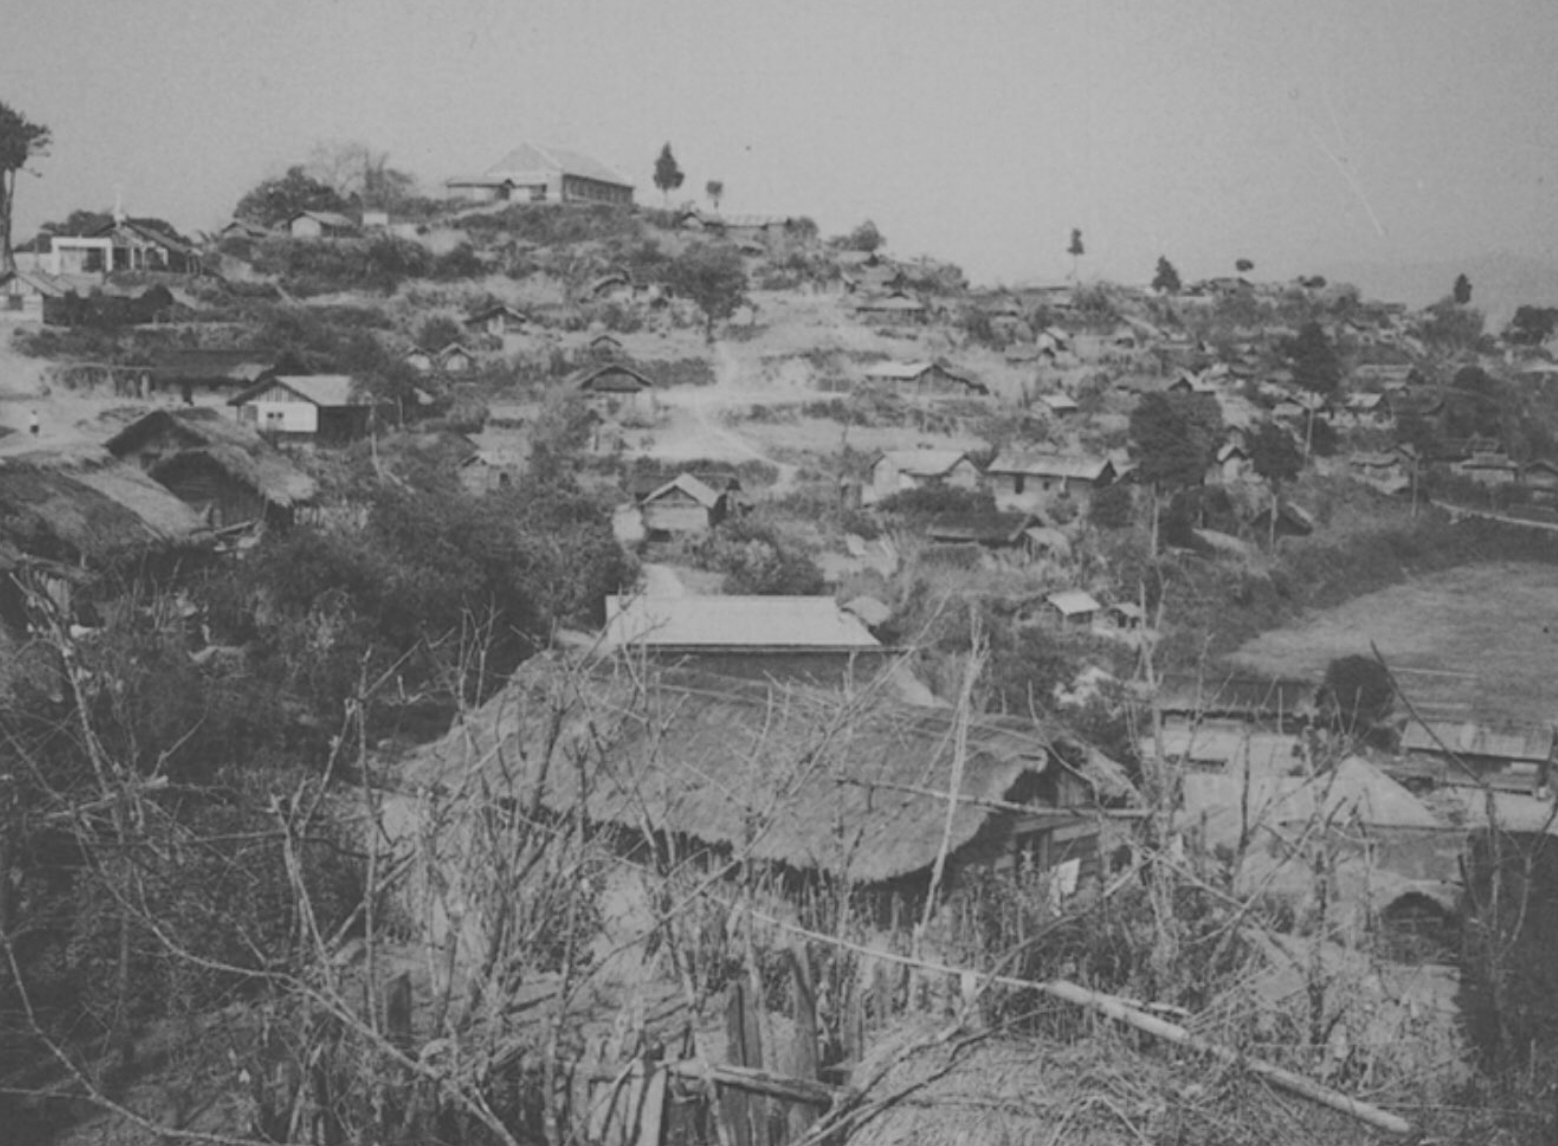
Several Naga villages that had been occupied by the Japanese had been completely destroyed by Allied shelling & bombing, such as the one at Kohima.
The devastated remains of the Naga Village at Kohima after the Japanese had gone.
June 26. Mutaguchi seeks permission to withdraw 15 Army
From 15 Army Headquarters at Maymo in Burma, Lieutenant General Mutaguchi had instructed Japanese 31 & 15 Divisions to mount a joint attack on Imphal. This order took no account of the state of these units, which were starved of rations & ammunition, severely depleted, & utterly exhausted. The divisional commanders knew that such an attack was impossible & made no attempt to comply.
Finally bowing to the inevitable on June 26, Mutaguchi sought permission to withdraw 15 Army from Lieutentant General Kawabe, his superior in Rangoon. Kawabe ordered him to continue fighting until approval had been obtained from the Commander of Southern Army, Field Marshal Count Terauchi. Permission was eventually granted on July 8. Initially, Mutaguchi tried to organise the fighting withdrawal, but this proved futile & so on July 20 he ordered a general retreat back across the Chindwin.
Gravestone of Gunner William Randall, 1920-1944, 10 Field Regiment Royal Artillery. Rest in Peace.
Pursuit
Lieutenant General Slim, Commander of Allied 14th Army, was determined to press home the advantage won by his troops. He would not allow the remains of Japanese 15th Army to withdraw to fight another day, but insisted on its complete destruction. He ordered 7th Indian Division to pursue Sato’s 31st Division from the north-west, whilst 80th Indian Brigade pushed towards Ukhrul from the direction of Imphal, aiming to cut the line of retreat of the Japanese 15th & 31st Divisions.
Lieutenant General Bill Slim, Commander of 14th Army
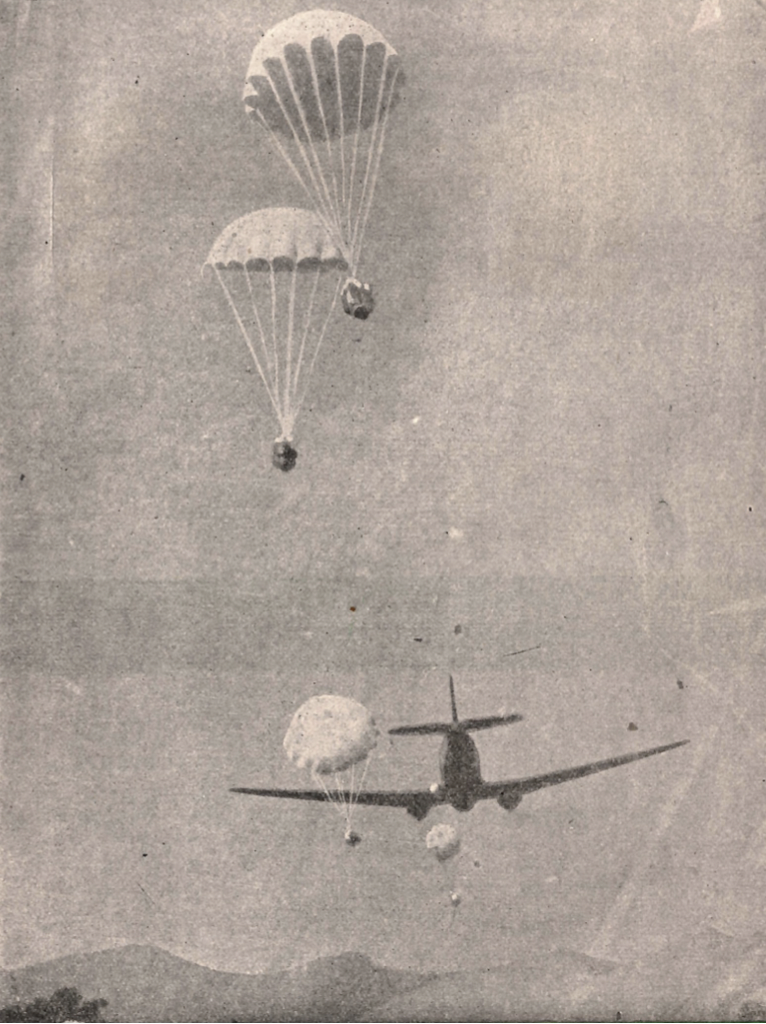
But 7th Division was physically & mentally exhausted. In February, it had fought for its survival in the Arakan, at the Battle of Admin Box, & then it was air-lifted north, to be thrown into the Battle of Kohima. Sickness was widespread. Furthermore, the rugged terrain would not allow a rapid pursuit, especially in monsoon conditions. Air drops were needed to keep the troops supplied, as the paths were inadequate to support motor transport. Fighting was restricted to small-scale clashes between Allied patrols & Japanese support troops defending their lines of communication.
Gravestone of Private Thomas Dalton, 1923-1944, 2 Dorsetshire Regiment. Rest in Peace.
Sato’s men search for food
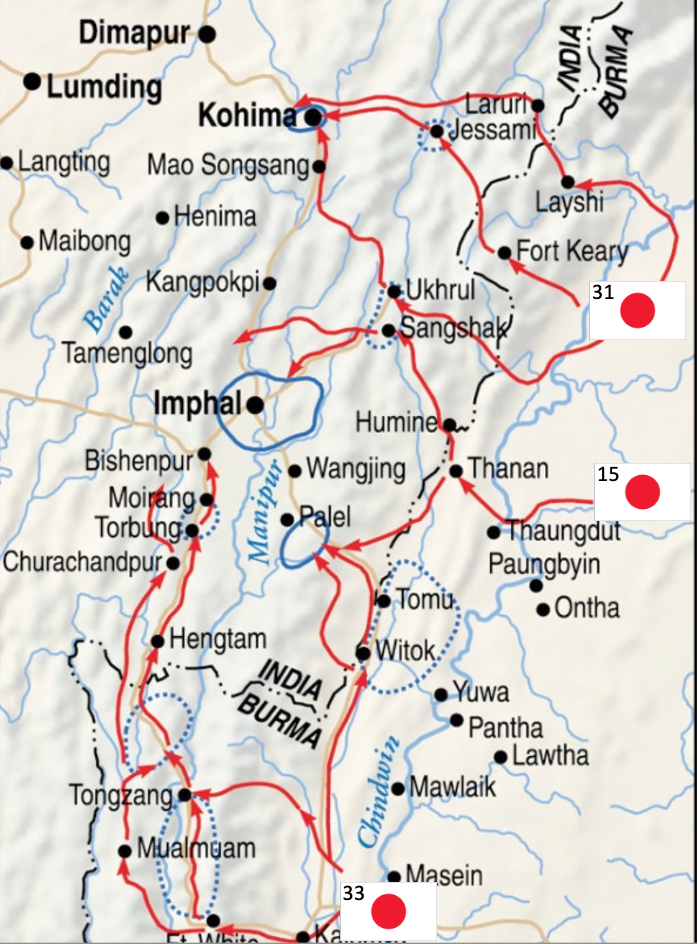
The tattered remains of Lt General Sato’s 31 Division dragged itself south-east across brutal terrain towards the Naga village of Ukhrul, where they expected to find supplies. The British 23rd Long Range Penetration Brigade of chindits was heading south to try to cut the Japanese line of retreat.
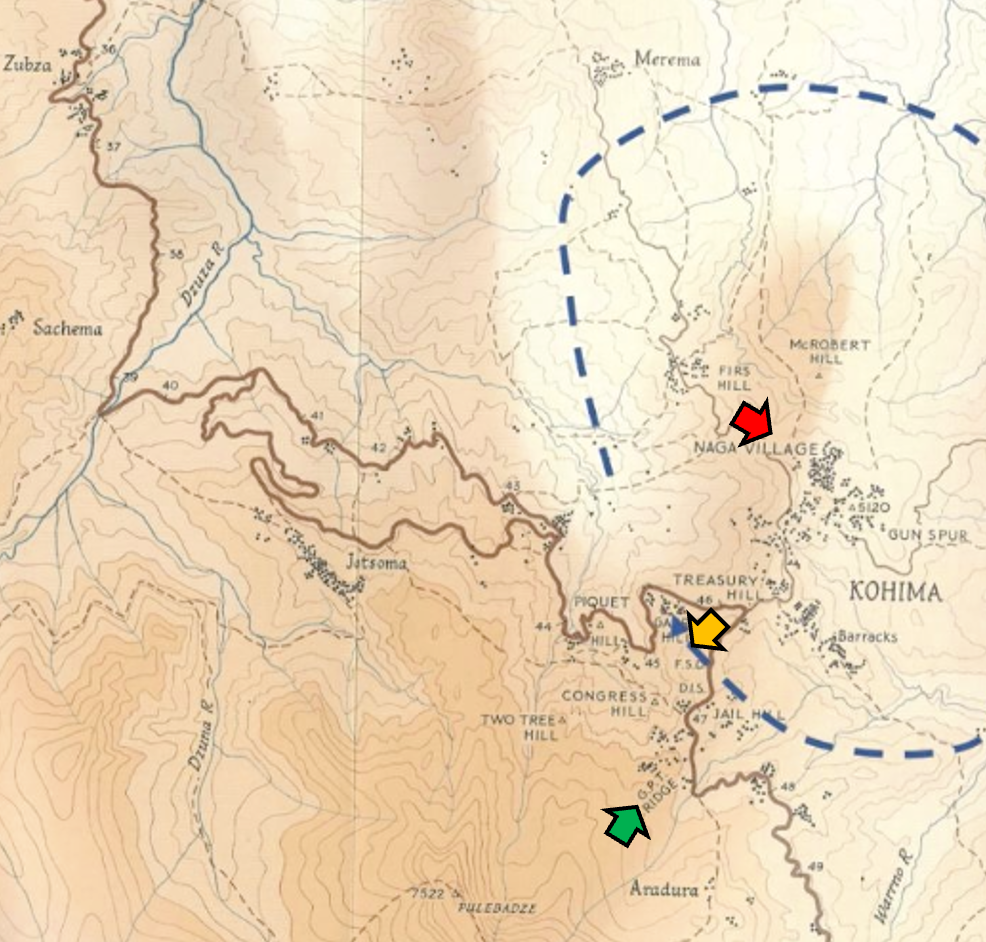
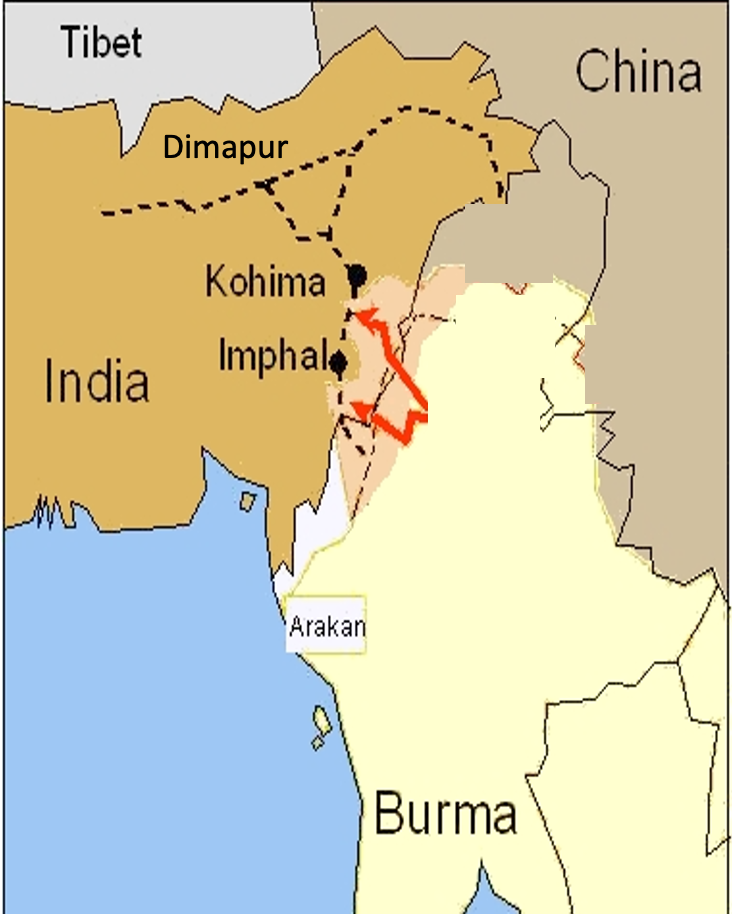
Map showing the retreat of Japanese 31 Division, attempt by 23 LRP Brigade to cut them off, & progress of British 2 Division towards Imphal. From “Kohima 1944. The Battle That Saved India” by Robert Lyman (2010) Osprey Publishing.
Attempts by Japanese 15th Army Command to deliver rations to Ukhrul were severely curtailed by monsoon rains that rendered the roads impassable for lorries. Some of the rations were taken by mule, but they could carry far less than motor vehicles. Furthermore, men of Japanese 15 Division got to the supplies at Ukhrul first, so there was nothing remaining when 31 Division arrived.
On June 21, Lt General Sato was visited near Ukhrul by Maj General Kunomura, Chief of Staff to Lt General Mutaguchi, Commander of 15 Army. Kunomura brought orders for 31 Division to deploy alongside 15 Division & take the offensive against Imphal. Lt General Sato reacted with fury:
“We are in an appalling situation through lack of supplies. To attack Imphal as we are is the height of absurdity. Please acquaint the Army command with this fact.” (15)
Kunomura explained that the supplies sent to Ukhrul had been taken by 15 Division. More food was at Humine, where the Japanese lorries had been forced to stop. So 31 Division trudged on through the rain & mud. Beside the gnawing hunger, almost all of them were racked with fever & diarrhoea due to dysentry. Corpses accumulated by the roadsides as they passed.
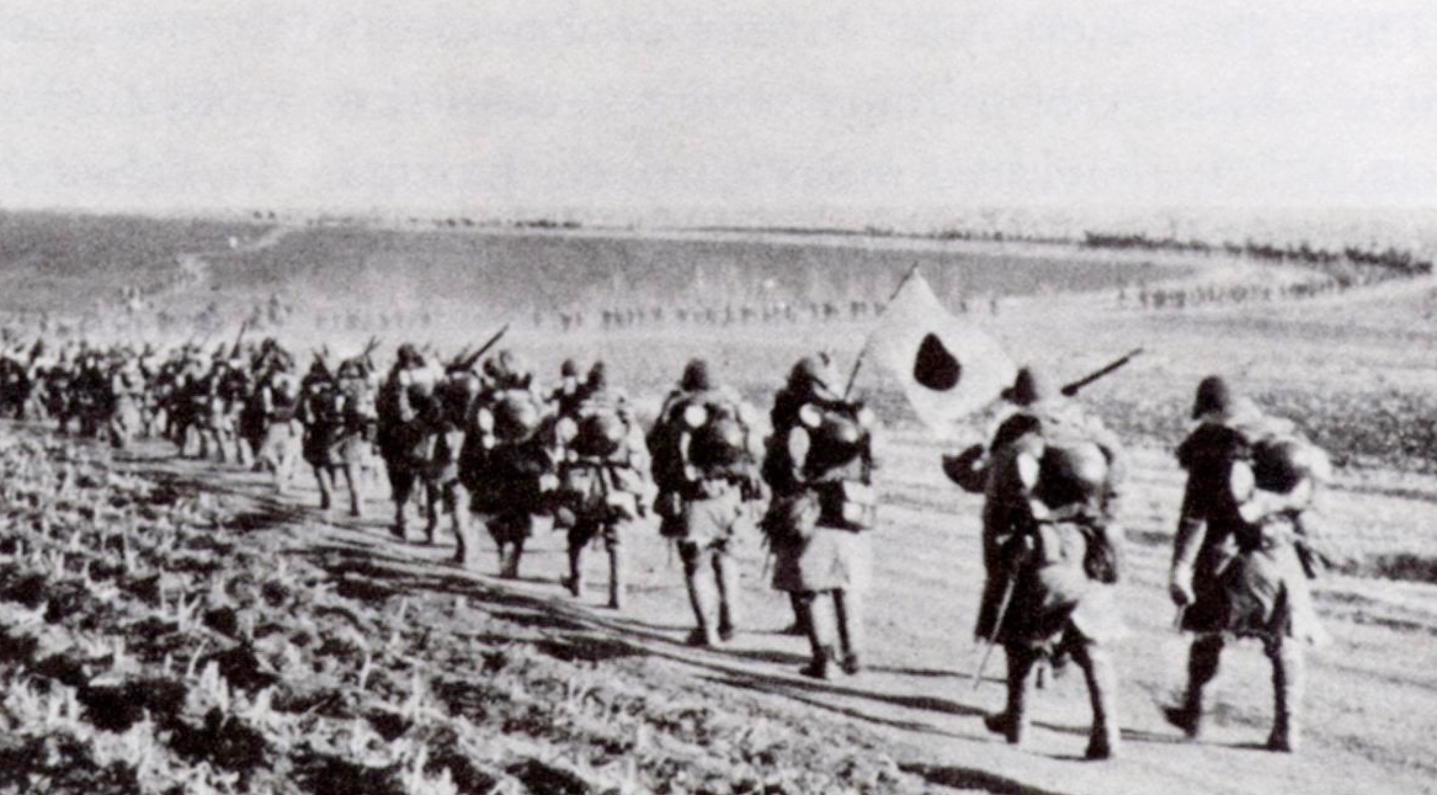
The Japanese retreat from Imphal.
They found rice when they reached Humine, but only enough to feed them for two days. An order came on June 23, with instructions for deployment of 31 Division for the proposed attack on Imphal. Sato instead dispersed his men to forage for food in the mountain villages.
June 22. We’d done our job
Gravestone of Private Stanley Warren, 1912-1944, 1 Queen’s Own Cameron Highlanders. Rest in Peace.
The Armoured Column of 2 Division set off again towards Imphal at first light, starting from Milestone 97. They were accompanied by 2 Durham Light Infantry in lorries, with a few riding on tanks, & followed by the rest of 6 Brigade. They engaged some disorganised groups of Japanese in the process of withdrawing; these were not from 31 Division, which had fought at Kohima, but from 15 Division that had attacked Imphal.
Gravestone of Private Frederick Smith, 1910-1944, 1 Queen’s Own Cameron Highlanders. Rest in Peace.
The Armoured Column passed an abandoned Japanese field hospital. Major David Wilson, of 6 Brigade Headquarters:
“I don’t remember taking any prisoners, but then I don’t remember any of them wanting to surrender either. Even in the field hospital that we overran near Kanglatongbi the patients had either been killed by their friends or had killed themselves to escape the shame of being captured.” (11)
However, Sergeant-Major Tochihira of 15 Division had a very different perspective as he watched from a hillside. He counted about 120 Japanese hospital casualties who had been lined up by the road & then abandoned as the British tanks arrived. Some had tried to make their own way but then fallen. Tochihira saw a soldier from the Advanced Column with a container of petrol, which he poured over the sick & wounded Japanese. He then bent forward & ignited it, using a cigarette that he had been smoking. Tochihira could hear cries of anger, fear & pain, as black smoke began to rise from the burning men. The appalling scene reminded him of paintings of the Buddhist concept of hell, where the damned roast in agony. (15)
The road carried the Advanced Column of 2 Division onto the Imphal plain. Captain Sean Kelly of the Durhams:
“Our tanks spotted movements away forward where elephant grass gave way to trees & began to brass it up properly. Soon they stopped. A plaintive message relayed through many sets had reached them: we were brassing up the advance elements of the 5 Indian Division of the beleaguered 4 Corps!” (11)
Brassing up was British vernacular for shelling. At 10.30, the 2 Division tanks & Durhams met men of 1/17 Dogras of 5 Division, 26 miles north of Imphal, near Milestone 109.
The Dogras had beaten the tanks coming from Imphal by rejoining the road after moving through hills to the west. But the Stuart tanks of 7 Light Cavalry weren’t far behind. Hand shakes were immortalized by an official photographer.
Captain Harry Swinson described the day in his diary, from the perspective of 5 Brigade Headquarters:
“The sun was shining as we rode forward. The whole Army was surging forward with the knowledge that the Japs were beaten & soon, soon, there would be rest. Nights spent in comfort unbroken by a sentry-go; time to dry clothes; time to bath; time to write letters home; time to become human again; and, most of all, time to sleep. You could hear the troops singing on the crowded trucks.
We arrived at M.S. 102 to find an order awaiting us to push on to M.S. 106. On we went. The defeat of the Japs became now more evident. Piles of kit were strewn along the road in great disorder; enough to equip whole battalions. Most of the clothing, I noticed, was British; they must have captured it all at Kohima. The road was choc-a-bloc with traffic. I noticed some armoured cars and carriers coming towards us. They were caked thick with mud and dust as if they’d been in action for days; their crews looked as if they’d been in action for weeks. I suddenly realised they weren’t our chaps. The road was open; they must have come from Imphal. I waved as we passed. They straightened up slightly & a grin crept over their dirty faces. Then they put up their thumbs & went trundling past us. Well, that was that. We’d done our job.
Eventually we established H.Q. on a grassy bank near the M.S. 102. Here we are this evening chatting, drinking our rum, & thinking that perhaps life isn’t so bad after all. By a stroke of luck I’ve had a pile of mail. An order came through an hour or so ago to clear the road for sixty 8-tonners that are rushing beer and canteen stores through to Imphal. The first few trucks have just gone past us. Up on either side in the hills the troops are having the occasional scrap, but there’s not much fight left in the Japs & they are being carved up. Our men have got their revenge all right.” (17)
Captain Sean Kelly, who was there when they met the Dogras:
“Imphal was relieved. We sat alone in the sunshine & smoked & ate. Soon the staff cars came purring both ways. It was a lovely day.” (11)
The Kohima Museum displays the diary of Major General Grover, Commander of 2 Division, with the simple entry for 22 June 1944 “Opened Imphal Rd”.
June 21. Great stuff
Captain Harry Swinson at 5 Brigade Headquarters recorded in his diary that
“The Brigadier says we must get the road open right away, as the Division at Imphal are in a bad way.” (17)
There was much more than a Division cut off at Imphal – around 60,000 Indians, Gurkhas & British of 4 Corps. Surely they knew this?
At Karong (milestone 92), the road to Imphal crossed a ravine by a 120-foot girder bridge. Seizing this was the day’s principle objective for the Armoured Column leading 2 Division’s advance. A serious delay would ensue if the bridge were destroyed. The Japanese had made preparations to demolish it, but delayed too long & it was captured intact by the British without a fight. The advance continued as far as Milestone 97.
An M3 Stuart light tank, such as those leading the Armoured Column.
Back at 5 Brigade HQ:
“The Armoured Column has been sweeping on, the news kept on filtering through. Then we heard that the bridge at Karong had been captured intact. Great stuff, this. Speculation is rife among both officers and men as to when we shall link up with the column pushing North from Imphal, and what will happen when we do link up. At 5.0 o’clock came word that the tanks were laagering for the night by M.S. 102. The gap is only three miles wide now.” (17)
This information exaggerated progress, probably reflecting excitement that the mission was almost accomplished after so much blood, sweat & tears. Harry Swinson recorded the party atmosphere prevailing as the Worcesters showed off their trophies from the assault on Maram:
“The Worcesters brought back their captured Jap gun to-day and have mounted it by their H.Q. Permission has been asked to keep it & the Corps Commander has put the request forward. They are keeping the odd Jap machine gun. One, I saw, is very like a Bren Gun and has a curved magazine. The troops love shooting the Japs with their own weapons. Met Edward Tooby, who had won a saki bowl with a delicately tinted drawing of the sexual act. He was very proud of it!” (17)
The Japanese machine gun that resembled the British Bren was probably their type 96 or type 99.
Japanese type 99 machine gun
June 20. Very proud
Gravestone of Corporal Stanley Robinson, 1915-1944, 2 Dorsetshire Regiment. Rest in Peace.
Captain Harry Swinson described in his diary the mood in 5 Brigade Headquarters after the Worcester’s success on the previous day in overcoming the Japanese rearguard’s attempt at Maram to halt the advance towards Imphal:
“This morning moved the H.Q. up into Maram. By 1000 hours the fighting had moved on to M.S. 82, where a few Japs were desperately trying to hold up the Dorsets. At 1100 hours the Brigadier held a conference. Everyone in good form and the conversation would not have been sub-standard in a salon. [Major] John Brierley’s stories of the attack were most amusing. Very proud of capturing a field gun. It was dug right into the ground and camouflaged up so that it only had a 6 degree traverse. The Japs had sited it to cover the road in an anti-tank role, but as “D” Company with their left hook worked round the back of it, this didn’t help much and the officer in charge was shot dead by Sjt. Plumley, M.M. The Japs never did know how to use guns in batteries or regiments, but to employ them like this shows utter panic.” (17)
Reunion in Kidderminster of Kohima veterans from 7 Worcesters with the 75 mm Japanese field gun they captured at Maram.
Most armies concentrated their artillery for maximum impact, but the Japanese generally dispersed theirs for use as infantry support.
Grave of Private Jack Nock, 1906-1944, 7 Worcestershire Regiment. Rest in Peace.
June 19. A great day for the Worcesters
Gravestone of Louis Albert Jelfs, 1920-1944, 7 Worcestershire Regiment. Rest in Peace.
Indian 4 Corps at Imphal had been sustained by air since March, when the Japanese had cut the only road to its supply depot at Dimapur. However, the amount that could be flown in had fallen considerably because flying conditions were impacted by the monsoon & many transport aircraft had been reclaimed by their American owners. The situation put British 2 Division under pressure to race southwards & re-open the road from Dimapur to Imphal. The rearguard of Japanese 31 Division was fighting to delay them, thereby keeping Imphal cut off & buying time for their comrades to escape.
At the village of Maram, the Japanese rearguard made a stand, taking advantage of the defensive potential of a ridge. British patrols determined that substantial force would be required to dislodge the Japanese. This began with an artillery barrage supported by Vickers machine-guns of the 2nd Manchesters. Captain Harry Swinson watched progress from 5 Brigade Headquarters:
“About mid-day the battle really got going. The Brigadier was squatting on a camp stool on a grassy bank by the side of the road. He was soon joined by the Divisional and Corps Commanders and more stooges than you would have thought could exist. The air was thick with orders and instructions. One shell here would have destroyed no end of military talent.
By two o’clock the Worcesters’ forward companies were putting up recognition smoke. We watched it anxiously. It appeared in small puffs without any apparent pattern, but slowly (oh, so slowly) it was moving up the hill. I could imagine the small infantrymen sweating and swearing their way up the slope. Then a small puff appeared in the scrub at the top of the ridge. Then another. Then another. Soon there was no end of it. The Brigadier lowered his glasses to mop his brow. A message came over the set from a company commander to say his men were fighting their way down the reverse slope. By 1500 hours it was all over, and the position had been taken. We found out later that a gun and miscellaneous kit and weapons had been taken and many Japs; our losses were one killed and seventeen wounded. A great day for the Worcesters, this.” (17)
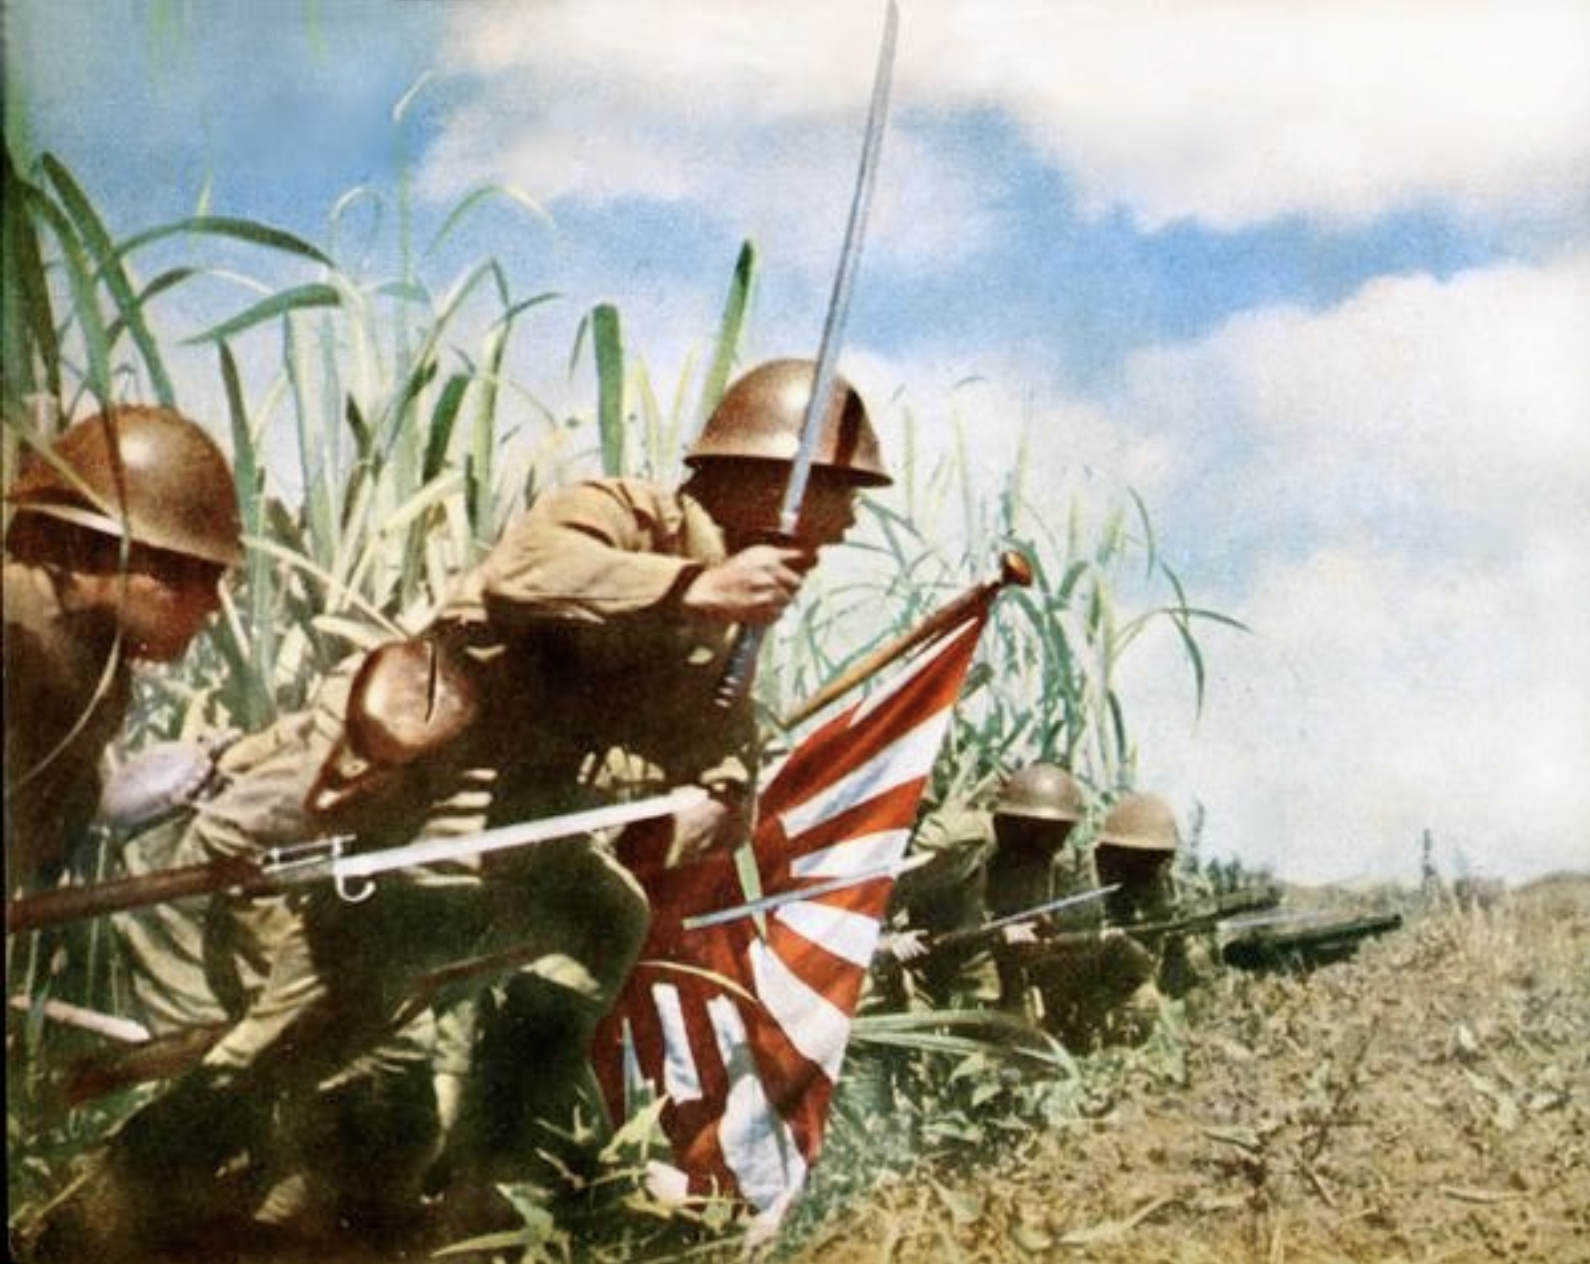
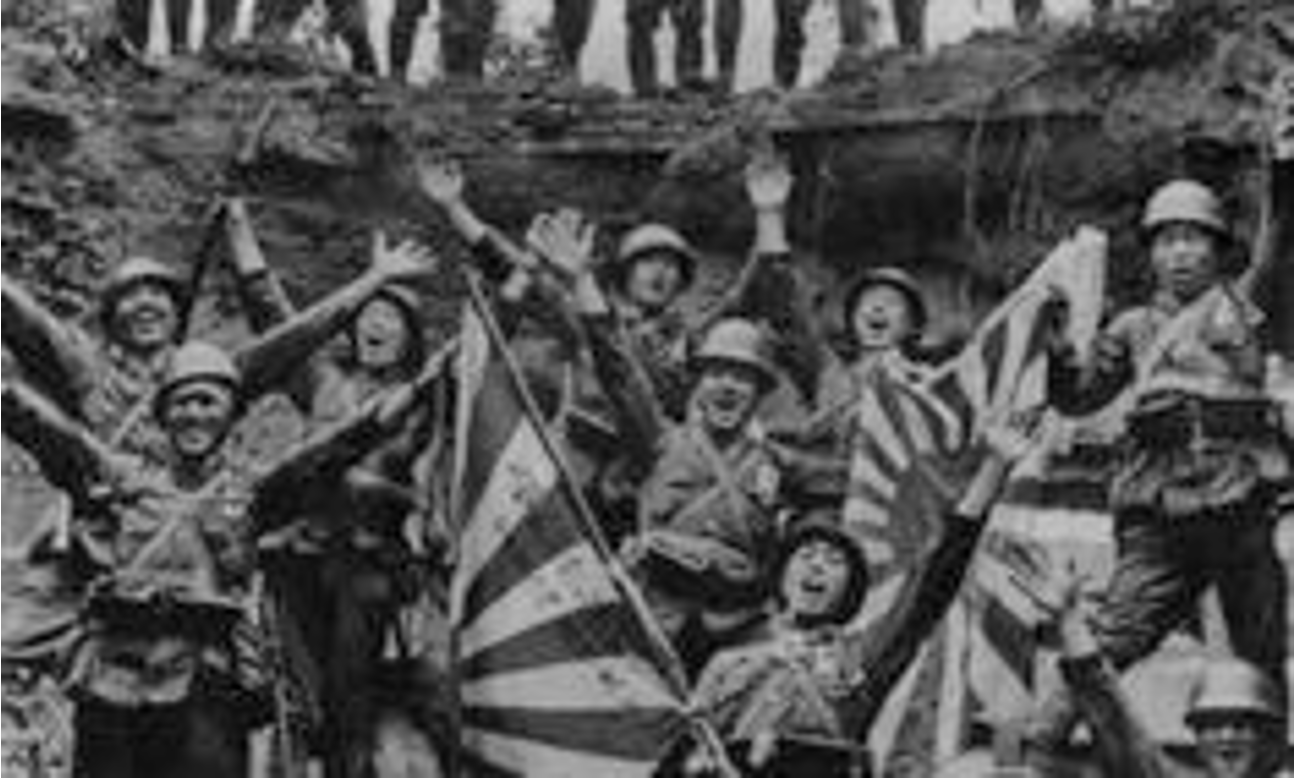
Men of 7 Worcesters inspect a captured Hinomaru flag.
June 18. A thrilling ride
Gravestone of Lance Corporal Stanley Burness, 1911-1944, 4 Queen’s Own Royal West Kent Regiment. Rest in Peace
On June 18, the 2 Division column progressed sixteen miles towards Imphal, eventually stopping for a bridge to be repaired at milestone 78 near the village of Maram. By this stage the road was going downwards from the Naga Hills & the terrain was becoming more open, as it approached the Imphal plain. Japanese corpses & abandoned equipment lay beside the roadside.
The advance was described in the diary of Captain Harry Swinson, a Staff Officer with 7 Worcesters & 5 Brigade Headquarters:
“Pushed transport forward for Worcesters & Camerons. Not easy, as what seems like the rest of the 14th Army is trying to race down this mountain road. Even bulldozers are well up and going strong. The Brigadier and his Command Post went forward at 0700 hours. I followed him soon after in the Jeep. It was a thrilling ride. The day was fair, the light was dancing on the mountains & we were racing forward after an enemy who was too demoralised to fight & too exhausted to run. Mile after mile we rode gaily along, passing troop-carrying 3-tonners, 15-cwts., and all manner of vehicles, until we found ourselves well up in the Armoured Column & were lucky not to get crushed between the Grants. Occasionally a landslide delayed us, but not for long. A frenzied half-hour with the Sappers & the whole force moved forward, on, on, into the mountains.
An M3 Grant tank speeding past a parked jeep.
About 1600 hours we were at M.S. 76. The tanks in front halted & word came back that a bridge was blown. I parked the Jeep off the road & took out my glasses. There was a valley stretched below us about a mile wide &, opposite, a grassy ridge with an occasional white basha or dark green copse silhouetted on the sky-line.
The Brigadier came up & said that the ridge was held & it would need a set-piece attack to capture. The gunners came up into position behind us, & the Manchesters on our flanks, while the Worcesters pushed out patrols to probe the Jap positions.
The Brigadier held a conference this evening. He was in good form and it was difficult to imagine we were planning a battle. His theme was this: if the patrols find the place is lightly held, we will push forward the Armoured Column with close infantry support. If it is strongly held, the Worcesters will have to do a pincer movement on Maram (the name of the village) & the tanks will smash through the road later. The composition of the column was thrashed out in detail. The gunners’ tasks were outlined. Conference broke up about 2200 hours and we crawled to bed.” (17)
So far, Major General Miyazaki’s rearguard had kept the British away from the main body of the retreating Japanese 31 Division. But the invaders’ escape was severely hampered by flooding of the road, causing mud-slides down slopes & quagmire at the bottom. Miyazaki sought assistance from 15 Division, which was struggling to contain Indian forces pushing north from Imphal to link up with the approaching British. However, all the Japanese units were in a desperate state, chronically depleted and starving, so little succour could come from 15 Division.
June 17. Deep in our hearts
Gravestone of Private Reginald Stout, 1924-1944, 1 Royal Berkshire Regiment. Rest in Peace.
After the Japanese rearguard had been displaced on June 14 from its stand at Viswema, 2 Division’s advance towards Imphal was led by 2 Recce Regiment & 6 Brigade (1 Royal Welch Fusiliers, 1 Royal Berkshires & 2 Durham Light Infantry). They were harassed at every opportunity by the retreating Japanese, with mines, sniper fire & ambushes by small units of defiant men.
Gravestone of Private James Buckingham, 1915-1944, 2 Durham Light Infantry. Rest in Peace.
On June 15, five men of 2 Recce Regiment & one of the Royal Berkshires lost their lives. On June 16, three more Royal Berkshires were killed & four Durhams. Another three Berkshires & four more Durhams died on June 17, as well as one Worcester (5 Brigade) & one from 2 Division’s Royal Corps of Signals. This steady toll of lives was a constant reminder that the Japanese remained dangerous, despite being beaten.
Gravestone of Private Roland J. Russell, 1913-1944, 1 Royal Berkshire Regiment. Rest in Peace.
June 16. These hands
Gravestone of Private Richard Trippett, 1918-1944, 2 Durham Light Infantry. Rest in Peace.
Gunner Richard George of 99 Field Regiment, Royal Artillery, had a distressing experience whilst supporting the vanguard of 2 Division’s advance. One of the Royal Scots’ casualties had been put in a shallow grave, but the monsoon had washed away some of the soil placed over him & exposed his hands. Gunner George recorded how he had covered them up:
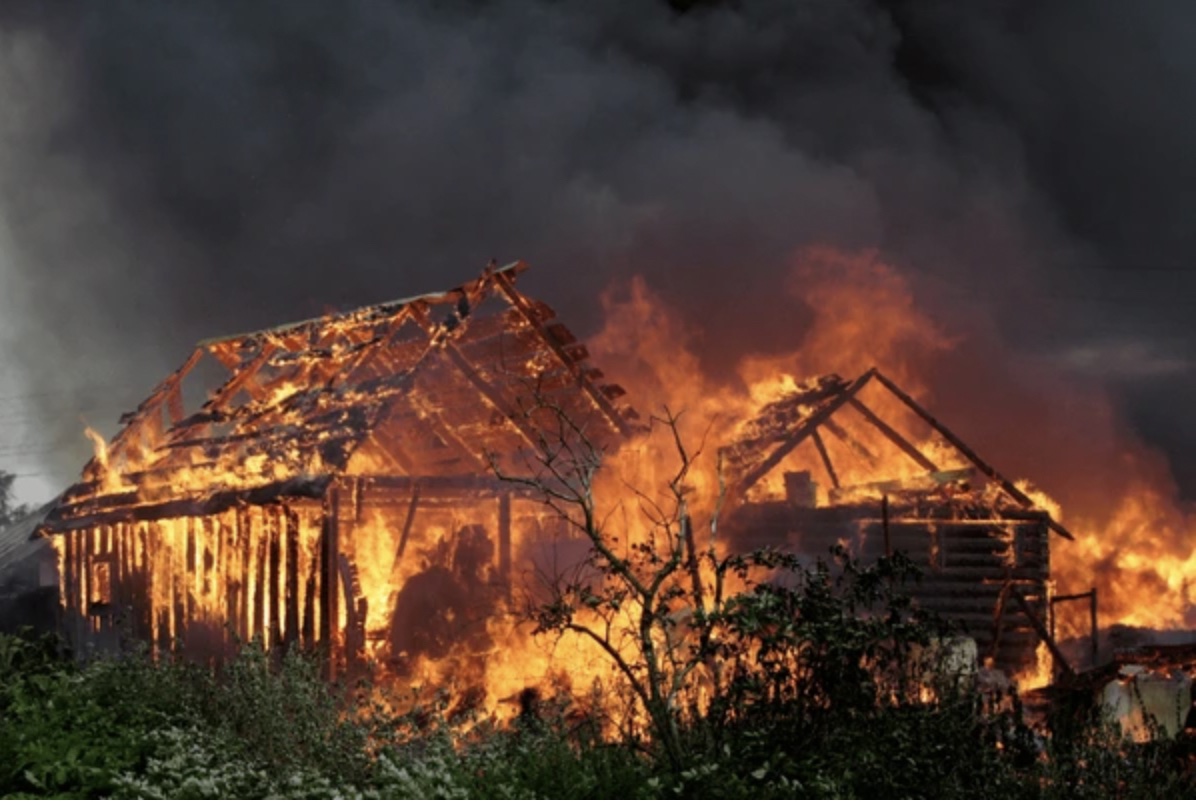
“Some of their bodies had been hastily buried and it was over one of these graves I stumbled when we moved in later. The village was still burning, and I knelt and covered the exposed hands of the dead Scotsman in his shallow grave.”
Moved by the experience, he wrote a poem that same night, which he called “These Hands” (16)
Beside the burnt-out remnants of this place I saw the lifeless hands above the earth Here then was war the horror of its face For this, for this, a man was given birth The shallow grave would scarce the body hide Akimbo sprawled the hands were still and grey I could not pass but knelt down by his side To scrape the soil and cover from the day These hands, I said, once moved and felt and knew The warmth of other hands, and touched things dear, Perhaps had picked firm fruit or flowers grew Or turned bright wheels or trailed through water clear But now no life beneath my burning touch I tried to hide which might have been my own Dead fingers here which once at life did clutch But now I press them down, alone – alone It seems so strange, the unexpected things Which one is called to do in times like these My mind revolves and childhood memory brings The tears I shed, and know I cannot grieve, Only some deep-down pain I cannot show Wells in my heart and floods without a sound For this quiet heap where grasses soon will grow For him who knows me not beneath this mound.
Gravestone of Lance Corporal Fatick Sanyal, 1915-1944, 1 Royal Berkshire Regiment. His proud father was a Lieutenant Colonel in the Indian Medical Service. Requiescat in Pace is Latin for Rest in Peace.
June 15. Major General Miyazaki
Grave of Lieutenant John Oliver-Jones, 1921-1944, 1 Royal Berkshire Regiment. Rest in Peace.
The Japanese rearguard that had held up the British for 6 days at Viswema consisted of two infantry battalions, supported by 37mm & 75mm field guns & some engineers. They stood up to the British 2nd Division of nine infantry battalions, with tanks & superior artillery support. The British were certainly much weakened by the fighting at Kohima (1/8 Lancashire Fusiliers were less than 150 strong), but that was undoubtedly also true of the Japanese, who had been fighting for longer & starved. The rearguard’s protracted stand at Viswema should be recognized as a considerable achievement. It illustrates the formidable ability of Japanese infantry to resist attack by superior forces, as long as they resisted the urge to squander their lives in futile charges.
Japanese 37mm anti-tank gun type 01
Credit for the rearguard’s achievement goes to Major General Shigesaburo Miyazaki. He was short of stature & respected by the troops for his great personal courage. They also liked the charming eccentricity of his pet monkey, called Chibi, who perched on his shoulder. Miyazaki was loyal to the Divisional Commander, Lt General Sato, with whom he shared contempt for Lt General Mutaguchi.
Shigesaburo Miyazaki
Miyazaki spent much of his early career in Manchuria, where he had fought against the Chinese. In 1939, he commanded an infantry regiment in the Battles of Khalkhin Gol, where the Japanese fought the Soviet Army over a disputed border.
Japanese infantry at Khalkhin Gol, beside wrecked Soviet armoured cars.
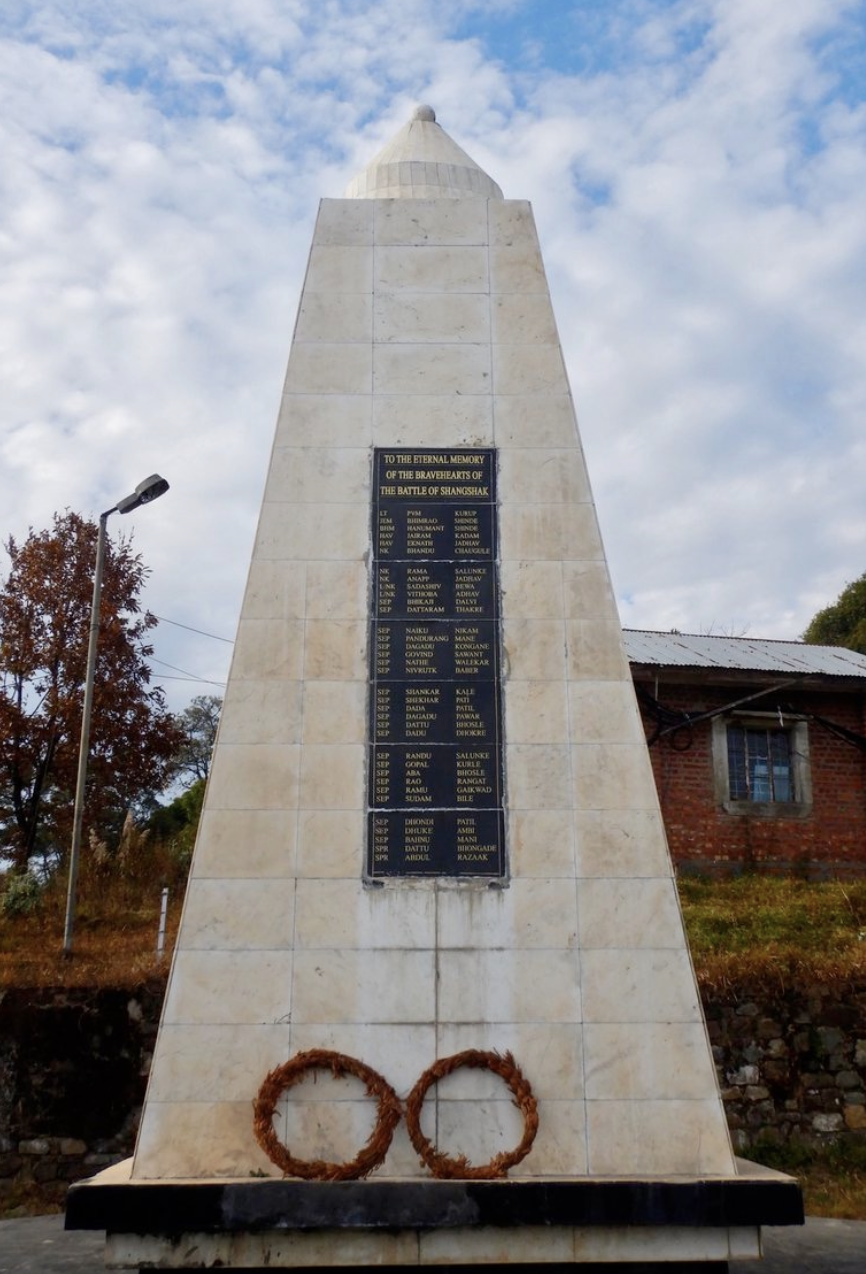
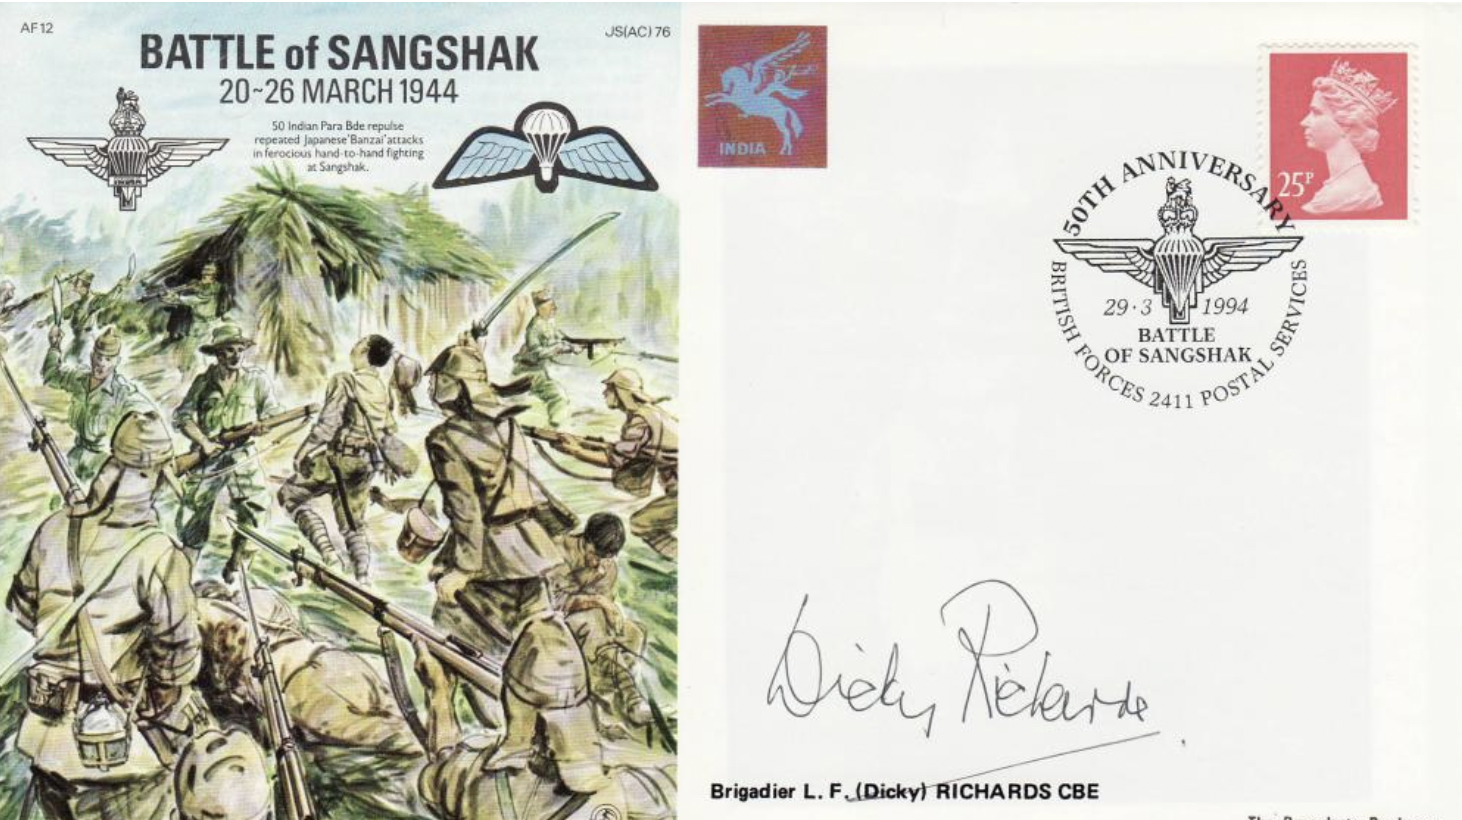
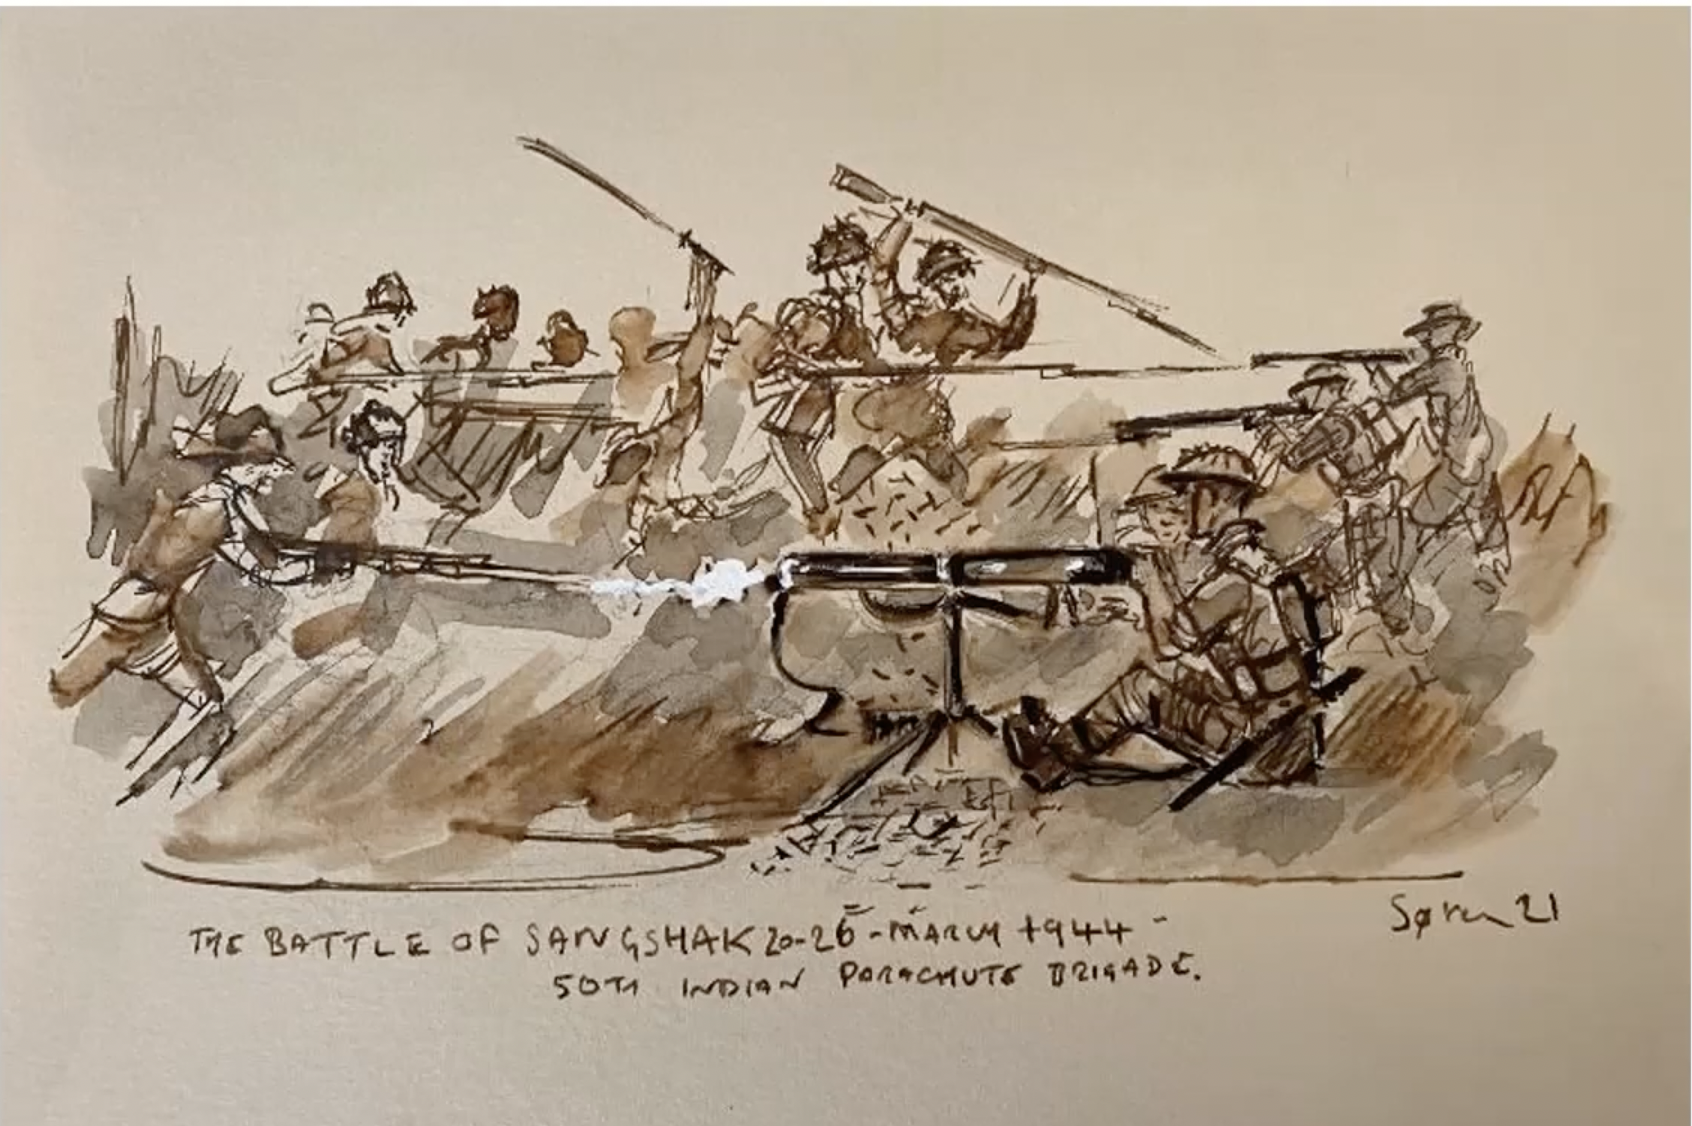
In March 1944, Miyazaki was in charge of the left (most southern) column of the 31st Division, as it invaded India. It was this column that had discovered the unexpected presence of 50th Indian Parachute Brigade, which it eventually overran in the Battle of Shangshak. The battle delayed the Japanese arrival at Kohima by a week, which was crucial in allowing reinforcement of the garrison. Miyazaki has been criticised for halting his column for so long, as he could have left the Indians to be dealt with by part of the Japanese 15th Division, which arrived 3 days after Miyazaki’s men.
Miyazaki became Commander of 54th Division in 1945 and fought against 14th Army’s invasion of Burma. After the war, he was detained in a camp in Burma until 1947, when he was returned to Japan. He ran a ceramics shop & died in 1965 at the age of 73.
Gravestone of Corporal William Howard, 1917-1944, 2 Recce Regiment R.A.C. Rest in Peace.
June 14. A military exercise
Gravestone of Gunner Douglas Brown, 1923-1944, 100 (8 Battalion Gordon Highlanders) Lt. A.A/Anti-Tank regiment Royal Artillery. Rest in Peace.
Map showing the attacks required to drive the Japanese rearguard from Viswema on the road to Imphal. From “Kohima: The Furthest Battle” by Leslie Edwards (2009) The History Press. (11)
After days of frustration, an assault by 7 Worcesters managed to drive the Japanese from Viswema at last. Captain Currie of 1 Royal Scots watched in admiration:
“The 7th Worcestershires put in a ‘set-piece’ attack on the fort on our left. A heavy barrage supplemented by the Brigade mortars was put down & the Worcestershires attacked behind it. We could see the whole attack quite plainly from the village & it looked fantastically like a military exercise. They came in hard up against the barrage & cleared the eastern end of the village with hardly a casualty. At about the same time, the Japanese left the heights on the west of the road.” (11)
The Royal Scots & the Manchester machine-gunners shot down many Japanese as they tried to escape from Viswema village. 1 Queen’s Own Cameron Highlanders seized the high ground to the west of the road, which had been abandoned. They found unoccupied bunkers made of steel & concrete, as well as a cookhouse & a lot of equipment.
June 13. All that he had, he gave
Gravestone of Fusilier Bernard Palfrey, 1924-1944, 1/8 Lancashire Fusiliers. Rest in Peace.
The advance of 2 Division towards Imphal had been held up at Viswema since June 9 by the stubborn Japanese rearguard. This bought valuable time for 31 Division to escape its pursuers & deprived Indian 4 Corps of urgently-needed supplies. To break the deadlock, an assault was planned for next day by the Worcesters & Camerons, supported by a barrage from 16 Field Regiment Royal Artillery.
Grave of Gunner Wilfred Taylor, 1921-1944, 100 (8 Battalion Gordon Highlanders) Lt. A.A/Anti-Tank regiment Royal Artillery. Rest in Peace.
June 12. Hinomaru flags
Gravestone of Lance Corporal William C. Newland, 1913-1944, 2 Royal Berkshire Regiment. Rest in Peace.
4 Royal West Kents were following the track to Jessami, in pursuit of the retreating Japanese. Private Ray Street described what happened:
“One early misty morning at first light we overran a Japanese camp. The enemy had left in a hurry, leaving everything as it was. They couldn’t have been gone long. A billy-can of water was still boiling on the fire. Rifles were stacked neatly in threes & uniforms still hung on bushes. I kicked the tin into the fire & we took the bolts out of the rifles & threw them down the jungle covered hillside. We went through the pockets of the uniforms for information, but most were empty.
A dead Jap was on a stretcher & I walked past leaving him alone, kicking a blood-stained white rag as I went by. My friend behind picked it up & to my disappointment shook it out to find it was a large Japanese battle flag with a tiger on it, a fine souvenir, nice & light & easy to carry. We continued to search the camp, but found nothing & started to go back. That so-called dead Jap had got up & gone. He was lying dogo & waited for the opportunity to leave. We wouldn’t be so foolhardy next time.” (6)
Many Japanese soldiers carried their own flag for good luck. The flags are known as “Hinomaru”, which translates as “circle of the sun”. Flags presented early in the war were made of silk, but cotton became more common as resources became scarce. They would be bought in a shop & then personalised with the name of the recipient, friends & family, as well as messages of hope, good luck & patriotic slogans.
A soldier posing amongst well-wishers with his Hinomaru flag.
The flags were popular souvenirs for Allied soldiers, in most cases taken from dead Japanese.
The flag above was found in 1944 by men of 1/1 Punjab Regiment. Its messages include “divine fighting spirit”, “defeat the US and UK”, “leadership spirit will reach thousands of miles”, “huge accomplishments in distant lands”, “for construction of world history”, & “beautiful death with honour and loyalty”.
A feature by the National Army Museum is the source of the above images & provides more examples & information about Hinomaru flags.
June 11. It didn’t seem true.
At the village of Viswema, the Japanese rearguard continued to block the road to Imphal. Attempts by a company of 2 Royal Norfolks to push them from a spur above the village ended in frustrating failure.
Kenneth Parkhurst, the chaplain to 1 Royal Welch Fusiliers, was missing his dead friend, Captain John Rostron, who had been killed in action on April 22. He wrote the following poem:
TO JOHN ROSTRON DSO
They said you had gone but it didn’t seem true I couldn’t believe it – it couldn’t be you With your eager mind And your humour gay And your heart so kind And your friendly way I thought of the things you were planning to do and I couldn’t believe it No Johnny – not you And I didn’t believe it was true, until I saw the sun on a little green hill And I thought of the downs that I knew far away And remembering something I wanted to say To you, because you’d know what I’d mean And see exactly what I had seen Something I wanted at once to share – I turned to tell you – but you were not there And then I knew that you had gone And I was left to watch alone.
The above is one of many war poems written by members of 2 Division, that were collected by Bob Cook & Robin McDermott, curators of the Kohima Museum. The poems are available in a book “Soldier Poets of the 2nd British Infantry Division”.
Gravestone of Lance Corporal William C. Newland, 1913-1944, 2 Royal Berkshire Regiment. Rest in Peace.
June 10. The hearts he left at home
Gravestone of Fusilier William Rigby, 1918-1944, 1/8 Lancashire Fusiliers. Rest in Peace.
With the support of divisional artillery, the Royal Scots & Lancashire Fusiliers made slow progress in prising Viswema village from the hands of the Japanese. The defenders fought fiercely & inflicted multiple casualties. Additional losses were caused by sniping from a spur over-looking the village.
Gravestone of Fusilier Robert Smith, 1917-1944, 1/8 Lancashire Fusiliers. Rest in Peace.
June 9. Viswema
Gravestone of Fusilier William Johnson, 1922-1944, 1/8 Lancashire Fusiliers. Rest in Peace.
Progress of 2 Division towards Imphal had been stopped at milestone 60 by the Japanese rearguard, which held ground overlooking the road from both sides. They also occupied the village of Viswema on the east side of the Imphal road. With tank support, 1/8 Lancashire Fusiliers tried to advance up the road, but were driven back by machine-gun fire & grenades from the Japanese on the higher ground beside the road & a 75 mm gun further ahead. A company of Fusiliers & a company of Royal Scots together succeeded in establishing themselves in part of Viswema nearest the road, but much of the village remained in Japanese hands. On the west side of the road, 2 Royal Norfolks pushed the defenders back a little & then had to fight off a determined counter-attack.
Gravestone of Corporal Henry Thurlby-Pearce from Streatham, London, 1920-1944, 2 Royal Norfolk Regiment. Rest in Peace.
Whereas 2 Division had headed south, 7 Division & other units had marched east from Kohima, aiming to prevent the Japanese from escaping in that direction. Amongst them were 4 Royal West Kents. The excitement about the Normandy landings had left them feeling neglected:
“We wished we could get more help out here, feeling that we were not getting the praise nor backup we deserved.” (6)
Their mood was not improved by the sight of a burnt-out British tank with a shell hole in its turret. Later they passed the skeletal remains of about thirty British & Indian troops scattered over a slope below some blown-out bunkers. Inside sprawled the skeletons of Japanese, with grinning skulls beneath their helmets. The West Kents trudged by in silence.
On June 9, Lt General Sato received an order from Lt Gen Mutaguchi that whilst his rearguard should continue to delay the British drive south, the remainder of 31 Division, by June 10, should
“… link up with … 15 Division & prepare to attack towards Imphal.” (8)
This order failed to acknowledge that both divisions were now starving & desperately low in ammunition. Sato thought it madness:
“I was flabbergasted … This incredibly nonsensical plan simply appalled me. I could not help questioning the Army HQ’s sanity.” (8)
Although aware of the plan, Mutaguchi’s superior, Lt General Kawabe, made no attempt to interfere.
Gravestone of Corporal Bert North, 1919-1944, 2 Royal Norfolk Regiment. Rest in Peace.
June 8. We wonder why
Gravestone of Fusilier Cecil Wardle, 1913-1944, 1/8 Lancashire Fusiliers. Rest in Peace.
At dawn on June 8, 1/8 Lancashire Fusiliers crossed the nullah (stream) at Kigwema unopposed & discovered that the bunkers overlooking the road had been abandoned. The Royal Engineers quickly repaired the bridge & cleared some landmines to allow the advance to continue. The Dorsets stayed behind to occupy Kigwema, where a mobile bath unit was established that furnished passing troops with clean clothes & beer.
After three miles of progress, the Column was again delayed at Milestone 58. The Royal Engineers cleared 33 landmines & repaired another bridge that the Japanese had damaged. As soon as it was possible to continue, the Lancashire Fusiliers pressed forward, but soon ran into an ambush with a field gun supported by automatic fire. The Fusiliers suffered six fatalities, including their Commanding Officer, Lt-Col Maurice West, who was killed by a shell.
Gravestone of Lt-Col Maurice West, 1906-1944, 1/8 Lancashire Fusiliers. Married to Kathleen West, his father had been Lord Bishop of Rangoon. Rest in Peace.
The quotation is from “O Valiant Hearts”, a poem by Sir John Stanhope Arkwright (1872–1954), that contains the lines
Splendid you passed, the great surrender made; Into the light that nevermore shall fade
The poem was published in 1919 in “The Supreme Sacrifice, and other Poems in Time of War”. It was set to music as a hymn that is often included in services of remembrance on armistace day. It begins
O valiant hearts who to your glory came Through dust of conflict and through battle flame; Tranquil you lie, your knightly virtue proved, Your memory hallowed in the land you loved.
Gravestone of Fusilier Harry Maybury of Salford, Lancashire, 1921-1944, 1/8 Lancashire Fusiliers. Rest in Peace.
June 7. Advance towards Imphal
Grave of Captain Richard Purser, 1918-1944, 2 Dorsetshire Regiment. Husband of Vera Purser. Rest in Peace.
Having discovered that the Japanese had left Aradura Spur, 2 Division began advancing down the main road to Imphal. In their vanguard were tanks, armoured cars, personnel carriers and trucks containing Royal Engineers & the Royal Scots infantry battalion. Progress was slow, due to road blocks & blown bridges, which the engineers had to repair.
5 Brigade had been working its way across country in parallel to the Imphal road, but was able to join the road at milestone 52, after dislodging some Japanese who had stayed to delay them. These milestones measured the distance from Dimapur.
A roadblock on the Imphal Road
The advance got as far the village of Kigwema, at milestone 55. In that day’s advance, the Royal Engineers had cleared three landslides and five road blocks, work that was greatly facilitated by the presence of bulldozers. They had also repaired several damaged bridges. At Kigwema they encountered another bridge that had been demolished by the Japanese. In this case, repair was prevented by Japanese machine-guns in bunkers overlooking the approach to the bridge. Neither tank fire nor infantry attack were able to dislodge the occupants before nightfall.
There was a military hospital at Kigwema, that had been abandoned in March when the Japanese arrived. It was out of sight of the bunkers & so provided a convenient place to spend the night. Lt-Colonel Wilbur Bickford recorded:
“The billets were in most cases extremely comfortable & some people were lucky enough to sleep on hospital spring beds after some dead Japanese had been cleared away.”
The troops were surprised & delighted when a van arrived bearing members of the Women’s Auxiliary Service. This was an organization of British & Australian volunteers who delivered food in mobile canteens.
Members of the Women’s Auxiliary Service.
Whilst 2 Division moved south, 7 Division was heading east on the track to Jessami, where 1 Assam Regiment had made its heroic stand two months previously.
June 6. How are they doing in France?
A patrol by 1/8 Lancashire Fusiliers was unable to find any live Japanese on Aradura Spur. Other units sent patrols to check & all came back with the same answer. The Japanese had gone.
As if to confirm that the ordeal was over, the rain stopped & the sun came out. Then news of the Normandy landings swept through the British troops. Everybody was buzzing with the feeling that the war was going their way at last. Staff Captain Arthur Swinson:
“The sunlight was streaming across the mountains, stretched west & south as far as the eyes could see. All the troops have been coming up to our signallers asking ‘How’s it going? How are they doing in France?” (3)
The mood was very different at 15th Army headquarters in Burma. One of Lieutenant General Mutaguchi’s officers recalled that their commander had taken to prayer:
“Near his house, he had a special place for prayer in Shinto style, a flat narrow square area covered with white sand with bamboo poles on four corners. Every morning he sat there & recited Shinto prayers loudly. As the Japanese advance was beaten back … he spent more time there; he was praying for God’s help for victory.” (8)
On June 6th, Mutaguchi held a strategy meeting with his superior Lieutenant General Kawabe, Commander of Burma Area Army. Kawabe recorded in his diary that
“Mutaguchi was in good health, but his eyes were filled with tears. “We are at the crossroads, but have no fears” he greeted me.” (8)
Lieutenant General Masakazu Kawabe, Commander of the Burma Area Army.
Both men knew that the Japanese invasion was failing, at Imphal as well as Kohima, but Mutaguchi failed to disclose that Lieutenant General Sato had defied his orders. In fact, of the three divisional commanders who had invaded India in March, Sato was the only one that Mutaguchi had not yet sacked. Despite the calamitous situation, the strategy meeting passed without either man having the moral courage to admit that it was time to cut their losses & withdraw the battered, starving 15th army. Although tens of thousands of lives depended on their decisions, it was more comfortable for these senior officers to carry on as normal, rather than lose face by acknowledging their catastrophic failure.
Years later, Mutaguchi claimed
“I guessed Kawabe’s real purpose in coming was to sound out my views on the possibility – or otherwise – of continuing the Imphal operation. The sentence ‘The time has come to give up the operation as soon as possible’ got as far as my throat, but I could not force it out in words. But I wanted him to get it from my expression.” (8)
The starving Japanese troops deserved much better than this. Brigadier Mike West hit the nail on the head when he described them as “first class soldiers in a third class army.” (12)
June 5. You could feel the elation
Gravestone of Lance Corporal F. J. Theed, 1920-1944, 2 Dorsetshire Regiment. Rest in Peace.
The Japanese on Big Tree Hill were pounded by seven batteries of 25 pdrs & four tanks firing from Kohima, supported by the mortars of 5 Brigade. After this preparation, the Camerons were able to ascend & capture the hill. They & the Dorsets then pressed on, in parallel to the Imphal road. They encountered no further resistance, but caught up with & killed some Japanese laden with equipment.
7 Indian Division & the Chindits of 23 Longe-Range Penetration Brigade were further east of the Imphal road & now moving south, aiming to cut off the line of Japanese retreat towards Burma. They found extensively prepared positions that had been abandoned, along with mortars, guns & other equipment.
It was now very clear that the Japanese had left Kohima. The battle was over at last.
“The spirits of the troops soared. You could feel the elation. People talked out loud, joked, laughed. Ours was a different army.” (3)
June 4. Our dearest only son
The Royal West Kents were cautiously checking for pockets of Japanese resistance. They uncovered a complex of abandoned bunkers that appeared to have been a Headquarters, but there were no signs of life.
5 Brigade was not so lucky. They were proceeding south in parallel with the Imphal road, to bypass the Japanese rearguard on Aradura Spur. However, their progress was halted by a strong force of Japanese on features dubbed Pimple & Big Tree Hill. Pimple was subjected to artillery bombardment & then attacked by the Dorsets, who reached the top but were forced to withdraw by heavy fire, with 14 wounded & 5 dead.
Gravestone of Captain E. A. Davies, 1913-1944, 2 Dorsetshire Regiment. Rest in Peace.
The Camerons took over & succeeded in capturing Pimple. Their assault was led by Major Angus Douglas, the battalion’s second-in-command, but he was fatally wounded by a bullet in the neck. Gordon Graham watched as
“He was carried past me on a stretcher, a death pallor on his face. I learned afterwards that he had asked for a drink. The sergeant accompanying him had only whisky in his flask. Angus took a gulp, smiled, & died.” (12)
Gravestone of Major Angus Douglas, 1912-1944, Queen’s Own Cameron Highlanders. Rest in Peace.
Big Tree Hill remained heavily defended & would need to be taken.
June 3. Spent bullets
Grave of Corporal W. Tait, 1914-1944, 2nd Recce Regiment R.A.C. Rest in Peace.
5 Brigade were ordered to march south parallel to the Imphal road, but a mile further east, with the aim of bypassing the Japanese on Aradura Spur. This meant working through jungle terrain, made slippery by torrential rain. Private Tom Cattle of the Dorsets:
“We marched all day in single file, slipping & sliding down, until we reached the low paddy fields. We knew that the Japanese could see us from the hills above & were firing at us, but we were out of their range. We could hear the hum of spent bullets.” (11)
As nightfall approached, the Dorsets halted & began to dig trenches to spend the night, when they came under attack. Tom Cattle again:
“We took up defensive positions & started to dig in. I had got down about two feet & had taken off my steel helmet as the sweat was pouring off me, when suddenly the Japanese started to attack us with mortars & machine-guns. Before I could take cover, a mortar shell landed near to me with a deafening explosion. I felt a sharp blow to the back of my head & was knocked out. I remember coming round. I put my hand to the back of my head & knew I had been hit because my hand was covered in blood. My mates bound up the wound with my field dressing. I was put on a stretcher & carried down the hill, back along the way we had started from earlier that day. I can’t remember much about that journey as I had been given an injection.” (11)
Evidently the Japanese rearguard remained dangerous.
Gravestone of Lance Corporal Sawlaurie, Burma Intelligence Corps. Rest in Peace.
June 2. They died apologising
An NCO of the Japanese 58th Infantry Regiment recalled:
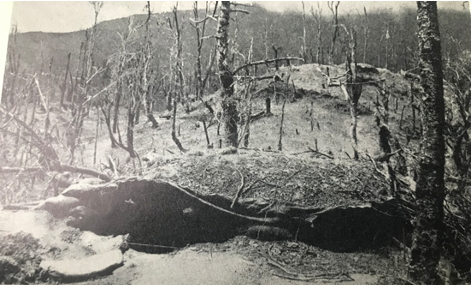
“In the final stages of the battle, many soldiers stayed in their bunkers because they were so far gone with starvation, malaria & beriberi that they did not have the power to move. Their clothes were soaked with rain, sweat & were filthy dirty. They could never get out of the bunkers to dry them. All they could do was rest against the fire slit & pull the trigger whenever attacked.” (11)
The last signs of Japanese resistance at Naga Village were at Hunters Hill. This was pounded by artillery, tanks & Hurribombers & then successfully stormed by 1 Queen’s Royal Regiment.
As far as could be ascertained, there were no more Japanese left alive at Naga Village. The triumphant Queensmen & 4/1 Gurkhas climbed into lorries & were ferried to the rear to recuperate. They were replaced by 4/5 Gurkhas & 2 South Lancashires of 114 Brigade, 7 Indian Division.
The devastated state of Kohima Naga Village by the time fighting had ended there.
161 Brigade of 5 Indian Division was mopping up to the west of Naga Village. The 4/7 Rajputs had occupied Merema & 4 Royal West Kents opened the track from Merema to Kohima.
Having suffered so grievously at Naga Village in May, the news that it had been liberated would have impacted 5 Brigade. They were now based on Transport (GPT) Ridge, supporting 1 Burma Regiment & 1/8 Lancashire Fusiliers on Aradura Spur. They were poised to advance if the Japanese withdrew from the Spur, as explained by Major Peter Everidge:
“The plan was not to assault Aradura, but to move in immediately the Japanese moved out. 5 Brigade therefore had to occupy GPT Ridge in a state of defence, but at the same time had to be prepared to move forward. Every day for five days, patrols from GPT Ridge reported no signs of Japanese on Aradura & then at night patrols reported that Japanese were still there. Everybody was rapidly going dizzy from being ordered to pack to move after dusk & then having it cancelled before midnight. The troops were very browned off.” (11)
The nightime activity of the Japanese at this stage probably reflected attempts to gather supplies, according to Captain Shosaku Kameyama of 3/58 Infantry Regiment:
“Although we kept fighting, it was very lonely & miserable to stay isolated in a foxhole on the mountain in the situation when a chance of winning seemed too remote. We ran out of ammunition & food, so sometimes we went out to attack an enemy position at night, & when the enemy ran away, we collected rations, bullets & grenades, & used them the next day. In this way, we held out stoutly day by day, but inevitably someone got hurt or killed. It was heart-breaking that even if one did his best, nothing could help. And it was even more heart-breaking that one’s comrade had to do more work if one became unable to move. If he were heavily injured he would regret over-taxing his mates. Those men passed away saying “Excuse me. I regret dying.” They died apologising & weeping. The battlefield takes the life of such brave men, & there is no way of helping them.” (5)
June 1. The fate of the Empire
To save face by pretending that withdrawal of 31 Division from Kohima was his decision, Lieutenant General Mutaguchi issued an Order of the Day that was full of stirring rhetoric claiming that 15th Army could save Japan & its divine Emperor:
“Withholding my tears & painful as it is, I shall for the time being withdraw my troops from Kohima. It is my resolve to reassemble the whole army & with one great push capture Imphal … ON THIS ONE BATTLE RESTS THE FATE OF THE EMPIRE … Everyone must unswervingly serve the THRONE & reach the ultimate goal so that the Son of Heaven & the Nation may be forever guarded.” (3)
Emperor Hirohito, referred to as Son of Heaven
Lieutenant General Sato’s order for 31 Division to withdraw did not reach all his men. On the evening of June 1, 138 Regiment supply officer Lieutenant Chuzaburo Tomaru returned from a foraging expedition to find troops abandoning their trenches. He initially thought they were deserting, until given the news of the order to withdraw.
Isolated pockets of Japanese continued to fight because they were unaware of the order. In addition, a rearguard of about 750 men under Major General Miyazaki was detailed to cover the retreat. It included a troop of mountain artillery, engineers & infantry from 124 & 138 Regiments.
Grave of Trooper I. Price, 1920-1944, 2nd Recce Regiment. Rest in Peace.
Reconnaisance by 4/1 Gurkhas had identified a position at Naga Village that was occupied by an estimated thirty Japanese with a 75 mm gun. It is not known whether they were acting as a rearguard or were unaware of the order to withdraw. A platoon led by Jemadar Patiram was sent to deal with them. The attack was described in a detailed report by the Gurkha’s commander, Lieutenant-Colonel Derek Horsford:
“The raid was preceded by a ten minute shoot by one tank. Jemadar Patiram led his platoon along the side of the feature & formed up just below the hill. A Japanese MMG [medium machine-gun] opened up from a bunker on a flank. Patiram stalked this himself, threw two grenades inside, killed the four Japanese in the bunker, & knocked out the MMG. The platoon continued blitzing its way through the position & finally came upon the 75 mm gun, manned by four Japanese. Led by Patiram, a section rushed this gun, killed the four Japanese with their kukris, & then threw five grenades down the barrel of the gun to render it unserviceable.
Patiram then collected his platoon & was starting to withdraw when a counter-attack came in from the rear. This was beaten off & the platoon then withdrew to the Battalion, having killed a total of twelve Japanese without any loss to itself, not even one man wounded.” (11)
Jemadar Patiram was awarded a Military Cross for his courage & leadership. The raid was so successful that other platoons begged permission to emulate it.
Also at Naga Village, 1 Queen’s Royals tried yet another assault on Church Knoll, which had resisted capture for weeks. This time, however, they encountered very little opposition, an early sign that resistance was waning.
Gravestone of Trooper D. Crass, 1918-1944, 2nd Recce Regiment. Rest in Peace.
The direction of Japanese retreat was initially south, along the main road to Imphal. This meant that 31 Division continued to block the delivery of supplies by road to Indian 4 Corps at Imphal, where the situation remained grave. 4 Corps rations had already been cut because the monsoon weather conditions restricted the ability to fly in food. Furthermore, the transport fleet would lose eighty American planes by June 15, as these were wanted elsewhere. It therefore remained imperative that the road to Imphal be opened quickly, to allow supplies from Dimapur to be delivered by truck.
Gravestone of Lance Corporal S. Birchall, 1917-1944, 1st Battalion Royal Welch Fusiliers. Rest in Peace. The epitaph is from the poem Requiem by Robert Louis Stevenson.
Requiem. By Robert Louis Stevenson (1850-1894)
Under the wide and starry sky, Dig the grave and let me lie. Glad did I live and gladly die, And I laid me down with a will
This be the verse you grave for me: Here he lies where he longed to be; Home is the sailor, home from sea, And the hunter home from the hill.
May 31. I now leave Kohima
Gravestone of Trooper R. J. Bunce, 1924-1944, 2nd Recce Regiment R.A.C. Rest in Peace.
1 Royal Berkshires supporting 1 Burma Regiment on Aradura Spur were relieved by 2 Durham Light Infantry. The Berks were withdrawn to a reserve position.
At Naga Village, 1 Queen’s Royals managed to occupy a bunker that had repeatedly defied them on previous days, after it had been shelled by tanks. Subsequently, Japanese artillery & mortar fire forced them to withdraw. Later, under cover of heavy mist & rain, they took the bunker again & this time managed to hold it.
Whilst the soldiers grappled over small gains & losses such as these, a decisive moment had been reached beyond the scenes of carnage, squalor & misery. Lieutenant General Sato, commander of 31 Division at Kohima, took a courageous decision that would save thousands of lives.
Lieutenant General Kotoku Sato
In response to his threats to withdraw, Sato had received a signal from the Chief of Staff of 15th Army:
“I am deeply pained that, forgetful of the brave deeds of your division, & adducing difficulties of supply, you have decided on a withdrawal from Kohima. I want you to maintain your present position for ten more days. The Army will take Imphal & reward the distinguished service of your division. Before a resolute will, even the gods give way.” (15)
Sato was infuriated. His men were starving & very low on ammunition. He decided to take control:
“I wish to inform you that, according to the situation, the divisional commander will act on his own initiative.” (15)
Although it was unprecedented for a general of the Imperial Japanese Army to disobey a direct order, he instructed his division to leave Kohima at midnight on May 31st. This done, he sent another message to 15th Army:
“We have fought for two months with the utmost courage, & have reached the limits of human fortitude. Our swords are broken & our arrows spent. Shedding bitter tears, I now leave Kohima. The very thought is enough to break a general’s heart.” (3)
Lieutenant General Mutaguchi, commander of 15th Army, replied furiously that he would be court-martialled if 31 Division retreated. Sato was beyond caring:
“Do as you please, I will bring you down with me!” (3)
Soon after, he followed up contemptuously:
“The tactical ability of the 15th Army staff lies below that of cadets.” (3)
Sato then ended communication with his superior.
May 30. The new flame-throwers
Gravestone of Private J. McK. Wilson, 1924-1944, 2nd Battalion Durham Light Infantry. Rest in Peace.
On Aradura Spur, the Burma Regiment came under repeated attack during the night. This endangered the Royal Berks, who were higher up the Spur & liable to be cut off if Burma Regiment was displaced. Accordingly, the Berks were ordered to withdraw & establish a new perimeter lower down the slope.
The No. 2 flame-thrower. It was not widely used.
4/1 Gurkhas consolidated their positions on the eastern side of Naga Village. Supported by tanks, they systematically knocked out a series of bunkers using pole charges. They had received two No 2 flame-throwers, which they had not used before. These proved very difficult to ignite, simply spurting fuel. When only 10 yds from a bunker, the operators had to resort to matches to light the fuel. One of them was killed by machine-gun fire & the other hit three times in the leg, leaving him helpless in the open, in great danger of the flame-thrower exploding. Subedar Narjang Ghale ran to save him, tied up his wounds & carried him back nearly a hundred yards under a shower of bullets. 4/1 Gurkhas did not attempt to use their flame-throwers again. Subedar Narjang received a Military Cross.
Firing slit of a bunker at Naga Village.
Supported by tanks, 1 Queen’s Royals attempted to infiltrate a bunker on Church Knoll, a site in Naga Village that had resisted former attacks. As previously, their attack was unsuccessful.
Gravestone of Corporal J. G. Bunney, 1920-1944, 2nd Battalion, Durham Light Infantry. Rest in Peace.
May 29. It had bloody well better work
Gravestone of Captain J. H. Chambers, 1913-1944, 2nd Recce Regiment R.A.C. Rest in Peace.
The British attacks on Aradura Spur had failed miserably & many of the sodden, exhausted, decimated troops were deeply disillusioned. They felt that the Battle of Kohima was already won & the Japanese should give up & go. Men who will risk their lives for a cause in the balance, greatly resent having to do so once the eventual outcome is certain. The Royal Welch Fusiliers had fled in such a way that their commander was replaced. The surviving Norfolks of 4 Brigade were sent back to Dimapur; their fighting at Kohima was over.
However, the Royal Berks of 6 Brigade were established on Aradura Spur & 1 Burma Regiment was dug in behind them, with Japanese around their perimeter. The positions of the Japanese were communicated to British artillery, allowing them to deliver a precisely-targeted barrage.
Despite the costly failure of the decimated 4/15 Punjabs to make headway at Naga Village, 33 Brigade commander Brigadier Loftus-Tottenham ordered 4/1 Gurkhas to attack in the same way. The Gurkhas’s newly-appointed commander, 27 yr-old Lieutentant-Colonel Derek Horsford, declined & suggested instead that they infiltrate Naga Village from the opposite direction to previous assaults. His patrols had identified apparent weak spots. The brigadier concurred, commenting sourly that
It did. After careful reconnaisance, 4/1 Gurkhas silently occupied a position at the back of the high ground at Naga Village during the early hours of May 29, completely unopposed. From there, they attacked an adjacent feature, Basha Hill, that was strongly defended by Japanese bunkers. Before the assault, their target was pounded by artillery & tanks. Lieutentant-Colonel Horsford:
“As the attack went in, the tanks fired in front of the troops, the leading flank men of B Company wearing white towels on their backs to indicate their positions to the tank commanders. There was a cloud-burst as the attack started &, not being able to see the white towels, it was thought B Company was late. In fact, the company had started on time & the shells were landing barely 10 yds in front of its leading troops, with the result that many of the Japanese were still crouching in their trenches when the attacking troops arrived. Twenty Japanese were killed, most being bayoneted or grenaded while sheltering in their holes. A further twenty were probably killed by the barrage & twenty got away.
B Company was then held up by six inter-supporting bunkers on the top of Basha, & proceeded to dig in below the crest. The Gurkha casualties had been none killed & twelve wounded, most only slightly.” (11)
An important advance had been made, with minimal loss, thanks to this change of approach that was instigated at battalion level, rather than higher up the chain of command. The rest of 4/1 Gurkhas established themselves nearby. They were counter-attacked three times during the night, but held on to their new positions.
Gravestone of Rifleman Bal Bahadur Magar, 1923-1944, Assam Rifles. Rest in Peace.
May 28. I felt angry
After postponements due to atrocious weather, Operation York began on May 28, aiming to drive the Japanese from Aradura Spur.
The Norfolks climbed through dense jungle up the steep slope to Charles Hill, which was bombarded ahead of them by British artillery. As they approached the crest, Japanese machine-guns opened fire from two bunkers, inflicting casualties & pinning the Norfolks down.
Map showing attacks on Aradura Spur by 4 & 6 Brigades on May 26-28. From “Kohima: The Furthest Battle” by Leslie Edwards.
Meanwhile, the Royal Scots approached Charles Hill from a different direction, but came under fire from machine-guns & a 75 mm gun. The Norfolks moved across to join up with them & supporting fire came from tanks on the road below. The British clawed their way up the treacherous slope. Walter Gilding, Norfolks Company Sergeant Major, was close to Lieutenant Colonel Robert Scott:
“The leading lads got to within 20 feet of the top of the hill, but it was murder. Robert Scott was with the leading troops, throwing grenades like the clappers. I had the sten-gun & I was firing, scrambling up, grabbing hold of a tree, firing the Sten-gun, going a little further, & encouraging the lads. All this shouting & swearing! I wouldn’t say I was frightened, I felt angry more than anything, wanting to finish it off. There was nothing to see at all, you couldn’t see bunker slits or anything as they were too well concealed.
A Japanese grenade came down towards Robert Scott & I think he decided to kick it away. He misjudged slightly, it went off & brought him down.” (11)
Scott was put on a stretcher & carried down “shouting & cursing because the lads wouldn’t let him get off the stretcher”. (11)
Gilding’s comment that he “felt angry” is worth noting. The Norfolks had been convinced that the attack would fail & saw their prediction proved right, despite heroic efforts & much bloodshed. When shown the plan, Lieutenant Sam Horner had written:
“This is a straightforward nonsense from start to finish. There was a very steep hill, we knew the Japs were on top & we were going to assault straight up the front – not a hope in hell.” (3)
Grave of Private W. A. North, 1924-1944, 2 Royal Norfolk Regiment. Rest in Peace.
As they were unable to progress further up the steep slope, Scott’s second-in-command ordered 4 Brigade to withdraw. Private William Cron was in the Norfolk’s rearguard:
“Everybody else had gone, so I turned & made a dash because I had no more ammunition. I scarpered more or less head over heels down the hill.” (11)
Gravestone of Private D. McLeod, 1912-1944, Manchester Regiment. Rest in Peace.
The withdrawal was covered by 2 Manchester Machine-Gun Regiment. Amongst them, Lance-Corporal Partington won the Military Medal & Lieutenant King won the Military Cross. The citations for their awards stated:
“Lieutenant King’s platoon moved forward & assisted the assaulting infantry who were pinned down. Lance-Corporal Partington was carrying out the duties of rangetaker when a Japanese 75 mm opened fire on the section, shells landing very close to him & severely wounding the section commander beside him. Lieutenant King then bound up the section commander & supervised his evacuation in full view of the Japanese.
Lance-Corporal Partington coolly continued to carry out his task of observation & despite more shelling in his locality, spotted the Japanese weapon & reported its location to Lieutenant King. King then personally led a tank round a bend in the road to a place from where the Japanese 75 mm gun could be engaged & directed the tank fire from the open until the gunner had picked up the target.” (11)
Grant tanks on the Imphal Road
At the same time as 4 Brigade’s costly & abortive assault, 6 Brigade attacked Aradura Spur a little further to the south. 143 Special Services Company took the vanguard, with the Royal Berks behind them. The Royal Welch Fusiliers moved into the trenches vacated by the Berks, where they were joined by Brigadier Shapland with his Tactical HQ. The Welch were badly depleted to begin with & quickly came under heavy machine gun & mortar fire from thick jungle nearby. Shapland was shot through the neck & blacked out, then woke to find the Royal Welch being overrun:
“When I came to, the forward company had broke. I saw Braithwaite trying to rally his men, but without success. I joined Braithwaite & ordered him to gather up the remnants of them & form a rearguard. My next clear recollections are being helped into the Burma Regiment Box perimeter.” (11)
Lieutenant Colonel Garnett Braithwaite, CO of the Royal Welch Fusiliers, ordered his men to withdraw, as many of them were wounded. They streamed in disorder down the hillside, severely shaken. The following day, Major General Grover relieved Braithwaite of his command.
The Japanese occupied the position vacated by the Royal Welch, but it was promptly recaptured by 1 Burma Regiment. Meanwhile, the Royal Berks had encountered heavy resistance. In view of this, & the disorder behind them, they dug in where they were rather than attempting to proceed any further.
Gravestone of Private S. Stone, 1911-1944, 1 Royal Berkshire Regiment. Rest in Peace.
The 4/15 Punjabs of 33 Brigade were ordered to attack once more at Naga Village. Their assault was again preceeded by a bombardment from artillery, tanks & Hurribombers. Major Arthur Marment of 4/15 Punjabs described what followed (notice the segregation of different ehnic groups):
“The attack went in, the Sikh Company onto Church Knoll & the Punjabs onto Hunter’s Hill. The Sikhs got to the top of Church Knoll, but were again driven off by heavy mortar fire & a tremendous amount of defiladed fire. Then the Jats of C Company, led by Colonel Thomas himself, reached the top, but it was just impossible to stay. The Japanese held every bit of cover.” (11)
The attack was reinforced by the Musselmen of B Company, but it was eventually called off after 83 men had been wounded & 12 killed.
Monument to the men of 4/15 Punjab who were killed at Kohima.
Although it belonged to 7 Indian Infantry Division, which was commanded by Major General Frank Messervy, 33 Brigade had been placed at the disposal of Major General John Grover, Commander of 2 British Infantry Division. An Indian Army Officer, recorded that Messervy was furious at the way 33 Brigade had been used:
“General Messervy, having visited … 33 Brigade, went off to see first General Stopford, then General Slim, to demand that 33 Brigade be removed from the control of 2nd Division, because of the unnecessary high casualties which were occurring in consequence of what he, General Messervy, said was inept handling by General Grover. I was present when General Messervy, in a furious rage, saw Brigadier Warren & spent a few minutes in his headquarters fuming at the overall situation.” (8)
Lieutenant General Stopford, Lieutenant General Slim & Brigadier Warren commanded 33 Indian Corps, 14th Army, & 161 Indian Brigade, respectively. It is worth remembering that Grover was under pressure from Stopford & Slim to re-open the road to Imphal as a matter of great urgency. Haste was always likely to bring more casualties than a cautious approach.
May 27. A place is vacant
Gravestone of Trooper R. Spencer, 1916-1944, 2nd Recce Regiment R.A.C. Rest in Peace.
The besieged Allied 4 Corps at Imphal was surviving on minimal rations, flown in by fleets of Dakotas. Many of these were American aircraft that had been commandeered by Lord Mountbatten, Supreme Commander South East Asia. But the Americans insisted that eighty of their planes be returned by June 15. This increased the urgency to open the road to Imphal, so supplies from Dimapur could be delivered by trucks.
To this end, preparations were underway for Operation York, which was intended to drive the Japanese from Aradura Spur, a jungle-covered ridge that dominated the Imphal road. The attack was to be made by 4 Brigade, with 6 Brigade on their right. Lieutenant Colonel Robert Scott, commander of 2 Royal Norfolks, was unhappy with the plan. His battalion was exhausted & severely depleted, with only 14 officers & 366 other ranks remaining, many of whom were suffering from dysentery, but refusing to be evacuated. A reconnaissance patrol by the Norfolks warned that their objective was strongly defended.
Because of its heavy losses on Kohima Ridge, 6 Brigade had been reinforced by the 1st Battalion Burma Regiment. Torrential rain had delayed the Brigade’s approach:
“Aradura Spur was covered with thick jungle. It rained almost continuously & the jungle tracks consisted of mud & water. All supplies were carried by mule or Nagas, two steps up & sliding back one. A number of mules fell over the side, including the one carrying the telephone-exchange. Wherever we went the Japanese was always uphill of us, a beastly situation. There was a steady drain of casualties from snipers.” (11)
1 Royal Berkshires were to lead 6 Brigade. The attack was scheduled for May 27, & they were to be led to their starting point by 143 Special Services Company. Their commander, Lieutenant Colonel Wilbur Bickford:
“By midday we had moved about three quarters of a mile. The SS Company had lost the way. I ordered the gunners to fire smoke shells & high explosives on to our objective to give us some indication of the direction. The map turned out to be so inaccurate that to trust in it any further was asking for trouble.” (11)
By 16.30, Special Services Company were still lost & the scheduled attack time was long gone. Bickford decided that it would have to be postponed:
“We had spent a very miserable time drenched to the skin since 03.00 hours that morning & it was bitterly cold. I therefore ordered the Battalion to form a perimeter for the night. In the evening, Brigadier Shapland arrived & agreed with me that the SS Company should start off at first light the next day to reconnoitre the route.” (11)
Gravestone of Major O. H. Owens, 1912-1944, 1st Battalion Royal Welch Fusiliers. Rest in Peace.
33 Brigade at the Naga Village were again attacked after dark, but the assault was weaker than on the previous night & was repulsed.
Meanwhile, nightime patrols by the 4/1 Gurkhas of 33 Brigade probed the Japanese defences at Naga Village in attempts to discover areas that might be vulnerable to attack.
May 26. We could self-detonate
The Japanese positions at Naga Village were again bombarded & attacked from the air by Hurribombers. The 4/15 Punjabs then attacked, using flame-throwers & pole charges to try & destroy the bunkers that opposed them. As on the previous day, they met fierce resistance that drove them back.
Devastation at the Naga Village of Kohima
After nightfall, the Japanese retaliated with determined counter-attacks. Private Nobuyuki Hata of 58th Infantry Regiment described the reckless ferocity of their assaults:
“When we mounted close-range attacks, we’d take three, four or five hand grenades & pull the safety pin out. And we’d put them in our pockets.”
With the safety pin out, striking the firing pin against a tree, helmet or boot would ignite it, ready to throw.
“When we charged the enemy, we’d have grenades in one hand. You usually pull out the safety pin with your mouth, but we didn’t have time for that. The pin would already be out, so we’d bounce the grenades against the soles of our shoes. We went out knowing full well we could self-detonate. When you’re charging the enemy, you’re driven into this state of madness. Of course it’s terrifying, but you can’t just hang back & not do anything. When you charge the enemy, you just become this crazed being.” (3)
A type 91 Japanese grenade displayed at the Kohima Museum. Its pin has been removed.
To arm their grenades, Japanese soldiers had first to remove the pin & then depress the top by pushing it against something solid. British soldiers learned to take cover if they heard the metallic sound of a grenade being struck against a helmet. Once activated in this way, black smoke was emitted, as well as a speck of blue light that was visible at night. The grenades were fused to explode after four or five seconds, but the fuses were somewhat unreliable. If tempted to use captured grenades, Allied troops were advised to throw them as soon as they were activated. The Japanese grenade pictured above is Type 91 & weighs 1lb 5oz. It is displayed in the Kohima Museum.
May 25. We ran like hares
Indian troops at Naga Village
It was the turn of 4/15 Punjabs of 33 Brigade to try to drive the Japanese from Church Knoll in Naga Village. Their attack was preceded by artillery bombardment & strafing by Hurribombers. Major Arthur Marment of the Punjabs:
“We ran like hares under our own 25 pdr barrage. I don’t think I have ever got in so close under a barrage. The shells were all dropping about 10 yds ahead of us. One eventually dropped short, wounding several men. Unfortunately, my right-hand platoon could not cross the start-line on time owing to the very heavy 75 mm fire. We were stopped by heavy sniping from our right. When the rest of the Company came up & there had been another tank bombardment, we had another go. We reached the top, only to be beaten off by heavy defensive fire.” (11)
The 4/15 Punjabs fell back after 58 men had been wounded & 8 killed.
Church Knoll in Naga Village, devasted by repeated bombardments
Although the Japanese had withstood another attempt by the Allies to displace them, their ability to hold on was approaching its limit, as the troops starved & their ammunition ran out. Whereas Major Marment believed that his Punjabs had come under “very heavy 75 mm fire”, the Japanese were reporting that their artillery had exhausted its ammunition. Senior Private Manabu Wada of 3/138 Infantry Regiment recorded his frustration:
“Our losses were dreadful. Our soldiers fought bravely, but we had no rations, no rifle or machine-gun ammunition, no artillery shells for the guns to fire, & above all, we had no support from rear echelons. How could we have continued in such dreadful circumstances? The monsoon season had also started & the Kohima region is notorious for having the heaviest rainfall in the world. In the unceasing rain there was no shelter.” (11)
Lieutenant General Sato signalled 15 Army Headquarters:
“My Division’s rations are now exhausted. We have completely used up ammunition for mountain artillery & heavy infantry weapons. The Division will therefore withdraw from Kohima by 1st June at the latest & move to a point where it can receive supplies.” (11)
May 24. A little unhealthy
Gravestone of Rifleman Sheikholen Kuki, 1923-1944, Assam Rifles. Rest in Peace.
At Naga Village, the Queensmen were settling into their new positions. They had not been impressed with the state in which they found it. Major Lowry, Commander of B Company:
“It had rained a great deal during the night. Early next morning, B Company continued with digging & wiring, except between 10.00 & 11.00 hours, when we organised a large-scale clean up. That hour’s hard work made a whale of a difference. There were fewer flies, not so much smell & no tins to trip over.
British troops at Naga Village
During the morning, 25 pdr smoke was put down all around the Naga Village to enable tanks to get up the track to the top of the hill. Three tanks came up preceded by a bulldozer that widened the track. This activity produced some Japanese harassing fire. One of the tanks on top of the hill suffered two direct hits soon after the smoke cleared. Another shell landed in amongst the 6 pdr anti-tank gun ammunition, which caught fire & made the Battalion Headquarters area a little unhealthy.” (11)
Grant tanks at Naga Village
Major Lowry was suffering from recurrent bouts of malaria & was evacuated later that day to hospital in Dimapur. By contrast, a Japanese officer with malaria, beri-beri & dysentry killed himself with a grenade, to avoid becoming a burden.
Gravestone of Corporal K. T. Thoburn, 1920-1944, Royal Engineers. Rest in Peace.
May 23. Fight on with your spirit
5 Brigade had been clinging to Naga Hill since May 4, where they had endured heavy losses but failed to displace the tenacious Japanese. On May 23, they were relieved by 33 Brigade of 7 Indian Division, composed of 4/1 Gurkha Rifles, 4/15 Punjab & 1 Queen’s Royal Regiment. Whilst the Gurkhas remained in support on Treasury Hill, the Punjabs & Queen’s moved onto Naga Hill. They found a scene of utter devastation, as described by Major Lowry of the Queen’s:
“The town & bazaar were mostly heaps of rubble, with corrugated iron strewn around everywhere. The place smelt of decaying matter, was generally filthy, the barbed wiring was inadequate & virtually non-existant, & no slit trenches or light machine-gun posts had been connected up within the sectors.” (11)
Corrugated iron from the rooves of shattered buildings of Naga Village.
The new arrivals spent the afternoon digging & installing barbed wire, to make their positions more secure. As they did so, they suffered casualties from sniping & shell fire.
Troops at Naga Village
Nearby, Lieutenant General Sato issued an extraordinary order to his starving troops, to strengthen their resolve:
“You will fight to the death. When you are killed, you will fight on with your spirit.” (3)
Spirit was one of the few things that the Japanese soldiers still had in abundance. What they needed was food & ammunition.
May 22. Long Range Penetration
Throughout the long, bitter battle of Kohima, 23 Long Range Penetration (LRP) Brigade operated in the Naga Hills to the north & east of Kohima itself. This was a Chindit brigade, composed of men who had endured a gruelling training regime of exhausting marches through dense, unforgiving jungle. Corporal Stanley Hutson:
“We were force marched all day until we were ready to drop, then made to carry on through the night, with a possible river crossing so that we were wet through, cold, hungry & tired out, before making a mock bayonet charge as dawn broke. We practised receiving air drops of food & ammunition until we & the RAF were perfect. We were made to go without food for two or three days at a time & made to cover extra distance just to prove that we could do it. We were taught to read signs like Red Indians & to hide our tracks, so that if the Japs did cross them, they would be unable to follow us.” (3)
23 LRP was 3000 men strong & commanded by Brigadier Lance Perowne, a striking character, tall, gaunt & sporting a monocle. It was organised into nine ‘columns’ of 300 to 400 men, drawn from 2 Duke of Wellington’s Regiment, 4 Border Regiment, 1 Essex Regiment, 60 Field Regiment & the Royal Engineers. Each column operated independently & was supplied entirely by air.
They had set off on April 12, with the aim of protecting Dimapur against attacks by Japanese who might approach it from the north, after bypassing Kohima. The columns trudged slowly eastwards through the dense rain forest that covered 6,000-foot Naga Hills. Lieutenant Philip Brownless:
“Moving across hundreds of miles of this mountainous, thickly jungle-covered country, with our mules, & carrying packs weighing more than 60 lbs, in addition to our rifles, grenades, ammunition & machine-guns, was an exhausting business. In places the mules had to be unloaded & they & their loads hauled up separately by the ropes used to tie on their loads. Several mules were lost falling down mountain sides.” (3)
As they progressed, they fought intermittent skirmishes against Japanese foraging parties, to choke off potential sources of sustenance that might help feed the starving invaders. Private Ken Keen:
“How we kept going, I honestly don’t know. I think it was the fear of being wounded & the Japs catching you. There was no chance of evacuating you. It’s unbelievable what the human body & flesh can stand, but at the back of your mind that knowledge was there, that you WOULD win & would be going home.” (3)
Gravestone of Signalman G. J. Burrell, 1913-1943, Royal Signals. Rest in Peace.
May 21. Blamed by the soldiers
5 Brigade at Naga Village received much of its supply by parachute, dropped from low-flying C47 Dakotas. Food was delivered in cardboard cartons containg American ‘K rations’, in which individually packaged meals included a tin of meat, powdered soup, biscuits, chocolate, chewing gum, cigarettes & matches. In addition, ‘Compo’ rations came in 4-gallon tins intended for eight men, which contained ‘bully’ beef, ‘spam’ or sausages, potatos, vegetables, fruit, porridge oats & milk.
British infantry collecting a food package delivered by air.
The sight of these daily deliveries falling from the sky was galling for the starving Japanese, who had received no food from their mythical supply lines since reaching Kohima, despite promises. They obsessed about filling their aching stomachs. An anonymous diary discovered on a corpse recorded that:
“Even to think of what we used to eat at home makes my mouth water & my mind swim.” (8)
Although they were not responsible & they shared the hardships of their men, Japanese supply officers felt humiliated by their failure to feed the soldiers. Lieutenant Masao Hirakubo of 58th Regiment recalled:
“Mr Ito couldn’t get food & was blamed by the soldiers. He decided to kill himself.” (8)
May 20. Aradura Spur
After the Worcesters’ unsuccessful attack the previous day, 5 Brigade stayed on the defensive. A patrol by the Camerons came under fire & promptly fell back to the battalion’s perimeter.
Grave of an unidentified soldier. Rest in Peace.
Roughly parallel to Transport Ridge ran the Aradura Spur, which was cut by the road to Imphal. Intelligence gathered from patrols & scouts indicated that the Japanese had concentrated in the jungle on the spur. They would have to be evicted before the British & Indian troops defending Imphal could be supplied by road.
On May 20, Major General Grover gathered the senior staff of 4 Brigade to discuss the best way to drive the Japanese from Aradurar Spur. A plan was formulated that involved 1 Royal Scots & 2 Royal Norfolks attacking up steep slopes, but the commanders of these units were very concerned that their men would sustain heavy casualties.
May 19. Naga village
Briefing of 7 Worcesters at Naga Village
At 08.00 hours on May 19, the artillery of 2 Division began bombarding Hunter’s Hill & Church Knoll, two hills in Naga village that were held by the Japanese. Simultaneously, bunkers on the forward slopes of these hills came under fire from the tanks that were supporting 5 Brigade, mortars & machine-guns of the Manchesters, Camerons & Lancashire Fusiliers. The barrage lasted until the target area was
“… like a ploughed field littered with crumpled pieces of corrugated iron, tree trunks, burning foliage & scattered rocks & stones.” (11)
British troops at Naga Village waiting to attack.
Two companies of 7 Worcesters then attacked, which required scrambling up terraced slopes & over walls. Once they were within thirty metres of the nearest bunkers, the Japanese opened fire, scything down their assailants, who were caught in crossfire. The Worcesters’ Regimental History recorded that
“The Japanese, making skilful use of the five-foot terraces, were able to site their bunkers so that as each terrace was scaled, the attackers came under withering fire from bunkers in the next terrace. The bunkers afforded each other mutual support.
Lieutenant Woodward was storming a bunker from which he had driven the Japanese with a flamethrower. Another bunker from behind fired on him & he was killed while making straight for it with a grenade.” (11)
After sustaining forty casualties, the Worcesters were ordered to withdraw.
May 18. Remembered always
Grave of Private A. E. Wright, 1920-1924, 2 Royal Norfolk Regiment. Rest in Peace.
The units of 6 Brigade still on Kohima Ridge were relieved on May 18 by 268 Brigade, comprising 2 Bombay Grenadiers, 5 Bombay Grenadiers & 17 Rajputs, under command of Major General Grover. The arrival of these fresh troops was timely, as Garrison Hill received a strong Japanese attack, which was repulsed by its newly-arrived defenders.
Gravestone of Naik Robuaia Lushai, 1923-1944, 1 Assam Regiment. Rest in Preace.
At Naga Village, Major Elliot of 7 Worcesters watched with trepidation an air strike by 24 Hurribombers against Japanese who were very close by:
“The target, Church Knoll, was only 170 yds away from us, so the pilots were releasing their bombs right over our heads. That gave us the impression that they would drop into our trenches, instead of swishing low overhead onto the enemy bunkers.” (11)
The tanks sent to Naga Village to support 5 Brigade were moved into position along a track made by Royal Engineers with bulldozers. Winches were required to pull the tanks up the terraces of the hill. The Japanese attempted to disrupt this maneouvre with mortars.
May 17. I’m in ‘eaven
Gravestone of Private J. Cronan, 1914-1944, Queen’s Own Cameron Highlanders. Rest in Peace
Whilst they were on Treasury Hill, the 4/1 Gurkhas were shelled every day & attacked most nights. Nevertheless, they maintained daily patrols & set nocturnal ambushes. During the thirteen days they stayed there, six Gurkhas were killed & nineteen wounded & one of their majors was also wounded, whilst on reconnaissance. Nevertheless, the battalion’s British officers made themselves at home:
“Our Mess on Treasury caused great interest to visitors, as it was almost completely underground. It contained a piano that had been skilfully ‘acquired’ by Major Nixon from a neighbouring hut, in full view of the Japanese. When Chris Nixon’s piano had been installed, even the rain, which had a habit of pouring in through the earth roof, could not take away the look of luxury & splendour which the piano gave the Mess. A private of the Queens called Freshwater took refuge in the Mess when shelling started one morning. His remark in Cockney when he heard an officer start playing confirmed our own feeling of uplift: ‘Cor blimey, I’m in ‘eaven’.” (11)
The piano was eventually damaged beyond repair by shells falling onto the Mess.
May 16. We will remember him
Gravestone of Private S. Pope, 1917-1944, Army Catering Corps. Rest in Peace.
On May 16, the 4/1 Gurkhas consolidated their position at the Treasury, which had only been contested by a lone brave Japanese sergeant. They then were subjected, somewhat belatedly, to shell & mortar fire, which caused a few casualties.
The 2 Norfolks on Transport Ridge received a hot meal for the first time since they embarked on their arduous right hook trek on April 25. Although this was gratefully received, many suffered upset stomachs, perhaps caused by the change in diet. Nevertheless, they sent patrols to explore the slopes of the Aradura Spur above them, which remained occupied by the Japanese. Shots were exchanged by snipers.
A Japanese soldier approached the British, wanting to surrender. On interrogation, he explained that he had passed the limit of his endurance & no longer believed that they could win. His battalion was much depleted, especially amongst the officers, & their guns had no ammunition.
May 15. To respect the dead
Gravestone of Fusilier D.C. Calvy, 1913-1944, 1/8 Lancashire Fusiliers. Rest in Peace.
Major John Shipster had been seconded to 33 Brigade, now under command of Major General Grover at Kohima. He had grown accustomed to the sight of Japanese corpses & had learned
“…to respect the dead, but did not mourn for them … it was essential for our own mental well-being.” (8)
Lance Corporal Angus Taylor of 1 Royal Scots discovered a wallet on the corpse of a Japanese soldier, with photographs inside. One showed the dead man, posing for the camera, proud in his immaculate uniform. Another his wife, appearing shy in traditional costume. A third was of their young daughter, happy beside a tree in blossom.
It was the Dorsets turn to recuperate at Dimapur, a rest they well deserved. Private Tom Cattle recalled the first stage of that break:
“We hobbled out of Kohima unwashed, lousy, wet, unshaved & undernourished. We went back to Zubza, where we had the luxury of hot baths out in the open. Fifty gallon petrol drums had been cut in half & filled with disinfected water. All of our clothes & boots were discarded, all the hair on my body was shaved off & after relaxing in the bath, we were treated with ‘powder’ & jungle sores covered with gentian violet liquid. We had new clothing & boots &, after a medical check, were treated for our various ailments. My feet were blistered & septic. The boils on my arms were treated & my arm was put in a sling.” (11)
For other units, the struggle continued to evict the Japanese & open the supply route to Imphal. 4/1 Gurkhas of 33 Brigade occupied Treasury Hill, after patrols had concluded that the Japanese had withdrawn. They found just one man alive there, a sergeant of 124 Regiment, who defiantly attacked the Gurkhas with grenades, but was promptly dealt with.
Strong points of resistance remained, including at the Naga Village. Brigadier Mike West took charge of 5 Brigade there, to replace the wounded Brigadier Hawkins. Since May 4, 1st Battalion of the Queen’s Own Cameron Highlanders had lost 35 killed, 10 missing & 60 wounded. Major General Grover sent the 2nd Battalion Durham Light Infantry to reinforce them. He also decided to send tanks, once a suitable track had been prepared by the Royal Engineers. The arrival of tanks had been crucial in prising Kohima Ridge from the clasp of the invaders.
Gravestone of Private James Michael, 1917-1944, 1 Queen’s Own Cameron Highlanders. Rest in Peace.
May 14. The most unearthly scene
Gravestone of Private E. Balaam, 1920-1944, Royal Army Medical Corps. Rest in Peace.
The debris on Kohima Ridge was combed for useful information that might have been left behind by the Japanese. The Intelligence Officer of 33 Brigade found this a horrible task:
“The dead are heaped up in their shattered fox-holes. Searching them has been an arduous & stinking job. Just one quick glance at Jail Hill gives a complete picture of a war & its utter destructiveness. It is the most appalling mess I have ever seen. The red earth is torn & churned by the thousands of shells pumped into it & the deeper craters, like filthy abscesses, are quickly being filled by muddy water. Dead & smelling Japanese are festooned on tree-stumps & inside the flooded foxholes lumps of flesh splash around. Not a blade of grass or a green leaf remains on the trees of this once lovely well-wooded slope. The clammy rolling monsoon mists now rolling over it makes it just about the most unearthly scene ever.” (11)
The Dorsets’ Intelligence Section searched the Bungalow Sector.
“We had collected documents including maps produced by the Survey of India, overprinted in Japanese, one being of Calcutta. Were the front-line Japanese troops expecting to reach so far into India?” (11)
The maps were thought to have been bought before the war.
Memorial at Kohima Cemetery to the men killed on Jail Hill of 1st Battalion Queen’s Royal Regiment & 4th Battalion 1st King George V’s Own Gurkha Rifles, 33rd Brigade, 7th Indian Infantry Division.
As the men of 1 Queen’s Royal Regiment departed from Jail Hill, an attack by enemy aircraft made clear that their opponents remained defiant. Major Lowry:
“While we were leaving, a Japanese Zero plane came over & dropped a bomb in the area of 33 Brigade Headquarters. Ten minutes later, about a dozen 97s & Zero escorts came over & also bombed & strafed the area. They were driven off by anti-aircraft fire & met by Spitfires as they left. Half-an-hour of dog-fights broke up the morning.” (11)
A Japanese Zero
Although they had been expelled from Kohima Ridge, Lieutenant General Sato’s 31 Division still held positions that blocked the road to Imphal, preventing the delivery of urgently-needed supplies from Dimapur. However, Sato was disguted that his men had never received the food & ammunition promised by Lieutenant General Mutaguchi. He signalled Mutaguchi:
“Because of the heavy rain & starvation, this Division should move to a point where it can receive supplies.” (11)
The response was unsympathetic:
“It is very difficult to understand that your Division should evacuate under the pretext of difficult supply. Maintain the present position for ten days. Within ten days, I shall take Imphal & reward you for your services.” (11)
It is doubtedful that Mutaguchi believed this, as the battle at Imphal was not going his way. If he retained any expectation of success, then he was seriously deluded.
May 13. ‘Old on!
The Grant tank chosen to attack the tennis court was commanded by Sergeant Waterhouse of 149 RAC. Lieutenant Highett of the Dorsets joined the crew, as he was familiar with the terrain. The day previously, the tank had been driven onto the Club House terrace, which was 10 yds above the tennis court.
Route taken by Sergeant Waterhouse’s tank to drop from the club house terrace onto the tennis court, 10 yds below
On May 13, after a preliminary bombardment, it drove off the edge of the terrace into thin air. Whether a Grant could withstand a 10 yd drop had never been tested. If it had landed on its side, the crew would have been at the mercy of the Japanese. Sergeant Waterhouse:
“I remember my driver shouting ‘old on!’ and bump, we’re smack in the centre of the tennis court itself. As we came over the top onto the tennis court we crashed right on top of one of the Japanese main positions & buried at least a few Japanese.” (11)
The ‘bump’ of the 30 ton tank must have jarred the crew tremendously, but they had no time to recover.
“We pulled to the right & found ourselves in front of a very heavily sandbagged steel water tower. Small-arms fire met us. My 75 mm gunner dealt with this position.” (11)
They were supported by a 3.7-inch mountain gun, firing from the terrace above. Two platoons of Dorsets poured onto the tennis court.
Painting by Terence Cuneo depicting the Grant tank & Dorsets storming the tennis court on 13 May 1944.
Lieutenant Highett, inside the tank:
“My job was to fire one of the tank’s two machine-guns. This I did at point-blank range at the Japanese bunkers 20-30 yds away. You could still see that it had been a tennis court. There was nothing like a net, of course, but I could still see one or two white lines. We were met by small-arms fire which did us no damage. For some reason, the Japanese anti-tank gun did not fire at us.” (11)
Perhaps it had no ammunition left. In fact, there was little resistance. Forty or fifty Japanese fled down the hill to the road, pursued by fire from the British. In case anyone remained in the bunkers, pole charges were thrust inside. These consisted of about 10 pds of explosives with short fuses, on the end of bamboo poles. Once it was clear that there was no more resistance from the tennis court terrace, the attack switched to the remains of the DC’s bungalow. Sergeant Waterhouse, inside the tank:
“The infantry commander told me by phone that all the tennis court positions had been captured & quite a few Japanese killed. We then went on to the edge of the tennis court terrace, where it overlooked the Deputy Commisioner’s bungalow, & gave the bungalow quite a pasting.
After everything in sight was well & truly plastered, the infantry went in & took the position. The infantry officer in the tank with me estimated that we ourselves had knocked out possibly forty of the enemy.” (11)
By 11.15, the entire sector down to the road junction was at last back in British hands.
The devastated remains of the Deputy Commisioner’s bungalow after its recapture
Lieutenant Norman Havers of the Dorsets:
“All who could went to see the place for which so many had suffered, or had given their lives. Everywhere there was the debris of war, shattered & unrecognizable buildings, bunkers & trenches, discarded weapons & equipment, & crumpled corrugated iron. The ground, where not dug up for defences, was broken by shell bursts, so that few natural or original features remained unchanged. As everywhere, trees were reduced to little more than torn & broken stumps. There was no life. It was a place of desolation & very horrible. By the pile of wreckage that was the bungalow, there were bodies [of Dorsets], some much as they fell in that first attack, some 17 days ago. Now someone had the grim task of identification by the removal of one of the two identity discs worn by each of our men on a cord around the neck. The Pioneer Platoon began the burials.
Gravestone of Fusilier W.J. Hignett, 1917-1944, 1/8 Lancashire Fusiliers. Rest in Peace.
A particularly nauseous sight was a body of a Japanese officer who had squatted in an open space &, holding a grenade against his stomach, committed hari-kiri.” (11)
The bunkers were searched for documents, starting with one dug into the ground where it rose from the tennis court terrace. Lieutenant Havers:
“Being at the base of the high bank, they went horizontally for such a distance as to leave daylight behind. We progressed on hands & knees through a warren of narrow … low passages. We were thankful to return to the open air.” (11)
The Dorsets prepared to repel counter-attacks, but none came. This reflected the greatly weakened state of the Japanese at this stage in the battle.
Still from newsreel film of Sergeant Waterhouse’s tank on the tennis court
Kuki Piquet was an isolated pocket of Japanese resistance, where many attacking troops had been massacred. On May 13, it was pelted by a heavy artillery barrage & then stormed by the Royal Welch Fusiliers. They captured a few shell-shocked Japanese, amongst the piles of dead.
On Supply Hill, the Berkshires could find no Japanese left alive, although countless numbers of their corpses remained, in various stages of decay. One of the bunkers was found to have been a battalion headquarters, “as big as a cathedral & full of galleries”. (11)
Jail Hill had been abandoned in a similar state, with twenty bunkers counted. Major Lowry of the Queen’s described the main one there:
“It had four strong points coming from its deep central bunker, which alone could have held about 40-50 Japanese. The openings of that central bunker had steel shutters on the inside, which could be closed. There was a quantity of rifles, ammunition, very rusty machine-guns, a battered Bren-gun & stacks of Japanese & British grenades. Several of the chaps found Japanese flags. We counted ten Japanese dead, who were searched, & five Japanese diaries were handed to me.
During the morning, we buried our dead. Most were taken down the hill & buried in a Queens’ site below the road. Others had to be buried on the hill itself. All arms, ammunition & equipment etc. were … collected by carriers & taken to the salvage dump-head. Barbed wire came up & we had the whole area wired in with trip & a single apron of wire by about 14.30 hours.
It smelt to high heaven. Flies were now so thick on this battered, barren & debris-scattered hillside, that complete corpses could be almost buried by them. I ate several large filthy-looking bluebottles which settled on a bully beef sandwich as it travelled between my hand & mouth. The fly problem at the best of times was bad, but since the 11th they were everywhere, & were now content to sit on the mud-blood hill itself. None of us ever saw a bird there. Jail Hill was, in fact, the acme of desolation, as, of course, was most of Kohima.” (11)
By dusk on May 13, the entire Kohima Ridge, from the DC’s bungalow to Transport Ridge, was firmly in the hands of British & Indian troops.
Grave of Private P.J. Chapman, 1919-1944, 2 Royal Norfolk Regiment. Rest in Peace.
May 12. Omnia audax
Gravestone of Captain C.H. Wainhouse, 1917-1944, 1/8 Lancashire Fusiliers. Rest in Peace. ‘Omnia Audax’ is the motto of the Lancashire Fusiliers & can be translated as ‘Daring All’
Brigadier Hawkins of 5 Brigade was wounded by a sniper whilst reconnoitering the area below Naga Village. Following the deaths of Brigadiers Goschen on May 7 & Theobalds on May 11, Hawkins was the third Brigadier casualty that week, although in his case the injury was not fatal.
Grave of Private R.H. Hoyle, 1914-1944, 1 Royal Berkshire Regiment. Rest in Peace.
Under cover of darkness, Grant tanks of 149 Regiment RAC managed to get past the roadblock that, the previous day, had halted their progress along the main road. When they reached Supply & Detail Hills, they were greeted by cheers from the infantry. Two came onto Supply Hill, where their fire was directed by radio against enemy bunkers discovered by the Berkshires. Two more pounded recalcritant bunkers on Detail Hill. In all, twelve bunkers on these hills were destroyed by the tanks that afternoon.
At dusk, Major Arthur Marment of 4/15 Punjabs led a patrol to the top of Detail Hill & was delighted to find it unoccupied:
“The Japanese were either dead, buried, or had packed up. It had been a wonderful show. All was quiet & someone thrust a bacon sandwich into my hand. I have eaten a lot of bacon since then, but no bacon sandwich has ever tasted so good again.” (11)
An M3 Grant tank
From the road, additional Grants pounded bunkers on Jail Hill. Queensmen nearby on the hill cowered in the mud. Major Lowry:
“It was an amazing sensation as the tanks shelled these bunkers. We all had to lie flat on our stomachs to avoid debris & even the shells, as the positions they pounded were literally only 15 yds away. After a quarter of an hour of this, the tanks ceased firing their 75mm shells & Browning automatics.
The bunker near the road was shot to pieces, & Japanese were seen being blown clean up into the air. Lieutenant Hamilton’s D Company platoon dashed through the Jail buildings & old bunkers, as soon as all firing ceased. It encountered no opposition.” (11)
The Queensmen & 4/1 Gurkhas stormed “with great gallantry & determination” bunkers on Jail Hill that remained occupied.
Gurkhas investigating the entrance of a captured bunker beside a dead Japanese.
The Japanese perspective was given by Saturo Yanagi, an officer of 1/124 Regiment:
“There were only about twenty soldiers of 58 Regiment left in front of us & we were ordered to cover their withdrawal. I sent two sections forward that night & the survivors were evacuated. I then ordered the firing of all remaining machine-gun ammunition & we withdrew.” (11)
The arrival of tanks was also a game-changer for Transport Ridge, where they were able to blast the lower bunkers that had resisted attacks by the infantry. With this support, Royal Scots finally succeeded in storming the ‘Norfolk Bunker’ complex. They found
“A rabbit warren, with passages that linked bunkers & concealed weapon placements. They were highly elaborate, burrowed out of the steep hillsides & reinforced inside.” (11)
Royal Scots displaying a Japanese ‘Hinomaru’ flag, most likely taken from a corpse.
In the evening, a few long-range shots came from Japanese 75 mm guns behind & above Transport Ridge. Despite these, the Allies felt extremely pleased with the progress they had made on May 12.
After the day’s tremendous success at the southern end of Kohima Ridge, an ambitious attempt to capture the tennis court was planned for next morning. Sappers had created a track that allowed a Grant tank up & across Hospital Spur to reach the terrace above the tennis court. Next day, it was to drive off the edge & drop ten feet, in the hope that it would land the right way up & be able to support an attack by the Dorsets. The night was filled with anticipation.
Gravestone of Private W.A.M. Salen, 1925-1944, 1 Royal Bershire Regiment. Rest in Peace.
May 11. The last one I was thinking of
As Kuki Piquet, immediately south of Garrison Hill, had resisted several assaults, the Royal Berks bypassed it to attack Supply Hill instead, from the direction of Hospital Spur. Whilst they waited on the start line, several were hit by friendly artillery & mortar fire, intended for the Japanese. Nevertheless, they quickly achieved their objectives & spent the rest of the day consolidating their gains.
A 6pdr gun was dragged to a position that overlooked the tennis court. After it had pounded away for five minutes, the Dorsets attacked, but made little progress & were driven back by heavy fire.
Map showing attacks made on May 11 by the Dorsets against the tennis court (red) & by the Berkshires against Supply Hill (blue).
In Naga village, a patrol of Worcesters was able to creep up to some bunkers & place explosive charges. Major Burrell:
“Suddenly there were rapid explosions & debris from bunkers went flying. Some Japanese tried to escape, but were shot down by Sten-gun fire from our men. Then there was silence, but not for long. The Japanese had apparently been caught resting & were taken completely by surprise. Now they started to fire their machine-guns & throw grenades in all directions. We heard them screaming.”
The Worcesters quickly returned to 5 Brigade’s defensive perimeter. Brigadier Hawkins told Major General Grover that the Japanese were constructing bunkers & it would need a substantial effort to shift them:
“I am convinced that it will take a full-scale attack by at least one brigade & possibly two, to capture these positions, & they will want all the artillery support they can get, even tanks.”
Grave of Private T.C. Beasleigh, 1919-1944, The Manchester Regiment. Rest in Peace.
At the southern end of Kohima Ridge, the Queen’s Royal Regiment attacked Jail Hill again. Their first attempt, on May 7, had ended in bloody failure, at least partly due to flanking Japanese fire from Detail Hill on their left & Transport Ridge on their right. This time, their left flank would be protected by 4/15 Punjabs attacking Detail Hill, but the bunkers on Transport Ridge would remain a thorn in the Queensmens’ sides, as the Norfolks’ attempt to clear them the night before had again been unsuccessful.
Map showing attacks made on May 11 by the Queen’s against Jail Hill (green) & by the 4/15 Punjabs against Detail Hill (orange).
Watching these attacks by the Queen’s & Punjabs was a BBC war correspondent, Richard Sharpe:
“It’s 38 minutes past four in the morning & I’m sitting in a dugout overlooking a high hill in Kohima. In just under two minutes, a considerable bombardment is going to begin. Guns & mortars are going to soften up the last Japanese-held hills & then infantry & armoured cars are going to make a simultaneous attack on all of them.” (11)
The claim that these were “the last Japanese-held hills” was wishful thinking. Jail & Detail Hills were the targets of the barrage, delivered by 2 Division artillery, supplemented with 3-inch mortars of 33 Brigade & Vickers machine-guns of 2 Manchesters. Sharpe continued:
“There is the crackle of small arms, the hammer-hammer of machine-guns, the crack of mortar bombs & over it all a roof of rumbling sound, the guns. The faintly discernible black ridge with the bumps of hill tops sticking above it is a focal point towards which red tracer curves slowly, sparks from mortar bombs swoop onto it &, as the sky gets lighter, you can see the skyline toss tumultuously into the air. You become aware of a thick white cloud drifting slowly down from the ridge. That is smoke. Underneath it, our men are moving forward under its darkness to assault the heights.” (11)
Major Lowry of Queen’s B Company:
“By 05.00 hours there were the first signs of daylight. I went over to each platoon & wished them the best of luck. We moved forward on to Jail Hill. Our speed & formation up the hill was grand & the chaps were in terrific form. The Japanese did not try to stop us until we were about three-quarters of the way from the top, & then they started.” (11)
Richard Sharpe, BBC:
“As the sun comes up, you can hear faint cheers as the men charge. Soon tiny black silhouettes can be seen moving slowly over the skyline, dropping to the ground or moving violently with hand grenades or pole charges.” (11)
Major Lowry, Queen’s:
“By 06.00 hours, we had reached the crest, taken one bunker & driven the Japanese out of another small one. But further progress was hard & costly. I told the men to remain where they were, to hold & contain the Japanese.” (11)
As they were under fire from both flanks, Lowry “got on the wireless” to call for a smoke screen. He then led his men down the reverse slope of Jail Hill, until they were forced to take cover from rifle & machine-gun fire. Lowry:
“Then followed a sniping duel, after which the air became thick with grenades, both theirs & ours. We all scurried about trying to avoid them as they burst. We did a fair amount of damage. Poor old Pen misjudged a grenade & did not crawl away in time. As a result, he was hit by a number of grenade fragments under the heart. He was soon dragged clear, but died about half an hour later.” (11)
It was decided that the Queensmen should consolidate & hold on to their gains. Two companies of 4/1 Gurkhas went forward to support them, eventually digging in on their left flank. Major Lowry:
“For the rest of the day we dug like beavers with everything we could find, plates, mugs, bayonets & entrenching tools, burrowing & tunnelling ourselves forward below ground level. By the evening we were completely dug in & all section posts linked up. At the first sign of dusk, a carrying party came up with ammunition, chiefly grenades. They also brought up some very welcome rum. It had been raining, so we were soaking wet.
We had a 50% stand-to all night, but we were all awake for most of it, as it poured with rain throughout & was one of the noisiest nights imaginable. The sounds of the Japanese machine-guns & our light machine-guns were punctuated by grenade & mortar fire. Three Japanese bunkers were only about ten or fifteen yards away. The Queens were fortunate in only having three more men wounded during the night.” (11)
Grave of Private J. C. Williams, 1925-1944, 1st Queen’s Royal Regiment. Rest in Peace.
Whilst the Queensmen were storming Jail Hill, 4/15 Punjabs advanced to attack Detail Hill, with pipes & drums playing. They soon came under heavy fire from Supply & Jail Hills & sustained 130 casualties. Their Commander, Colonel Conroy, was wounded in both arms, but continued to direct operations. However, they made little impression on the main bunker, despite support from 4/1 Gurkhas.
The assault on Detail Hill should have been supported by tanks, but the road was blocked & attempts to bypass the obstacle led to the front two tanks having tracks blown off by anti-tank mines.
Grave of Lieutenant P.M. Wood, 1915-1944, 149th Regiment Royal Armoured Corps. Rest in Peace.
The attacks on Jail & Detail Hills suffered from flanking fire from Transport Ridge. At first light, the Norfolks had made another unsuccessful attempt to take the ‘Norfolk Bunker’. The Royal Scots then had a go, in which Lance-Corporal Canham had managed to force his Bren gun into a loophole, but he was killed after firing his first burst. The Scots were ordered back. Major Menzies:
“We were still close to the Japanese. We tried to burn them out with petrol tins, which we set alight with Verey flares. Then our trenches began to fill with water. Soon we were standing on dead bodies to get a foothold.” (11)
Grave of Private E.L. Wilmshurst, 1918-1944, 2 Royal Norfolk Regiment. Rest in Peace.
Brigadier Theobalds, Lieutenant-Colonel Scott & several 4 Brigade staff assembled later opposite ‘Norfolk Bunker’ to discuss options. Sergeant Fred Hazell saw what happened:
“Theobalds came down looking all very spic & span, with his red braided cap on. He was with four or five others. He knelt down alongside my hole & said ‘I thought I’d come up & see where all the action is. How are things going?’ I said ‘It’s fairly quiet at the moment, but keep your eyes open for grenades. In fact, I wouldn’t stand there if I was you, there’s a grenade coming now!’
There was a fairly long slit trench just behind me & they all jammed into it. About six feet behind the trench was a tree stump. I saw the grenade hit the top of this tree stump & bounce back into the trench.” (11)
Scott was unharmed, but Brigadier Theobalds & the staff officers were badly injured. Hit in the back & paralysed, John Theobalds was evacuated, but died five days later. He asked a friend to tell his wife that
Brigadier John Theobalds, 1902-1944. Rest in Peace.
May 10. Revolting
Lieutenant Gadsby led a sodden section of 2 Manchesters, with a Vickers machine-gun, from Garrison Hill down to join the Dorsets dug in at the northern tip of Kohima Ridge, where the blackened remains of the Deputy Commissioner’s bungalow were situated:
“The weather was foul with thick mist & it was pouring with rain. We were soon wet through. We had great difficulty in digging in as the ground had been so shelled that the earth just fell in as soon as we started to dig. We remained almost totally out in the open for the night with the Japanese only a few yards away. Fortunately, they kept quiet. I hate to think what would have happened to us if they hadn’t.” (11)
Lieutenant Norman Havers of the Dorsets was miserable too:
“We were increasingly plagued by flies, mostly bluebottles. They swarmed over everything. The knowledge that they had hatched from maggots infecting our own & enemy dead made them so much more revolting. Rats too were multiplying in this place where there was so much to feed on. Most of the dead lay out in the open where they had fallen & there they had to remain until the battle ended.” (11)
Red arrow shows the path of the patrol made on May 10 by a company of 1/8 Lancashire Fusiliers from the 5 Brigade position. They came under artillery fire from Firs Hill (top left).
Brigadier Victor Hawkins sent a company of 1/8 Lancashire Fusiliers down from the top of Naga village to reconnoitre:
“Just below our position was a terrace which contained the Kohima Village schools, but they were now in a dilapidated condition because of air bombing. I watched the Lancashire Fusiliers’ company moving down … & once they got amongst the mass of bashas & houses they ran into a considerable number of snipers. When the Fusiliers tried to cross the road & get onto Treasury Ridge, they came up against stronger opposition & lost some men to a light machine-gun dug into a bank above the road. I ordered them to withdraw back to the Brigade perimeter. On their way back, a Japanese gun on Firs Hill suddenly opened up & put a round right in the middle of them.” (11)
Grave of Fusilier T. Walker, 1911-1944, 1/8 Lancashire Fusiliers. Rest in Peace.
Since the death of Brigadier Goschen, killed by a sniper on May 7, command of 4 Brigade had passed to Brigadier Jack Theobalds, who had been second-in-command of 5 Brigade. He spent the night of May 10 in the Norfolks’ command post with Lieutenant-Colonel Robert Scott & Captain John Howard, to be on hand for another attempt to clear the Japanese from Transport Ridge. They were only 200 yds from the ‘Norfolk Bunker’ complex, where Randle had been killed on May 6. Howard described how two 6pdr anti-tank guns were brought up by Gordon Highlanders of 100 Anti-tank Regiment:
“The Japanese positions were only a few yards from the Norfolks’ forward foxholes & it was impossible to use ordinary artillery support with our men so close. Two anti-tank guns had therefore been taken to bits & man-handled up to the Norfolks’ positions with great difficuly & very slowly. They were then to fire at a range of about 40 yds & blast the Japanese bunkers to pieces.” (11)
As they worked, the determined gunners crouched behind the shields of their guns, for protection against the furious fire coming from their targets. At the same time, a mortar barrage supported their efforts, delivering 1,500 rounds in half an hour.
A mortar in action
Night had fallen when the bombardment ended, & in the darkness a platoon of Norfolks advanced to try again to clear the bunkers 50 yds from their trenches. They passed John Randle’s shattered remains, which lay where he had fallen on May 6, & reached their objective with only one casualty. But then a storm of grenades fell amongst them. A signaller with a telephone urgently reported that the platoon was being destroyed & Brigadier Theobalds ordered them to withdraw. The officers in the command post watched the survivors return. Captain John Howards:
“We then stayed miserably in that hole in the ground for the rest of the night. The Brigadier gave me some chocolate, which he had brought with him when he came to take over the Brigade. But we had been on short rations for two weeks & the sudden richness made me sick & I spent all night having recurring bouts of diarrhoea & vomiting.” (11)
Grave of a soldier who could not be identified. Rest in peace.
May 9. Something nice
Private Manabu Wada of 3/138th Regiment, Imperial Japanese Army, had been told that they would feast their way to victory, seizing troves of British supplies, as they had in Malaya & Burma. But when they reached Kohima:
“The British had burned their food & supply depots so that not even a grain of rice or a round of ammunition was left for us in the captured enemy positions. Throughout our long seige of Kohima, enemy fighter aircraft flew along the face of the valley in front of us & cargo planes dropped arms & water to their leading troops. Without meat, rice & ammunition, we could only watch.” (3)
The huge imbalance in logistic support was made clear to the Japanese by the sight of supply planes delivering food to the British. In stark contrast, Private Masaoki Okoshi killed, cooked & ate a mangy dog that had strayed into his camp:
“It wasn’t a question of whether it tasted good or not. We didn’t care what it was as long as we could put something in our stomachs. It was just a case of eating & easing our empty stomachs a little, that was all.” (3)
To the starving Japanese, an attack offered the possibility of plundering rations from enemy dead. To Private Hidehiro Shingai, the announcement of a planned attack brought mixed feelings. The positive side was that
“We’ll get to have something nice for dinner today.” (3)
May 8. Most depressing
It was three weeks since 2 Division had locked horns with the Japanese at Kohima & British morale was sinking. One of the Staff Officers, Captain Arthur Swinson, described the previous day as
“probably the most depressing for the Allies in the whole battle.” (3)
Grave of Private J. N. Foster, 1913-1944, 2 Durham Light Infantry. Rest in Peace.
Yet another attack had ended as a bloody failure & progress towards evicting the Japanese was painstakingly slow, despite the massive logistical superiority enjoyed by the British. It seemed that bringing tanks into close proximity was the only reliable way to destroy bunkers. Indeed, two tanks belonging to 149 Regiment climbed to the top of Supply Hill on May 8 & blasted Japanese positions at point-blank range. But many bunkers were inaccessible to tanks.
Grave of Corporal D.J. Woolford, 1917-1944, 2 Dorsetshire Regiment. Rest in peace.
Lieutenant Lintorn Highett of the Dorsets admired the tenacity of his opponents:
“Every army in the world talks about holding positions to the last. Virtually no other army did – but the Japs did.” (3)
Colour Sergeant Fred Weedman of the Worcesters felt the same way, describing the Japanese as
“… fanatically stubborn defenders. Artillery attacks & Hurricane & Vengeance bombers had little effect. The British & Japanese were hopelessly intermingled. One side would attack, the other counter-attack: neither would give way. During daylight they fought ferociously ten or fifteen yards apart & at night they crept even closer, attacking with grenades & bayonets.” (3)
Whereas the British were able to bring in 33 Brigade to replace their losses in this grim attritional struggle, the Japanese had to rely on the dwindling units that had been fighting since they reached Kohima on April 4, not to mention the 20 day trek to get there & the battles fought at Sangshak & Jessami in March. They were scraping the bottom of the proverbial barrel to keep their defences manned:
“Even the invalids & the wounded were driven to the front to help supply manpower. Even those with broken legs in splints were herded into battle, malaria cases too. I have seen these going forward with yellow faces, the fever still in their bodies. I saw one man, whose shoulder had been shattered by a bullet, stagger forward to the front.” (3)
For how much longer could this go on?
May 7. Silly arses
After a few days of recuperation, the Berkshires returned to Garrison Hill to replace the Durhams, who were transported to Dimapur for a break from the purgatory of Kohima Ridge.
At first light, 4/1 Gurkhas attacked the bunkers on Transport Ridge that remained in Japanese hands. Their assault was preceeded by a bazooka barrage & then launched through a smoke screen, but it was repulsed by showers of grenades. The Gurkhas’ commander, Lieutenant Colonel Hedderwick, was killed by a sniper as he watched the attack from one of the Norfolks’ trenches.
Grave of Lieutenant Colonel I. H. Hedderwick, 4/1 King George V’s Own Gurkha Rifles. Rest in Peace.
A sniper also killed Brigadier Goschen, as he stood to observe the Gurkhas’ attack. His uniform may have attracted attention, according to Lieutenant Dickie Davis:
“Goschen came down with Robert Scott, full of red things on their hats, silly arses! I said ‘Excuse me, Sir, there are snipers there, could you get down!’ But he was a Guardsman & he still thought it was an exercise! You know, a Guardsman wouldn’t get down, so he didn’t & unfortunately got killed.” (11)
Staff officers. Brigadier Goschen is standing fourth from right & Major General Grover is standing third from left.
The assault by 4/1 Gurkhas had been intended to allow 1 Queen’s Royals to attack Jail Hill unmolested from Transport Ridge. After a short delay, the Queen’s went ahead despite the failure of the Gurkhas’ attack. They soon came under fire from Transport Ridge. Major Lowry was commanding their reserve company & followed progress ahead:
“As the haze & smoke of the bombardment lifted on Jail Hill, D Company came under very heavy cross-fire from Detail & Supply Hills & from the right by Japanese machine-guns firing straight down the road. Through my glasses, I could see what a terrible time they were having.” (11)
The Queen’s managed to overcome some lower bunkers on Jail Hill, but were mauled by withering fire from higher up, from Detail Hill on their left & from Transport Ridge on their right. Major Lowry’s reserve company was sent to bring back the casualties. To him
“The air seemed to be scorching hot from the heavy firing … from in front of us & from all sides. Getting in the casualties was a ghastly job. They were magnificent, some men making four or five journeys with casualties through this hell.” (11)
The Queen’s were ordered to withdraw. Their abortive attack had demonstrated the importance of overcoming the remaining bunkers on Transport Ridge before assaulting Jail Hill. In retrospect, the Queen’s attack should have been postponed when the 4/1 Gurkhas failed to achieve their objective, but Major General Grover was under urgent pressure from Corps Command to open the road to Imphal.
Grave of Corporal G.W.A. Wood, 1920-1924, 1st Queen’s Royal Regiment. Rest in Peace.
At Naga Village, 5 Brigade were also suffering. A temporary cemetry there grew every day. Evacuation of the wounded required
“… the nightmare of a three-hour journey … on a swaying stretcher, carried by four Nagas, often under mortar fire. Then a 43 mile trip by ambulance … into the torrid heat of Dimapur. [The casualties] lie still beneath the blankets, white with pain but uncomplaining.” (11)
Grave of Fusilier N. Cookson, 1917-1944, 1/8 Lancashire Fusiliers. Rest in Peace.
Although Japanese 31 Division continued to thwart British attempts to displace them, Lieutenant General Sato knew that his men were starving & low on ammunition. In response to his demand for re-supply, Lieutenant General Mutaguchi had told him to forage. Sato went over his head, appealing to the Commander in Chief of South East Asia & to Imperial Headquarters in Tokyo.
May 6. Lights out
At dawn on May 6, Captain Randle led a frontal assault against the bunker complex on Transport Ridge. He was soon hit. Sergeant Bert Fitt described the attack:
“The Japanese had two light machine-gun posts which were carving us up terribly. Captain Randle had already been hit at least twice, fairly heavily in the upper part of his body, before we even got to the bottom. I shouted to him to go down & leave it to me, because I could see that he’d lost blood. He said ‘No! You take that left hand bunker; I’m going to take this right hand one.
The Japanese didn’t realise that I was coming up the slope ‘underneath’ them. I managed to push a grenade in through the slit & after four seconds it went off. Anybody inside that bunker was either dead or knocked out.
John Randle, mortally wounded, throwing a grenade into the bunker.
I immediately spun right. I saw Captain Randle at the bunker’s entrance. He had a grenade he was going to release into the bunker. I just stood there. I couldn’t do a thing to save him. If he could have held out for about three minutes, I would have got on top of the bunker & knocked it out without getting hurt. But unfortunately, he had been hit again at point blank-range. As he was going down he threw his grenade into the bunker & he sealed the bunker entrance with his own body. But he had got the occupants, killed them.
Captain John Randle
It was the main gun position & I am certain that’s why he went for it. He knew that if he didn’t knock it out it would be lights out for the rest of us. It was a quite deliberate act to block the opening of the bunker to save the remainder of the men. In doing so, he was unfortunately killed.” (11)
Grave of Captain John Randle, 1918-1944, 2 Battalion Royal Norfolk Regiment. Rest in Peace.
Sergeant Fitt charged 15 yards to the next bunker, where he threw in a grenade & shot a Japanese. He was then shot by someone outside his field of vision:
“He had come out of the back door of the bunker behind me. He got me through the side of the face under my jaw, took my top teeth out, fractured my maxilla & the bullet burnt along the side of my nose. I spat out a handful of teeth. He was only a few paces away. He had a rifle & bayonet & I had a light machine-gun. I pressed the trigger but found I’d got no ammunition left. He came towards me. I was an unarmed combat instructor & knew I could go hand-to-hand against anybody with a rifle & bayonet. I therefore let him come & I crashed the gun straight into his face. Before he hit the ground, I had my hand on his windpipe & I tried to tear it out. I then managed to get the bayonet from his rifle & I finished him with that.
As I stood up, I heard a shout from 12 Platoon telling me that they were pinned down by another bunker I couldn’t see. They told me where it was. I threw a grenade over the top of the bunker & a chap would could see it yelled back a correction. I threw a second one that bounced straight into it, killing the occupants.”
A fresh Norfolk platoon appeared, led by Second-Lieutenant Davies. Fitt told him that he couldn’t continue:
“I had been bleeding heavily & the front of me was pretty red with blood. I was getting weak, so I said to him ‘Well you’d better take over now, Sir.’ I went & sat just inside a bunker. Eventually someone put a field bandage around my head.” (11)
Sergeant Fitt was evacuated & eventually received the Distinguished Conduct Medal. Captain Randle was awarded a Victoria Cross.
Albert Fitt
Second-Lieutenant Davies took his platoon to attack bunkers on the other side of the slope, facing Jail Hill. Davies:
“We couldn’t throw grenades at them as they were facing away from us, so we made holes in the tops of them with bayonets, pulled the rings out of grenades & dropped them in through the holes.” (11)
However, as casualties mounted they stopped to consolidate in trenches amongst the captured bunkers. An order came that they should not risk bringing in the wounded.
Grave of Private E. Whyman, 1919-1944, 2 Royal Norfolk Regiment. Rest in Peace.
As the Norfolks settled in to hold the positions they had taken, the bunkers further down the ridge remained a major challenge. Some of them faced Jail Hill, which was to be attacked the following day. Its size & position allowed Jail Hill to dominate Detail Hill & the main road to Imphal, which ran through a cutting at this point. The Japanese on Jail Hill also provided covering fire for part of Transport Ridge.
Several of the features on this map were known by more than one name. Supply Hill is labelled FSD. Detail Hill is DIS. Transport Ridge is labelled GPT.
The attack on Jail Hill was to be carried out by the 1st Battalion Queen’s Royal Regiment. They belonged to 33 Brigade of 7 Indian Division, which had come under command of Major General Grover. The brigade had been air-lifted from the Arakan & had only just arrived at Kohima, exhausted & stricken with malaria. 33 Brigade’s other battalions were 4/15 Punjab & 4/1 King George V’s Own Gurkha Rifles. The 4/1 Gurkhas were required to clear the remainder of Transport Ridge to allow the Queens to assault Jail Hill.
Before the Gurkas could attack Transport Ridge, their path had to be cleared by 1/1 Punjab on Congress Hill. 1/1 Punjab was part of 161 Brigade, which had denied Kohima to the Japanese back in April & was now also under Grover’s command. The other battalions in 161 Brigade were 4/7 Rajputs & 4 Royal West Kents. The West Kents were now protecting lines of communication after their brief recuperation after the siege was lifted. The 4/7 Rajputs were sent to Garrison Hill, to reinforce 1 Royal Welch Fusiliers & 2 Durham Light Infantry. The Durhams had lost 175 men & 11 out of 15 officers, including their commander. A staff officer visiting Garrison Hill found it “indescribably beastly”, but the troops seemed cheerful, though “badly in need of a wash”. (11)
Grave of Private W. Blackmore, 1909-1944, 2 DLI. Rest in Peace
A small group of Durhams & Royal Welch were still clinging to some ground on Supply Hill that they had seized on May 4. Exhausted & severely depleted, they were evacuated by road under cover of tanks & a smoke screen. When the withdrawal was complete, Major Ezra Rhodes of 149 Royal Tank Regiment was ordered to attempt to drive his Grant north along Kohima Ridge from Supply Hill to Garrison Hill. As he attempted to follow a narrow track around the east side of Kuki Piquet, the tank ran out out of room & slithered down the hillside until stopped by a tree. The immobilised Grant was at the mercy of the Japanese, so the crew bailed out & sprinted up the road, zig-zagging to avoid rifle & machine-gun fire. They all managed to escape & eighty years later, the crashed tank can still be found where it came to rest in 1944.
May 5. Make it all right
Grave of Private A. G. W. Pitt, 1920-1944, 2 Battalion Dorsetshire Regiment. Rest in Peace.
The British 2nd Division, commanded by Major General Grover, was part of 33 Corps. The Corps Commander in Chief, Lieutenant General Montagu Stopford, met Grover on May 5 & pressed him for more progress. The meeting was at Zubza & coincided with an air raid by four Zeros. Harry Swinson of 7th Worcesters watched them attack & escape unscathed:
“… flying low & swept down the valley through the flak that was already filling the sky, to strafe Div HQ & the forward gun positions. A quick wheel before Kohima Ridge & they came roaring down on us, their cannons blazing. The flak by this time was thicker than ever, but the Zeros seemed equipped with immortality. Ten seconds & they were on us, so low that I felt I could reach up & pluck them out of the sky.” (3)
On Kohima Ridge, an isolated group of Durhams & Royal Welch Fusiliers remained on Supply Hill after the previous day’s attacks. They were delighted when tanks of 149 Regiment, Royal Armoured Corps, trundled up the road below them. These were lead by a Light Minesweeper Tank, but this hit a mine, which blew its track. Nevertheless, the following tanks reached Supply Hill, where they engaged with Japanese bunkers & succeeded in killing their occupants. Bypassing Kuki Piquet under cover of a smoke screen, some Royal Welch Fusiliers from Garrison Hill were able to reinforce the men on Supply Hill. Light tanks later delivered stores to them & three tanks stayed to support them overnight. At one point the tanks were threatened by six Japanese carrying mines, but these exploded under British fire.
Grave of Fusilier G. Davies, 1915-1944, 1st Battalion Royal Welch Fusiliers. Rest in Peace.
In the early hours of May 5, the Cameron Highlanders in Naga village were attacked in strength, following a preliminary mortar barrage. After confused melees, they eventually fell back to the adjacent area held by the Lancashire Fusiliers. This withdrawal was covered by mortar fire from the Lancs & machine-gun fire from a platoon of the Manchesters.
The position of 5 Brigade in Naga village was strengthened by arrival of the Worcesters, with engineer & medical support, who built bunkers that could withstand a bombardment. Brigadier Victor Hawkins circulated a Special Order of the Day, to emphasize the importance of defending a hillock they had named West Knoll:
“On no account will anyone retire if they get overrun by the Japanese. If Japanese infiltrate into the positions, they will be dealt with by bayonet at the first opportunity. West Knoll must be held at all costs.” (11)
Grave of Private R. A. Jones, 1921-1944, 2 Battalion Royal Norfolk Regiment. Rest in Peace.
On Transport Ridge, the Norfolks sat miserably in foxholes full of muddy water. Lieutenant Colonel Scott toured the positions to provide encouragement. Sergeant Bert Fritt felt a grim determination, that he thought was shared by those around him:
“I think they all had the same feeling that I had, which was that come what may we were going to annihilate the Japanese”. (11)
The Norfolk’s location was very exposed to fire from mortars & snipers. Corporal ‘Dolly’ Payne was one of many victims:
“I heard a shot. Dolly had poked his head up & a sniper had shot him. The bullet entered the right hand side of his forehead so that the front had gone & his brain was visible. We got to him, put him down in the bottom of his trench & covered him with a monsoon cape. He said ‘You might as well fill the bloody hole up’.” (11)
By the time Payne was removed on a stretcher “He was moaning & whimpering like a child.” (11)
Higher up the slope, in the jungle overlooking Transport Ridge, the Royal Scots extracted retribution by ‘bagging’ many Japanese. The Adjutant Captain F. C. Currie:
“For the first day or two, we were continually sniped & harried. But gradually we got the better of them. First we blitzed the area between ourselves & the Norfolks & joined up the two Battalion boxes. Then we started counter-sniping, at which we had considerable success. RSM Brunton was particularly keen & efficient. He discovered a Japanese water point & sat over it. His bag was a welcome addition to the daily total. We also laid some very successful ambushes around our position. I remember that we counted 31 Japanese bodies.”
Perhaps the biggest challenge for 4 Brigade was the ‘Norfolk Bunker’ complex that straddled & dominated a track down from Transport Ridge to the main road to Imphal. Not only did it block progress along the Ridge, resupply & evacuation of the wounded, it also had Jail Hill & Detail Hill in its field of fire, undermining attempts to liberate these important hills from the Japanese. An assualt on Norfolk Bunker was planned for dawn next morning, so Captain Jack Randle led a patrol to identify the best point to attack. Later, Randle sat calmly with other officers in a trench full of water, planning the assault & musing about his wife Mavis & son, born after his departure. When he left, Randle’s last words were
“If I do not come back, make it all right with Mavis & the kid, will you?”
Junior officers of the Royal Norfolks. Captain Jack Randle is third from the left. On his right is Signals Officer Lieutenant Sam Horner. Second from the right is Captain John Howard, 4 Brigade Intelligence Officer.
May 4. Right-ho boys, let’s go!
Two weeks had passed since the Siege of Kohima was lifted & the gallant garrison replaced by fresh troops of 2 Division. The British had suffered heavy losses during that time, but had made little progress in evicting the Japanese. The Battle of Imphal was raging eighty miles south & the supplies flown there were insufficient to maintain Allied 4 Corps. Unless the road from Dimapur could be opened soon, 4 Corps would need to start flying men out to reduce demand on food & ammunition. This would inevitably weaken the chances of holding Imphal. So Major General Grover was under intense pressure to open the road. He hoped that this would swiftly follow the concerted attacks he had prepared for May 4th.
Attacks launched on 4 May by the three brigades of 2 Division. 4 Brigade (green) attacked Transport (GPT) Ridge. 5 Brigade (red) attacked Naga Village. 6 Brigade (yellow) attacked Kuki Piquet & Supply (FSD) Hill.
On Kohima Ridge, the Royal Welch Fusiliers of 6 Brigade would attack from Garrison Hill to seize the adjacent hills of Kuki Piquet & Supply Hill. They would be supported by the Durham Light Infantry (DLI), attacking from the road, assisted by tanks. Simultaneously, the Cameron Highlanders & Worcesters (5 Brigade), with 1/8 Lancashire Fusiliers, would deliver the left hook against Naga Village, where the HQ of Japanese 31 Division was located on a hill. Meanwhile, the Royal Norfolks & Royal Scots (4 Brigade) would attack Transport Ridge in a right hook. These three simultaneous attacks should limit Japanese ability to reinforce threatened positions.
B & C Companies of the DLI had returned to Garrison Hill after a few days of recuperation. From 07.45, 2 Division artillery pounded Kuki Piquet & Supply Hill, the hills south of Garrison Hill on Kohima Ridge. The Royal Welch Fusiliers & the DLI then attacked, but were strongly resisted. Private Peter Wilson:
“We started our attack but were soon under fire from heavy machine-guns & mortars from Japanese secure in bunkers. Stretcher bearers were called constantly, but there was nowhere safe to take the wounded. During our attack we came upon a gully where the Japanese had piled hundreds of their dead from their recent attacks.” (11)
A & D Companies of the DLI were to be brought to Detail Hill by road in Bren Carriers, but these came under heavy fire as soon as they passed the junction. The troops jumped out of the carriers & took cover near the DC bungalow, before withdrawing to Garrison Hill. Their Commanding Officer, Lieutenant Colonel John Brown, was killed by artillery fire. Only a small group of DLI & Royal Welch got as far as Supply Hill, where they dug in, surrounded by Japanese.
Grave of Lieutenant Colonel John Brown, 1904-1944, Commanding Officer 2 Battalion Durham Light Infantry. Rest in Peace.
The left hook attack began early on May 4th, with the Queen’s Own Cameron Highlanders & Lancashire Fusiliers advancing as quietly as possible in gym shoes. Their stealthy approach was successful & they reached Naga Village undetected. It was situated on high ground overlooking Kohima Ridge. The village had many buildings, but was “smashed up” & squalid, with flies everywhere.
The British dug themselves in & soon came under fire from artillery on Firs Hill, which had been bypassed after the Lancs’ costly attack on April 28. The British occupied much of Naga Village initially, but were forced back by heavy fighting to a box they established on a hillock dubbed West Knoll, which they circled with barbed wire.
Grave of Fusilier H. F. Birchall, 1919-1925, 1/8 Lancashire Fusiliers. Rest in Peace.
The arduous right hook manoeuvre had brought the Norfolks & Royal Scots into jungle above Transport Ridge, ready to launch their attack. Setting off at 04.15, the Norfolks soon ran into the bunkers discovered by their patrols on the previous evening. As planned, they bypassed these & continued, leaving two platoons to contain the bunkers’ occupants. They scrambled on down a steep slope through thorny undergrowth. Encountering another Japanese defensive position, which could not be outflanked, they rushed & cleared it. As he was about to continue, Captain Fulton turned to Sam Horner & said
A few seconds later he was shot by a sniper. Sergeant Albert ‘Winkie’ Fritt passed him lying there:
“I remember seeing some wounded, including poor old Captain Fulton. He had been hit through the top of the head & his scalp was laid open. You could see his brain actually moving & he had a pleading look in his eye as if asking for a bullet to finish him off. Well you couldn’t do that, but it was obvious that he hadn’t long to go.” (2)
Captain C.E.M.C. Fulton, 2 Battalion Royal Norfolk Regiment. Rest in Peace.
As the Norfolks proceeded in single file, they came under fire from a series of bunkers higher up the slope, but they carried on. Stretcher bearers patched up the wounded & then left them for the following troops to pick up. Captain John Mather, Medical Officer:
“I kept up with the troops, I was running part of the way & so were my chaps. We dealt with anyone who was injured, gave them treatment & left them behind for other people to take back.” (11)
Grave of Private W. H. Leggett, 1926-1944, 2 Battalion Royal Norfolk Regiment. Rest in Peace.
To conserve ammunition, the Norfolks maintained fire discipline & only returned fire when they could see a target. But their commander, Lieutenant-Colonel Robert Scott, ordered
“Start blasting them & advance. Shoot up in the trees, get shooting.” (11)
Spraying the jungle around them felt better & kept Japanese heads down. When they reached the start line, the leading Norfolks waited for the rest to catch up. Sergeant Fritt:
“We should have had artillery support. That was all laid on to blast GPT Ridge before we attacked it. But things got rather desperate as we lay on the start line. We were getting shot up & hadn’t a chance.” (2)
Lieutenant Sam Horner, Signals Officer:
“Robert Scott decided, absolutely rightly, that the momentum was being lost & he kept it going. The battery commander said ‘What about the guns?’ ‘No, no. Forget it, we’ll just get straight on through.’ He ran off with A Company, who were then spearhead, & practically led the assault.” (2)
Sergeant William Robinson of A Company:
“Bob Scott lined us up with Bren-guns, a sling over our shoulders taking the weight & a man behind us with extra ammunition. All he had was a pistol & his khud stick. His famous words were ‘Right-ho boys, let’s go!’ That was it. The instructions were to fire at everything, spraying some down, some up & forward because there was a bunker there. Up to that time I hadn’t seen any Japanese at all. But in this semi-clearing several got up & started running away. They didn’t get far because the fire power was terrific, about twelve Bren guns. The bunker was taken.” (2)
British soldier armed with a Bren light machine-gun.
Captain John Howard, 4 Brigade Intelligence Officer, described Scott’s appearance that day
“He was about six foot two & very big. His huge boots covered in mud. His trousers were covered in dried blood. He had grenades, a pistol & his dagger hanging round his huge waistline. He’d acquired a silk Japanese flag which he was using as a scarf. Like the rest of us, he had four or five days of beard & a bandaged head & his tin hat had a ragged bullet hole in it. His bravery was magnificent.” (11)
Lieutenant Colonel Robert Scott, Commanding Officer, 2 Battalion Royal Norfolk Regiment
Despite this success, the Royal Scots were not sent forward to make the planned ‘follow through’ assault on Pimple, which may have been a missed opportunity. Instead, they formed a defensive box for 4 Brigade Tactical Headquarters about 200 metres above & behind the Norfolks, who dug in to defend the ground they had taken. Captain Jack Randle distinguished himself by helping bring the wounded into the Norfolk’s perimeter, although his knee had been injured by grenade splinters.
A complex of bunkers on the forward slope of Transport Ridge dominated the road to Imphal. This became known as the Norfolk Bunker. Captain David Glasse was ordered to storm it after dark, without artillery support. Sam Horner:
“David gave me his watch & said ‘Take that & write to Louise, won’t you, & see that she gets this.’ I said ‘We’re going to see you again shortly David!’ He said ‘I doubt it! I doubt it!’ He just knew he was going to get killed.” (11)
Although his platoon rushed & captured the bunker, they then came under machine-gun fire, which killed Glasse. They were ordered to withdraw, in case of a counter-attack.
Grave of Captain David Glasse, 1918-1944, 2 Battalion Royal Norfolk Regiment. Rest in Peace.
An excellent webinar by Steve Snelling about Robert Scott & the Royal Norfolks at Kohima can be watched on the website of Kohima Educational Trust.
May 3. Lump in my throat
Protected by a smoke screen, B Company of the Dorsets reached the isolated positions held by A Company beside the ruined DC Bungalow at the northern tip of Kohima Ridge. Captain John Bowles then led the remnants of A Company back to Garrison Hill. Major Geoffrey White was moved by the spectacle:
“I confess to feeling a large lump in my throat as I watched the 28 survivors of the hundred-odd of my old ‘A’ Company clamber up the hillside into Battalion Headquarters. Blackened & red-eyed, John Bowles’s men had for five & a half days hung on by the skin of their teeth against almost overwhelming opposition in the most exposed position. They had fulfilled their task & had not only gained a lodgement on their objective, but had kept the road open & had killed a large number of Japanese. Under constant fire by day & continual ‘jittering’ by night, they had fought on with rapidly diminishing numbers.” (11)
A platoon of B Company charged from their new trenches to the bungalow, which they set alight. They killed five Japanese but lost six killed & 4 wounded to fire coming from bunkers in a bank below the tennis court. That night, B Company lost a further seven killed & eight wounded.
Grave of Serjeant R. Clarkson, 1922-1944, Dorsetshire Regiment. Rest in Peace.
To help the left hook attack achieve surprise, 1st Cameron Highlanders, 7th Worcesters & 1/8th Lancashire Fusiliers replaced their hob-nailed army boots with gym shoes. To this end, 3,000 pairs of gym shoes were sent from Dimapur by lorry as far as Zubza & then carried to the troops by mules. The availability of so many gym shoes in provides demonstrates the extraordinary capacity of the supply depot at Dimapur.
The right hook was much less well prepared for its attack. Indeed, the terrain was so challenging that Brigadier Goschen, Commander of 4 Brigade, remained uncertain of their precise location. The jungle restricted visibility to five yards & they could not find landmarks to identify their position with any confidence. Lieutenant Sam Horner, Signals Officer with the Royal Norfolks, described another of the problems:
“There was a map showing where we were going. It was absolutely white because it had never been surveyed, nobody had ever been there, the Nagas said they didn’t go there, because there was a lot of superstition about it – witches & that sort of thing. All there was, drawn from aeroplanes, was a few little nalas, watercourses, & the rest of it was white – so it was a fat lot of use having a map.” (2)
In fact, they were higher up than they realised. With their attack planned for next day, Brigadier Goschen briefed his staff. Captain John Howard, 4 Brigade Intelligence Officer:
“That evening we sat in silence under the trees while Brigadier Goschen gave his orders. The Norfolks were to launch the attack with the object of securing the highest point of GPT [Transport] Ridge below the trees. Information was scanty. No one had seen the ground … but we believed that we were about 500 yards from the edge of the trees & that beyond lay the barren north-east end of GPT Ridge.
A plan based on such scanty information had to be fluid. Two platoons of the SS Company were … to patrol ahead of the Norfolks while they approached their start line which was to be 100 yds above the edge of the trees.
During this approach, [2 Division artillery] were to register on the barren portion of GPT & fire diversionary concentrations onto Jail Hill & the hillock [known as Pimple] at the end of GPT on the opposite side of the road to Jail Hill. When the Norfolks were ready to leave the start line they were to call for a concentration of all guns on to their objective. They were to leave the present concentration area at 07.00 hours the next day, the 4th May. The Royal Scots & the other two SS Company platoons were to be in the Brigade Reserve.” (11)
5.5 inch British artillery
SS here stands for Special Service. The SS Company drew men from every regiment in 2 Division & was intended as a task force that might be used for quick reaction to urgent situations. However, they had been assigned to strengthen the right hook & had been in the vanguard of its gruelling advance, often responsible for hacking through jungle to allow progress by the long column behind them.
The plan for May 4th was for the Norfolks to form up at the jungle edge & advance behind a succession of barrages from 2 Division artillery. An initial 45 minute barrage would use two 5.5 inch guns that had been discovered in a railway siding at Dimapur to provide shell holes where the Norfolks could shelter after storming Transport/GPT Ridge. The Royal Scots would then pass through the Norfolks & attack the Pimple hillock at the north-east end of the ridge.
Royal Scots resting. The central figure is Major Howard, 2iC of 1st Battalion
An immediate challenge arose when an enemy position was discovered between the brigade & its intended start line for the attack. Brigadier Goschen decided that the position would be contained & by-passed, to avoid delaying the assault. As part of the Norfolk’s vanguard, Sergeant Ben Macrae led a night patrol to familiarise himself with the route:
“I went down the hill. I think there’d been a skirmish the night before, because I discovered the body of one of the SS chaps. Someone had taken his boots. There were Japanese positions. I got right up close & could hear voices & movement. We got back & reported.”
May 2. Military Medals
On Kohima Ridge, the Dorsets were loosing a lot of men to sniper fire, especially when men tried to recover supplies dropped by parachute. Private Tom Cattle described an example:
“Our trenches were about 20 feet apart. We had ropes passing between the trenches to enable supplies to be pulled along between us. We were short of water & rationed to a pint each day, if we were lucky, as our supplies were dropped to us by air.
On one occasion a 2-gallon can of water was passing from the trench on our left towards us, the rope being pulled by Corporal Woolford in our trench. Suddenly he stopped pulling, cursed & said ‘It’s caught on a tree stump’. He got up out of the trench to see if he could free it, there was a single shot & he fell back into our trench. He was dead before he fell onto us, shot straight through the head. We were stunned & shocked, we couldn’t believe it. His body had to stay in the trench until dark.” (11)
Shortly before nightfall, the Japanese brought a 75 mm gun along the road to fire at close range, about 300 yards, on A Company of the Dorsets in their isolated positions at the tip of the ridge near the bungalow. Despite counter-fire from British artillery at Jotsoma, the Japanese gun inflicted heavy casualties on A Company & damaged their radio. At 23.00 hours, Corporal Mansfield carried the broken radio through the Japanese lines to Battalion HQ on Garrison Hill, with a request for A Company to withdraw due to their losses. This was transmitted to Major General Grover, who insisted that the important position be held. Mansfield was given some rum & sent back with this message & an undertaking to relieve A Company in the morning. Such conduct later earned Corporal Mansfield the Military Medal, which is awarded ‘For Bravery in the Field’.
Grave of Private L. P. Andrews, 1912-1944, 2nd Battalion Dorsetshire Regiment. Rest in Peace.
The British 4 Brigade continued to make slow progress through dense jungle, in a right hook movement to get behind Transport (GPT) Ridge. The Japanese had discovered this manouevre & attacked the Royal Scots on a feature named Pavilion Hill, where they were supported by two Machine Gun Platoons of the Manchesters. Major Menzies of the Royal Scots described how they fought off the attack:
“We’d had no time even to dig in that night before the Japanese were on us. Often the Japanese were so close we had to hold on to our grenades for some seconds after the pins were out to make sure they would do their work. The Japanese tried to post a machine-gun on a height that overlooked our whole position … but Lance-Corporal McKay picked off one crew after another with his Sten-gun.” (11)
McKay was the Manchesters’ section commander, who remained in action despite being wounded. He received a Military Medal, for which the citation stated:
“He showed great tactical ability & combined it with fearlessness & contempt for danger which had a marked effect on the fighting quality of his command.” (11)
Military Medal
After grappling hand-to-hand, the Japanese were driven off. Major Menzies concluded:
“The extraordinary thing was that we lost so few men, only about half a dozen all told. When daylight came, we found that we had killed a tremendous number of Japanese. They had rolled down that hillside until stopped by trees & bushes, or lay dead on narrow ledges.” (11)
The Manchester’s Platoon Commander, Lieutenant King, was also awarded a Military Medal for his part in this incident, bringing an impressive tally of three for 2nd Division on May 2nd 1944.
May 1. The Mound
On May 1st, a Stuart light tank succeded in reaching the terrace above the tennis court. This inevitably drew fire from Japanese artillery & the tank was quickly knocked out by a 3.7-inch anti-tank gun. The crew were lucky to survive.
Sketch of the bungalow sector as it was before the battle. The Mound (top left) overlooks the tennis court
Pre-war landscaping had left a large pile of soil that overlooked the tennis court & was known as the Mound. This feature was exploited to try to dominate the no-man’s land below. Private Tom Cattle was not keen:
“It was a ‘hill’ which had been dug out & was a series of tunnels. From it, we were able to look down onto the Japanese. Due to its exposed position, it could only serve as an observation post as it was continually being fired on by the Japanese & any movement seen by them brought down a concentration of shell & machine-gun fire. I hated this position, as there was only one tunnel entrance & exit.” (11)
However, Major Geoffrey White was more positive about it:
“Gradually, by constant observation, we pieced together some idea of the lie of the land & the habits of the Japanese. It was not too comfortable an observation post, as the Japanese was apt to throw quite a lot of stuff at it & it was constantly being sniped. However, we found that it was a grand place from which to throw things back & undertake our own sniping. The Mound observation post became the rendezvous of anyone who felt that he could shoot at all & I well remember how one evening when I went down to visit & bagged my first Japanese.” (11)
Grave of Private A. C. Bottomley, DLI. Rest in Peace.
When the Japanese of 31st Division had set off for Kohima on March 15th, they had carried with them only enough food to last twenty days. This reflected their aim to travel fast across very difficult, mountainous terrain. Their commander, Lieutenant-General Kotoku Sato, had understood that 31 Division was to be resupplied from bases in Burma, with 250 tons of food & ammunition delivered each day. By the end of April, they had received almost nothing. With his men starving & low on ammunition, Sato signalled Lieutenant General Mutaguchi, Commander of 15th Army & the invasion of India:
“31st Division at the limit of its endurance”. (3)
He waited angrily for a reply, but none was forthcoming.
April 30. A great show
Two fresh companies (B & D) of the 2nd Battalion Dorsetshires were sent onto Kohima Ridge to reinforce A & C Companies, that had already been in heavy fighting in the bungalow sector.
Grave of Private C. S. Upson, 1913-1944, 2nd Battalion Dorsetshire Regiment. Rest in Peace.
Private Tom Cattle of D Company recorded his first impressions:
“The trees were shattered & parachutes shrouded the broken trunks which stood stark & stripped against the sky. The earth was churned & uneven where a continuous barrage of shells forever threw up the soil leaving huge shell holes. The ground was strewn with dead bodies, some Japanese, some British & some Indian. They lay where they had fallen, covered by flies & maggots. It was not possible to move them, as our positions were in view of the Japanese on the ridges to our right & the high ground around Kohima village. The air was foul & putrid.” (11)
Undeterred by the failed attempt to winch a Grant tank up to the bungalow sector at the north end of the ridge, an attempt was made with a Stuart light tank. This ended in farce, when the Stuart was found to have run out of petrol.
As 5 Brigade continued its left hook movement to bypass Kohima Ridge, two Lance Sergeants & a Lance Corporal of the Camerons were killed when fire from British artillery fell short of its intended target. They are buried on Kohima Ridge, with touching epitaphs (12):
Lance Corporal Robert Moore-Hemsley. In the garden of remembrance we meet every day. Loving wife & son Philip.
Gravestone of Lance Corporal Robert S. P. Moore-Hemsley, 1918-1944, Queen’s Own Cameron Highlanders. Rest in Peace.
Lance Sergeant William Cavanagh. A smiling face, a heart of gold, memories of him will never grow old.
Gravestone of Lance Serjeant William H. Cavanagh, 1918-1944, Queen’s Own Cameron Highlanders. Rest in Peace.
Lance Sergeant Arthur Woodall. Still loved & missed. He is ever dear. Though absent he is ever near. Phyllis.
Gravestone of Lance Serjeant J. Arthur Woodall, 1917-1944, Queen’s Own Cameron Highlanders. Rest in Peace.
At Zubza, on the road from Dimapur to Kohima, Harry Swinson of the 7th Battalion Worcestershire Regiment watched the arrival of a column of wounded from 5 Brigade’s left hook:
“It was a precarious journey as a heavy shower of rain had rendered the precipitous tracks unnegotiable. Saw the slow, winding column come up the road, the casualties lying quite still, obviously exhausted. Here they were transferred to ambulance cars, each car moving off as it received its four stretchers. The doctors were full of praise for the conduct of the Nagas. When the odd mortar bomb came over, they had put the stretchers down under cover & fanned the wounded men with branches till they could move on again. A great show this. I could see the [Medical Officer] was pleased. Had the Nagas shown they couldn’t take it, a most difficult situation would have arisen; there aren’t enough troops to do the job.” (3)
Grave of Fusilier S. Wright, 1916-1944, 1/8 Lancashire Fusiliers. Rest in Peace.
April 29. I couldn’t care less
The Berkshires & Durhams on Garrison Hill were exhausted. Private William Cornell wrote
“I couldn’t imagine that I would ever see England again, or even get out of this battle. A feeling that set in with me was I couldn’t care less if I get killed. I accepted it. It wasn’t fear. The only thought was ‘will I get wounded or will I get killed’. Right round me it was chaos, shouting & screaming; stretcher-bearers running about.” (2)
They needed to be relieved & a decision was taken to replace them with the 1st Battalion Royal Welch Fusiliers, who had been stationed at Jotsoma, and a platoon of the 2nd Manchesters, with two Vickers machine-guns.
Cap badge of the Royal Welch Fusiliers
They were transported up the road in personnel carriers, before making the treacherous climb onto Garrison Hill. Like previous new arrivals, they were revolted by the smell:
“The most lasting impression of all was caused by the stench of decaying bodies, half buried or lying in the open between the lines. In some of the slit trenches, rotting bodies of Japanese were used to form a protective parapet. Space was so limited that dug-outs, latrines, cook-houses & graves were all close together. It was almost impossible to dig anywhere without uncovering either a grave or a latrine.” (11)
Grave of Private H. Carvell, 1919-1944, 2nd Battalion Dorsetshire Regiment. Rest in Peace.
The 1/8 Lancashire Fusiliers were reorganising after the previous day’s reverse on Firs Hill. About one hundred of them were dead, wounded or missing. A column of the wounded was escorted away, with Nagas carrying on stretchers those incapable of walking. Twenty fusiliers returned to Firs Hill to identify & bury the British dead. No Japanese were encountered, live or dead.
The right hook of 4 Brigade had been fighting its way through the jungle for three days, but had only traveled about four miles. Brigadier Goschen ordered the column to rest in a valley below Mount Pulabadze. The location turned out to be a dark, dank quagmire, filled with huge trees covered in dripping moss. Bugler Bert May of the Royal Norfolks considered it
“… a stinking hell hole. All the vegetation on the ground was dead & it stank to high heaven. Leeches got through onto any part of your body that was open. We tried to keep the bottoms of trousers, ends of sleeves & everything else as closed as possible. If we got leeches on us, we never pulled them off, because the head stayed in the flesh & that made a nasty ulcer. So we got a lighted cigarette, stuck it on its tail & it would pop off. Blood would keep on coming out.” (11)
A leech sucking blood from somebody’s leg
April 28. I never saw him again
The early hours of April 28 saw an attack on Garrison Hill, which was described by Lieutenant Norman Havers of the Dorsets:
“To cover themselves in what was then bright moonlight, the Japanese had laid down a heavy smoke screen & visibility was soon only a few feet. Bombs, explosives & smoke were bursting around us. The smoke became so thick in our trench that we started coughing & I wondered if gas was being used. As some protection, we tied damp handerkerchiefs over our faces.” (14)
The attack overran the Berkshires’ cook house & came “within an ace” of getting into their Regimental Aid Post. At first light, a barrage was delivered by 25 pdr guns at Jotsoma. A smoke screen provided cover against fire from Kuki Piquet & the Durhams launched a counter-attack, signalled by a hunting horn, which reclaimed the positions on Garrison Hill that had been captured during the night. Of the 136 members of the Durham’s A Company that had arrived on Kohima Ridge on April 20, only 60 remained alive & unwounded by April 28.
Graves of the Durham Light Infantry on Garrison Hill
An armoured car was used to deliver food & ammunition to the Dorset’s A Company, isolated at the tip of Kohima ridge, & it also evacuated their wounded. It was unscathed by grenades that the Japanese rolled onto the road.
The drive up to the DC’s bungalow was widened by a bulldozer to allow a tank to ascend, attached to a hawser, but it crashed back down & ended in a state that was no longer servicable.
To progress the left hook’s approach towards Kohima Naga Village, 1/8 Lancashire Fusiliers were ordered to take a feature named Firs Hill. They suffered casualties from artillery & machine-guns as they approached, but climbed the hill through thick undergrowth, bamboo & trees that restricted visibility. On reaching the top, the leading troops were wounded or killed by heavy fire from bunkers.
Grave of Bill Abbott, 1920-1944, 1/8 Lancashire Fusiliers. Rest in Peace.
Corporal John McCann was part of C Company, which was sent to provide support:
“We all got to our feet & advanced, the front troops crashing through the scrub on their way to the top of the hill. I passed the obviously dead bodies of Fusiliers Alex Petrie & Bill Abbot, who had been struck down in earlier fighting. At the crest of the hill, men before me began to crumble & stagger. Casualties were so heavy that Major Pearse ordered us to take cover & we went to ground.” (13)
Grave of Alex Petrie, 1921-1944, 1/8 Lancashire Fusiliers. Rest in Peace.
“As I hugged the earth, a cloud of white smoke came running towards me making human noises. There was a Fusilier at its centre & as he came nearer smoke grenades in his ammunition pouch continued to ignite each other. As each one exploded, the density of the cloud increased & sparks of phosphorous flew from him. As the cloud passed me, I saw, in the heart of the billowing smoke, the shape of a soldier on fire. It would be easy to say he didn’t suffer long, but the truth is he had to wait until next day before dying.” (13)
Mitsubishi Ki-51 dive-bomber, known to the Allies as a ‘Sonia’
This attack on Firs Hill might have been less costly if it had been preceded by a preparatory barrage. This had been prevented by an attack on the British artillery by Japanese dive-bombers, which had inflicted damage & casualties. However, the artillery was back in action by 14.10 & able to “plaster” the top of Firs Hill. It then laid down a smoke-screen & Major Pearse led the fusiliers forward again. Corporal McCann described what happened next:
“Machine-guns from unseen close positions fired across us from both flanks & cut down a lot of our men. I emptied my magazine & threw myself to the ground. I caught a glimpse of Major Pearse still on his feet, body vibrating as he fired from the hip & surging forward. I never saw him again.” (13)
Grave & photograph of Major Frederick Pearse, 1/8 Lancashire Fusiliers. Rest in Peace.
Corporal MacCann & the surviving fusiliers helped the wounded down the hill, pursued by Japanese. Their retreat was covered by machine-guns of the 2nd Manchesters & by a tank that had joined the left hook column on the previous day.
Grave of Gunner M.C. Payne, 1912-1944, 100th Gordon Highlanders L.A.A./A.TK Regiment Royal Artillery. Rest in Peace.
April 27. The day had not been an easy one
The Japanese were becoming more defensive & had not attacked Garrison Hill since April 23, but in the last four days the Durham Light Infantry had still lost 15 men to shells, mortars & snipers.
Sergeant H. E. Woodcock, 1914-1944, DLI, Rest in Peace
The British were keen to capture the northern tip of Kohima Ridge, where the Deputy Commisioner’s bungalow was situated, now in a ruined condition. This would make the Imphal Road less dangerous to use as far as the junction. Motor vehicles could then take the road that leads north from the junction to meet the left hook of 5 Brigade as it approached the Naga Village.
Arial photograph taken in May 1944 of the northern part of Kohima Ridge. Garrison Hill occupies the bottom right quadrant & many parachutes from air drops can be seen as white spots. The road from Dimapur comes from the bottom left & follows the western edge of the ridge to the junction, top centre, before turning sharply for Imphal & following the east side of the ridge down to the lower right. The road north from the junction leads to Naga Village & then west to the village of Merema. The Deputy Commissioner’s bungalow was just south of the road junction.
The Dorsets began the attack at 02.54 & soon encountered fire from several machine-gun positions, requiring them to proceed in short dashes between any available cover. C Company stalled after its commander & two platoon commanders were killed, but A Company reached the road junction & were dug in there by dawn. The leading sections crawled up to the bungalow & exploded pole charges inside it, allowing it to be assaulted unopposed. Pole charges were grenades or other forms of explosive attached to the end of a pole.
Detail of a painting at the Kohima Museum, showing a soldier with a pole charge, which he intends to push through the firing slit of a bunker
Although many Japanese bunkers were still occupied on the terraces above the bungalow, the Dorsets had managed to outflank them by following the western edge of the ridge & had dug in above the road junction. They were very isolated, but allied artillery at Jotsoma provided them with crucial support. Major Geoffrey White, second-in-command of the Dorsets, reported with cool understatement that
Sergeant G. A. Adams, 1912-1944, Dorsetshire Regiment, Rest in Peace
With the Dorsets controlling the road junction, a troop of Grant tanks of 149 Regiment was able to turn up a track to meet the approaching left hook column of 5 Brigade. They were accompanied by some engineers in armoured cars & a troop of light tanks from 45 Cavalry. 5 Brigade was further cheered by a successful air drop to deliver water, food & ammunition.
Jungle-covered ridges & ravines around Kohima
The going was much tougher for the right hook column, as it dragged itself in single file up ridges & down ravines, the sodden ground slippery under foot. For much of the way, the dense jungle had to be cut away with machetes. Ropes were put down for the men to pull themselves up the steepest slopes. Captain Currie of the Royal Scots remembered it as
“… simply a matter of climbing to the top of a ridge & slithering down the other side on one’s haunches. The ridges varied in height from hundreds to thousands of feet & the temperature in the valleys & on the tops varied accordingly. It was not even a march in the accepted sense of the word. It was a climb, pure & simple.” (11)
To Lieutenant Sammy Hornor of the Norfolks
“It was slow, exhausting & very difficult, but with Naga help we made it.”
April 26. Only to end in a dream
The 1/8 Lancashire Fusiliers had spent the night in thunder, lightning & heavy rain on top of the hill that they took the previous day. They were also shelled & expected an attack to follow, but none came.
Fusilier Howard Henthorn, 1917-1944, 1/8 Lancashire Fusiliers, Rest in Peace
The next hill was occupied by the 7th Worcesters & the Lancashires watched the 1st Queen’s Own Cameron Highlanders capture another hill further on. This constituted steady progress of the left hook column towards its goal, Kohima Naga Village, which was occupied by Japanese.
Cap badge of the Dorsetshire Regiment
To try to break the stalemate on Kohima Ridge, two companies of the 2nd Dorset Regiment were sent to reinforce the 1st Berkshires & the 2nd Durham Light Infantry on Garrison Hill. As they moved up the road, the Dorsets came under fire from Japanese mortars & a machine-gun. Lieutenant Norman Havers described their approach:
“Suddenly, those in front picked themselves up & we followed, doubling up that last stretch where vehicles littered the road, blown up & burnt out in earlier fighting. The bodies of a Japanese & an Indian were at the side of the road, swollen to many times their normal size & quite black. Such bodies & thgeir associated stench were to become an all too familiar & nauseous background to our lives.
We left the road to start up the steep & open hillside [to Garrison Hill] & then waited alongside the shattered & burnt-out remains of the Indian General Hospital. I finished the climb partly by crawling & partly by short rushes from cover to cover. I remember clearly the alarming swoosh of our artillery covering fire, apparently passing within a few feet of my head.
Lieutenant Jimmy Hodder & I agreed to share a slit trench & were allocated a hole in the ground some seven feet long by three wide & just over five feet high to the underside of a timber & earth roof. It was to be my home until 15th May. At night rats would scamper around & to my fury scatter grit onto my face while I lay on the floor trying to sleep.” (14)
A bunker on Kohima Ridge with a timber roof covered in earth
When Major Geoffrey White of the Dorsets first arrived on Garrison Hill, he was aghast to see that
“… in some places where the Jap had put in a ‘Banzai’ attack, his dead lay piled deep where they had fallen in their assault on our positions. In a steep gully, at the top of which lay one of our posts, were piled high the bodies of about 150 of the enemy, who had perished as they made one of their suicidal attacks against the Royal Berks.” (3)
Grave of an unidentified soldier. Rest in Peace
To get behind the Japanese positions on Transport Ridge, the right hook flanking manouevre needed to penetrate terrain that the British troops found extremely challenging. The effort of the march was described graphically by Lieutenant Sam Hornor of the 2nd Battalion of The Royal Norfolk Regiment:
“The physical hammering one takes is difficult to understand. The heat, the humidity, the altitude & the slope of almost every foot of ground, combine to knock hell out of the stoutest constitution. You gasp for air which doesn’t seem to come, you drag your legs upwards till they seem reduced to the strength of matchsticks, & you wipe the salt sweat out of your eyes. Then you feel your heart pounding so violently you think it must burst its cage; it sounds as loud as a drum, even above the swearing & cursing going on around you. So you stop, horrified, to be prodded by the man behind or cursed by an officer in front.” (11)
Lieutenant Sam Horner, Signals Officer, 2nd Battalion, Royal Norfolk Regiment
However, the Naga porters, who carried much of the heavier equipment, “were quite unable to understand why the troops were out of breath.” (11)
April 25. Holding my Sten-gun so tightly
Cap badge of the Lancashire Fusiliers
The 1st Battalion of the 8th Lancashire Fusiliers was part of the left hook flanking movement led by Brigadier Hawkins of 5 Brigade. At dawn on April 25 they came under attack. After a hail of mortar, machine-gun & rifle fire, Japanese infantry scrambled up a slope towards them, led by an officer with a flag in one hand & his sword in the other, screaming “Banzai”. A savage melee ensued, before they were eventually beaten off, leaving 35 dead behind. Five Lancs had been killed & 25 wounded, many severely.
Inspection of the dead Japanese discovered that each carried in his breast pocket a bundle of brand new bank notes bearing the words, written in English, ‘New Japanese Currency of India, One Pound’.
Once the Lancashires had recovered from this attack, they set off in the direction of Kohima. Ascending a hill, they spotted the firing slit of a bunker. Corporal John McCann was sent to investigate. He approached from outside its field of fire & threw in a grenade. The bunker was found to be deserted.
Shortly afterwards, however, the Lancashires came under machine-gun fire, which killed a Bren gunner & a stretcher bearer. The source could not be seen. They lay flat & waited as bullets skimmed over their heads. A Japanese officer rose from some bushes & brandished a sword, but the Lancashires shot him down. Corporal McCann recorded what happened next:
“The Japanese started shouting & a line of them rose from the bushes about eight yards in front of us & started to rush forward. The bushes on both sides of them were also alive with charging, shrieking Japanese, bayonets pointing at us & rifles firing. Their bullets whistled through the air. Small holes began to appear in faces & the tunics of the oncoming men started running with blood. In ones, twos & threes they crumpled before us, the nearest one getting to as close as three yards away before we stopped them all.
I found that I had been holding my Sten-gun so tightly that when I tried to relax my hold on it, my hands wouldn’t let go. A thin column of smoke still rose from its short barrel. About six months before, the Sten-gun had replaced the Tommy-gun as the personal weapon of Section Commanders. At first sight of them, we had been amazed. Their construction was in complete contrast with the workmanship & artistry of the Tommy-gun. Our rifles & Bren-guns had quality & precision written all over them, but the Sten-guns were like bits of old iron welded carelessly together. Now I had confidence in mine.” (13)
Sten-gun
When war broke out in 1939, the British government hastily accumulated submachine guns by importing U.S. Tommy-guns, but these were unacceptably expensive. Britain needed a homegrown submachine gun that could be produced rapidly & cheaply. The Sten was the answer, ugly but very cheap & the perfect gun for emergency wartime production. Given the shortage of precision machine tools in Britain at the time & the stress on manufacturing, the Sten was designed for stamping & pressing processes that could be performed in the humblest of workshops. Indeed, many resistance movements in Nazi-occupied countries produced their own in cellars & garages. However, it frequently jammed & its short barrel & small bullets severely restricted accuracy & stopping power, with an effective range of only 100m, compared to 500m for Lee–Enfield rifles. Nevertheless, it filled a crucial gap in British armaments & was produced in vast numbers.
Whilst 1/8 Lancashire Fusiliers & 5 Brigade continued their left hook towards the northern part of Kohima, a right hook was launched further south, aimed to attack from behind the Japanese on Transport Ridge to ‘shoot them up the arse’. The 1st Battalion Royal Scots & the 2nd Battalion Royal Norfolks of 4 Brigade were the largest components of this manoeuvre.
April 24. No time to say farewell
After beating off the frenzied attacks of the previous day, the Royal Berkshires & Durham Light Infantry were left in relative peace on April 24. Nevertheless, Garrison Hill remained a dangerous place. The Berkshires’ Regimental History recorded that
“Mortar & artillery fire were constantly exchanged & snipers’ bullets flicked everywhere. No one stirred without being shot at, & whenever they moved men ran swiftly from cover to cover.” (11)
Private Alfred Thorne, 1911-1944, 2DLI, Rest In Peace
However, after nightfall a Japanese attack succeeded in capturing a feature called the Mound, as well as the end of one of the Berkshires’ trenches. Lieutenant-Colonel Bickford ordered an attempt to recover this ground, but it ended in failure:
“I decided to recapture this position, but all efforts were unsuccessful. The only way one could get at the Japanese was to throw grenades into their end of the trench or go over the top with bayonets. The latter method would have been sheer suicide because the area was swept by machine-gun fire from two directions. It was during one of the grenade attacks led by Major Sawyer that he received a grenade wound in the chest & died. Many of our casualties were caused by the Japanese throwing our own grenades back at us.” (11)
In the five days they had been on Kohima Ridge, 21 Berkshires had been killed, 5 were missing, & 114 wounded, of whom 98 had been evacuated.
Grave of an unidentified soldier, Rest In Peace
The left hook flanking manouvre led by Brigadier Hawkins of 5 Brigade had worked its way through the difficult terrain to reach some high ground overlooking the village of Merema. According to Lieutenant Wilson of the 2nd Manchesters
“Although tired, the men were in good spirits. Rations were getting on the low side, but we were promised replenishments in the very near future.” (11)
The intention had been to deliver supplies by air, but this was no longer considered practicable. Instead, Nagas were engaged to deliver rations to the hungry British. They took a while to get organised, but then reached 5 Brigade in half the time expected. Major General Grover fed & paid these Nagas when they returned, recording that
“All the troops are filled with admiration for these stout-hearted, cheery hill men. They are doing us so very proud that I feel we must at least show our gratitude.” (11)
March 31. The spirit of the battalion was magnificent throughout.
Surrounded at Jessami with their radio smashed, the 1st Assams believed they were under orders to fight to the last man. Lieutenant John Corlett volunteered to carry through the enemy’s lines a message to withdraw. Initially, the Assams shot at him, assuming he was a Japanese infiltrator, but he persuaded them otherwise & delivered the new order.
Lieutenant Colonel ‘Bruno’ Brown decided it was too late to withdraw that night, so the garrison had to hold out at Jessami through another long day. Expecting them to attempt a break out, the Japanese attacked repeatedly. Bunkers kept changing hands in savage fighting. When night came at last, the Assams abandoned Jessami.
The Japanese had laid ambushes, but ‘Bruno’ Brown extricated most of his men & led them to Kohima, a hazardous march of 78 miles, completed in just 39 hours.
British despatches reported that:
“Orders were given to the Jessami and Kharasom garrisons to withdraw on the night 31 March/1 April. A message in clear was dropped on Jessami by air but, unfortunately, not on the garrison. The consequence of this was that, when 1st Assam Regiment withdrawal took place, all roads & tracks leaving from Jessami were heavily ambushed by the enemy. The withdrawal of 1st Assam Regiment completed a brilliant operation by a comparatively new battalion in their baptism of fire. Not only had it held the enemy attacks & inflicted more casualties than it suffered, but it had successfully delayed the enemy’s advance and thus given valuable time for preparation to the Kohima Garrison. The spirit of the battalion was magnificent throughout, and in the end it had extricated itself without any of the help it had been led to expect.”
A webinar can be found here about the role of 1st Assam Regiment in 1944, by Rob Lyman & Bruno Brown’s grand daughter Charlotte Carty
March 30. The finest traditions
By March 30, most of Japanese 31 Division had reached Jessami. Three companies of 1st Assam Regiment were now facing five battalions of Japanese infantry & two battalions of mountain artillery. These were prodigious odds.
The 1st Assams had been ordered to fight to the last man. Staff at Kohima now rescinded this order, but could not tell the gallant Indians because they no longer had radio contact. The message was therefore dropped from a light aircraft. However, it fell outside the Assam’s perimeter & was recovered by the Japanese.
The persistance of the Japanese shelling & assaults was wearing down the Assam’s ability to hold them at bay. Jemadar (warrant officer) Tonghen Kuki showed conspicuous courage in supporting one of the defenders’ forward bunkers, for which he later received the military cross. The citation read:
After three days of hard fighting between 28th & 30th March 44 at JESSAMI, it was known that our men in a forward & isolated bunker position were short of food. Jemadar TONGHEN KUKI volunteered to get the food to them, although aware that the ground was covered by Japanese machine guns at very short range. Despite the fact that he was clearly visible to the enemy he again and again crossed the open space to the bunker carrying food, water and ammunition, under constant enemy fire from which he was eventually badly wounded in the head. The magnificent courage of this Viceroy’s Commissioned Officer undoubtedly saved the lives of the men in the bunker, as well as enabling them to continue the fight. His complete disregard of personal safety & determination were in the finest traditions of the service. (9)
Jemadar Tonghen Kuki of 1st Assam Regiment
That night, wave after wave of determined Japanese assaults were still unable to overcome the Assams. Any attackers who breached the outer perimeter were cut down by troops manning the inner defences.
March 29. All the calmness in the world
At Jessami, the mortars of the surrounded 1st Assams were put out of action by Japanese artillery & mortars.
Japanese & their allies in the Indian National Army (INA) called out in English & in Hindustani for the Assams to surrender. Sovehu Angami, a havildar (sergeant) in the 1st Assams, recalled that
“The INA soldiers would ask our soldiers to go and join them in Hindi. Sometimes, our soldiers would invite them in Hindi and fire at them when they appeared!” (9)
Noisy Banzai charges were again made during the night. Although they were repulsed, the loss of their mortars made this more difficult for the Assams than on the night before.
Captain Peter Steyn was proud of his men:
“Young & inexperienced sepoys were fighting like veterans; red-hot machine-gun barrels would be ripped off, regardless of burns suffered in the process; Japanese grenades & cracker-bombs were picked up & thrown clear of the trenches with all the calmness in the world & there did not seem to be a man in the garrison afraid to carry out any task given to him.” (10)
March 28. Japanese reach Jessami
The 280 men of 1st Assam Regiment at Jessami lay in the path of the main thrust of Japanese 138 Infantry Regiment. As at Kharasom, the Assams at Jessami had prepared their position carefully, with deep trenches & mortar pits protected by barbed wire.
At 08.55 on March 28, the leading Japanese came into sight. The Assams watched the first 25 approach to within 40 yards, before cutting them down with Bren light machine guns.
Once alerted to the presence of their opponents, the main Japanese force behaved cautiously, spending the day attempting to draw fire from the Assams, to determine their strength & locations. The Indians waited calmly without returning fire.
Several noisy Banzai charges were made in the night, but were beaten off by the defenders’ fire without loss to the Assams. Isolated infiltrators got through the wire before being killed. Documents & a unit flag were gathered from Japanese corpses for intelligence purposes & carried to Kohima by runner. This was a good start, but the Assams knew that far worse was to come.
March 27. The last man
Whilst Japanese 58 Regiment was delayed by 50 Indian Parachute Brigade at Sangshak, further north the Japanese 138 Regiment was advancing towards Kohima. In their path lay 400 men of the 1st battalion Assam Regiment. This was the youngest regiment in the Indian Army, raised just 3 years previously from local hill-men, including many Nagas.
They had been ordered to defend the approaches to Kohima to the last man & the last bullet. Most were dug in at the Naga village of Jessami, but A Company, 120 men strong, was 9 miles south at the village of Kharasom. The Assam’s had carefully prepared their defensive positions, with deep trenches protected by barbed wire.
At daybreak on March 27, Captain Jock Young, A Company commander, saw a battalion of Japanese approaching Kharasom complacently, with mules carrying ammunition & elephants dragging artillery. Before they could deploy, their front ranks were scythed down by withering fire from the Assams. Three Japanese assaults before nightfall were repulsed with heavy losses. This pattern was repeated for the next 3 days.
By March 30, food, water & ammunition were running low. The arrival of fresh Japanese troops convinced Jock Young that the position would soon be overrun. He therefore ordered his troops to sneak away after nightfall, whilst he remained to fight on alone. Young was unaware that the order to fight to the last man had been rescinded. The Japanese attacked at dawn & were met by Young, manning a bren gun. He was quickly silenced.
Colonel Hugh Richards, garrison comander at Kohima, wrote of Jock Young’s heroic stand that
“As an example of complete self-sacrifice, nothing could be more magnificent.” (8)
Of the 120 Assams who had fought at Kharasom, 56 made it back to Kohima two days later.
A webinar by Robert Lyman & Roy McCallum about Jock Young and the 1st Assams at Kharasom can be found here.
Battle of Sangshak: The reckoning
The Japanese gave a casualty figure of 580 at Sangshak, of whom nearly half were killed. This included a disproportionate number of platoon & company commanders, which blunted the effectiveness of 58th Infantry Regiment. More importantly, their arrival at Kohima was delayed by 6 days, buying time for the Allies to rush in reinforcements.
Of the two thousand defenders at Sangshak, 900 were killed, wounded or taken prisoner. Worst hit was 152 Indian Parachute Battalion, which suffered roughly 80% casualties.
Monument at Sangshak
Lieutenant General W. J. Slim, General Officer Commanding-in-Chief, Fourteenth Army wrote later:
“To the officers & men of the 50 Parachute Brigade I send my congratulations. Your Parachute Brigade bore the first brunt of the enemy’s powerful flanking attack, & by their staunchness gave the garrison of Imphal the vital time required to readjust their defences.”
March 26. Fight your way out
Major Maurice Bell of Brigade Signals Section:
“At 17.45 on the evening of 26th March, the signaller noted down a message received over the crackling radio from Major General Roberts: “Fight your way out. Go south then west. Air and transport on lookout. Good Luck. Our thoughts are with you.” (7)
“I could barely believe my ears or the accuracy of my morse reading! A moment of bliss as there dawned the possibility – however slim – of a future life. (7)
“Then came the doubts. Firstly, was this a genuine message or something sent by the enemy? Secondly, had the Japs intercepted the message? We had destroyed our code books early in the battle to prevent them falling into Japanese hands & had been communicating ‘in clear’ ever since. On the first issue, we asked for information on personnel in Brigade Signals. This was personal stuff unlikely to be known by Japanese intelligence & included such details as the nicknames of various signalers. All the questions were answered promptly & correctly & we were reassured that the message was genuine. (7)
“On the second issue we could do nothing. I told the two operators to keep the news to themselves and took the message to Brigade HQ, wondering on the way how we would cope with the many wounded in the field hospital. (7)
There were about 150 severly wounded who could not be moved. Everyone knew that the Japanese routinely murdered such men, remembering the massacre of wounded in the Admin Box in February. “Much discussion & heart-searching” (8) preceded the decision to abandon the wounded. They were sedated & left in an opiate stupor.
The night was moonless & pitch black, allowing the survivors of 50th Indian Parachute Brigade to creep away in small groups. They made their way back to Imphal, a trek that took these exhausted men at least 3 days & demanded climbs of around 4,000 feet.
On this occasion, the wounded were spared because of the discovery that a popular Japanese officer, slain during the battle, had been wrapped in a blanket & buried. Lieutenant Shosaku Kameyama recorded that
“Our men were all moved by this. As the enemy treated our company commander respectfully, our regimental commander ordered that enemy wounded should … not be killed.” (8)
They were sent to Japanese field hospitals with orders to treat them mercifully.
March 25. None of us expected to get out alive
At 0400 hrs on March 25, after heavy artillery & mortar fire, a large Japanese assault broke into the church position, but was driven out. This was repeated with fresh troops several times over the next few hours, fighting continuing inside the church, until all its defenders had fallen.
The Japanese were now established on the highest ground within the defensive perimeter, setting up their machine guns in the Indian’s trenches & gun pits. Captain John Sanderson of 152 Battalion described this desperate combat:
“My men and I were fighting for our lives, hand to hand, when a grenade exploded and knocked me out. A fellow soldier’s body fell on top of me. The Japanese came through bayoneting our men but they must have thought I was dead. A counter-attack finally drove the Japanese back again. When I regained consciousness, I found I was the only one left alive. The weapon pits were a shambles of dead and dying, both our own and Japanese. It was impossible to be certain who was still alive. Major Smith and Major Lock commanding the Mortar and Gun batteries were both killed fighting gallantly in counter-attacks to save their battery positions.” (7)
All the company commanders of 152 Battalion had been killed or badly wounded. Ordered to retake the church area, Lieutenant Robert de la Haye of the 152nd, calmly checked his equipment and combed his hair, before leading his men forward to fight their way up to the church with bayonet and kukri, but they were shot down in minutes. Some positions were retaken by further counterattacks, but could not be held because they had no more grenades.
“We continued to fight by day & night. The position became utterly gruesome & macabre. The perimeter was littered with corpses, which could not be buried, & there were mule carcasses everywhere. Some went into the cooking pot, but others very quickly rotted in that climate – and there were Japanese bodies, our own bodies, & excreta everywhere. It was impossible to construct properly dug-down trenches, dysentery became rife & the situation was almost intolerable. We were getting weaker by the hour – our men were getting killed off one after the other, we were running out of ammunition & food & some men were almost delirious after many days without sleep. Some of us would drop off for a few minutes in mid-conversation. The situation was desperate, & by 25 March, none of us expected to get out alive. But somehow that didn’t seem to mean anything, either – we just went on, relentlessly. I never heard a single man complain.” (3)
Captain Dicky Richards, 152 Indian Parachute Battalion.
Dicky Richards survived the Battle of Sangshak & rose to become a Brigadier in the British Army & a Commander of the British Empire.
March 24. Well done indeed
Lieutenant Kameyama Shosaku recalled:
“We attacked every night from the 22nd to the 25th & every night many soldiers were killed. Despite that, we went forward.”
The defenders were under strict orders to stay put at night, so that any movement could be recognised as hostile & fired upon. A critically-wounded Gurkha filled the darkness with screams for his mother, before dying just before his comrades could reach him at dawn,
Major Harry Butchard of 153 Battalion:
“Conditions on the plateau soon became pretty grim – bodies lying about, human & animal, decomposing rapidly. Snipers were a constant nightmare – one morning I was speaking to two officers of 152 battalion, and when I returned that way a few minutes later, I found them both lying dead, in exactly the same place – shot through the head”.
High ground around the church was key to the whole position & under almost continuous attack. If captured, the Japanese could sweep the area with fire. Several times they reached the church, but were eventually driven back with heavy casualties.
A message of encouragement was received from HQ, saying
“Well done indeed. Of greatest importance you hold your position. Will give you maximum air support.”
March 23. The brave pilot
At daylight on 23rd March, Dakota transport aircraft dropped supplies, but were flying too fast & too high for accuracy, so that most parachutes floated down to the Japanese positions. Years later, John Sanderson, who in 1944 was a Captain in 152nd Battalion of 50th Indian Parachute Brigade, told his son (7)
“Dakotas flew over with parachuted supplies of ammunition, water, food and equipment. We were frustrated to see almost all these containers floating down into the Japanese-held positions. The mountainous region and low clouds made the pilots’ task difficult.
Parachutes dropping from a Dakota transport plane
“The aircraft came in high to avoid the enemy’s fire from the ground and slung their loads out in one run over the position. One aircraft, however, came over very low and made a number of runs over the hilltop, dropping only two parachute loads each run. The brave pilot made every flypast so low that the beseiged soldiers could see him waving. They could clearly make out the dispatchers in the doorway, as they watched and shouted encouragement.
The Japanese directed intense small arms fire from the jungle as the single Dakota flew over their heads. All subsequent supply drops followed the same pattern. Of every flight on subsequent days, they could only rely on being able to collect this one precious load. The pilot and crew of this aircraft had taken part in the Brigade air training.
On hearing that 50th Brigade was cut off, and having to rely entirely on supply from the air, they were determined that whatever happened, and regardless of the risk to themselves, the Brigade should at least get their entire aircraft load.” (7)
To try to recover parachuted supplies, an attack was launched by Gurkhas of 153 Battalion, 50th Indian Parachute Brigade, but they were driven back empty-handed.
Gurkhas in action (NAM)
Ammunition & supplies quickly became depleted & rations were cut to a minimum. Priority was given to the wounded for what little water remained.
During the morning, large Japanese columns including elephants reached Sangshak, bringing artillery.
Both sides valued the strength of elephants, which were controlled by experienced native handlers.
Shelling began at midday, followed by large attacks. These were beaten off after fierce hand- to-hand fighting. A call for air support brought strikes by Spitfires, but targets were difficult to locate precisely & the defenders were strafed as well as the Japanese.
March 22. No attempt at surprise
Once it got dark on March 22, Japanese of 2/58th Regiment charged in waves, without artillery support, up the slopes to Sangshak. They made no attempt at surprise, carrying lights & shouting as they ignited the village. Flames from the burning buildings lit the battlefield. Ninety Japanese were soon dead, including their battalion commander, but they kept attacking through the night, disregarding casualties. When dawn broke, the Japanese withdrew into the jungle & shooting subsided.
“From our experience in China we were confident of the success of the night attack. But when 8th Company broke through the enemy front line … very fierce enemy firing made their progress impossible. Under a strong counter-attack the commander and most soldiers of 8th Company were killed or wounded. Though we wanted to advance we could not even lift our heads because of the heavy fire which we had never before experienced.” (3)
“Our battalion commander … ordered an attack during the coming night.”
“Company Commander Marukawa gave an address of instruction: “Let everyone toast their lives to me in this operation…” He was speaking in tears. Then about ten porcelain cups were brought in, filled with Japanese sake, and circulated among us. After we all had a sip, the cups were thrown at a rock to be broken in pieces – a ritual before going into a hard battle.” (5)
The Battle of Sangshak
The Battle of Sangshak by Søren Hawkes
“On the evening of 21st March, we occupied the village of Sangshak. The enemy mounted a heavy counter-attack on us after sunrise. This was the first time that we had fought with the British-Indian forces, which was very different from our experience of fighting the Chinese army which had inferior weapons to ours.” (3)
A webinar by Robert Lyman & Harry Fecitt describing the Battle of Sangshak can be found here.
March 21. Our great disappointment.
As instructed, 50th Indian Parachute Brigade prepared a defensive box at the Naga village of Sangshak, which was perched on a hill. The Allies had about 2,100 men, with mountain guns, machine guns & mortars. Digging in was hampered by hard rock just a few feet below the surface, so trenches were very shallow.
Although Sangshak was not on their way to Kohima, the Japanese were unwilling to leave a significant force threatening their flank. So they turned aside to deal with the unexpected threat of 50th Indian Parachute Brigade. Around 2,200 Japanese with mountain guns were initially engaged, but they were joined by more later.
Capturing supplies abandoned by their retreating enemies was a key part of Japanese strategy, as they had set off with only enough food for 20 days. Captain Shosaku Kameyama, of 3rd Btn, 58 Infantry Regt, 31 Division, recorded
“After 6 days’ hard march we poured into Ukhrul, a small village on the road from Kohima to Sangshak. British troops seemed to have evacuated it only a few hours before & the village was burning. We then realised that the enemy had destroyed all their food & supplies, to our great disappointment.” (3)
March 20. Your task is to destroy Japanese
Brigadier Hope-Thomson, Commander of 50th Indian Parachute Brigade, received the following orders:
“Your task is to destroy Japanese moving west through Naga Hills. If unable to do so owing to superior enemy strength you will ensure security of your force by concentrating it into close defence box in general area of Sangshak.
The Naga village of Sangshak
In event of enemy by-passing your positions you will cut their lines of communication and harass their rear. Your continued resistance in your present area of operations is an essential part of a plan for defence of Imphal. If your communications are cut and cannot be opened you will be supplied by air.” (3)
March 19/20. Such a brave act.
Unknown to either side, the 50th Indian Parachute Brigade lay in the path of the Japanese advance. Formed of volunteers from many regiments, they were carrying out jungle training near the Naga village of Sangshak & were not yet prepared for combat.
Insignia of 50th Indian Parachute Brigade
The first Indian unit to make contact was C Company of 152 Battalion, who were several miles from most of the brigade, on a hilltop in an isolated position. On March 19, the seven British officers & 170 men of C Company found themselves surrounded by 900 Japanese of 58th Regiment. Repeated attacks were repelled until the following morning, when, according to the 58th regimental history
“Suddenly from the top of the hill, a small group of about 20 men charged down towards us, firing & shouting in a counter-attack … At the very top of the position an officer appeared, put a pistol to his head & shot himself in full view of everyone below. Our men fell silent, deeply impressed by such a brave act.” (3)
Indian troops attacking
This futile gesture seems extraordinary for a British officer. It is far more consistent with the culture of the Imperial Japanese Army, where suicide could be considered heroic, even when nothing was gained. Perhaps this is why the Japanese were so impressed.
Of the 177 paratroops of C company, only twenty escaped.
Conditions were hard
Senior Private Manabu Wada, of 3rd Battalion, 138 Infantry Regiment, 31 Division, recalled that
“Conditions were hard, well-nigh impossible. At 3,000 metres the mountains were shrouded in freezing cloud, and the rocks and trees were covered in moss and lichen. Matches struck at this altitude went out immediately, so we could not light cooking fires or boil water.
Our cattle and horses fell down the mountainside, taking our provisions with them; the slopes were so steep we couldn’t go down to retrieve anything.” (5)
A Japanese column climbing in the Naga Hills
“We complained bitterly to one another of the incompetence of our generals who had sent us into the mountains without any proper climbing equipment or clothing, and hampered by large herds of cattle which could not climb the steep, rocky paths which even we soldiers found hard enough.” (5)
Japanese troops climbing, burdened with equipment
“But at last we reached the summit and could see, to the west beyond the boundless sea of clouds, Tibet and the Himalayas.” (5)
Peaks of Himalayan mountains in the distance, like a row of clouds.
Beasts of Burden
Japanese 31st Division had to cross mountainous jungle terrain to reach Kohima, 120 miles away. There were a few narrow, winding tracks, but no roads that could take motor transport from the frontier. An average infantryman carried about 100 lbs, so heavy that he needed help to stand up; this included his personal supply of rice for 20 days. Mules could carry 160 lb & were used in huge numbers, as were horses.
Terrain crossed by the Japanese 31st Division en route to Kohima.
Mutaguchi attempted to use bullocks to transport stores & munitions, providing his army with a source of fresh meat when needed, but these beasts plodded far too slowly. They were used to pulling carts or ploughs, not to carrying burdens on their backs, & they would stop frequently & stubbornly refuse to move. This was hugely frustrating for troops rushing to reach their objective. Captain Shosaku Kameyama expressed the opinion that
“These ideas of our top brass proved to be wishful thinking, which disregarded the harsh reality.” (5)
A Burmese bullock
Captain Kameyama recorded that 700 oxen were allocated to his battalion & one of its four rifle companies was converted into a transportation unit responsible for them. This was less than popular for these young fighters, eager to prove themselves in battle.
17,000 of the beasts of burden supporting the Japanese, mules, pack ponies & bullocks, perished in the Invasion of India.
March 15. Japanese 31 Division set off for Kohima
March 15th 1944. Japanese 15th & 31st Infantry Divisions crossed the Chindwin, heading for Imphal & Kohima, respectively.
“I shall never forget the date of 15 March 1944. This was the dry season and the great Chindwin River was now so shallow that we were able to walk across to spearhead 31 Division’s rapid advance to attack the British and Indian forces beyond the Arakan Mountains and capture Kohima in India’s Manipur State. At that time we thought only of victory, never of defeat.” (5)
Japanese infantry fording shallow river
In contrast to Manabu Wada’s 138 Infantry Regiment, most crossings were further south where the river was higher & needed pontoon bridges to get over the Chindwin.
River crossing by Japanese infantry using a pontoon bridge
Mutaguchi’s Plan
The Japanese 15th Army that invaded India was commanded by Lieutenant General Renya Mutaguchi. He was 56 years old & liked to brag of his prowess in combat & with women. Ambitious & political, he had been prominent in the belligerent faction that had precipitated war with China. He sacked his chief of staff for suggesting that the invasion of India would be unable to overcome the logistic challenges of supplying an army across mountainous territory with inadequate roads.
Renya Mutaguchi, Commander of the Japanese 15th Army
Mutaguchi’s primary objective was to destroy the Allied IV Corps, which was based at Imphal, using two of his divisions (15 & 33). His remaining division (31) would head for Kohima, a small town in the Naga Hills. Capturing Kohima would cut the main supply route to Imphal & isolate Allied IV Corps, allowing its destruction by 15 & 33 Divisions (his “Victory of Annihilation”).
Mutaguchi’s plan to cut off & crush Allied IV Corps at Imphal, push on through Kohima to capture Dimapur, closing this supply route to China
The Allied supply base was at Dimapur, which had airfields, good rail connections & huge store depots. Dimapur was the source of supply not only for Allied IV Corps, but also for China, which had been at war with Japan since 1937. Mutaguchi planned for 31st Division to push on from Kohima & take Dimapur. This would be catastrophic for the Allies. Not only would it cut the supply route to China, but the resources at Dimapur would springboard his triumphant “March on Delhi”. He imagined millions of grateful Indians overthrowing the British, their colonial oppressors, & welcoming their Japanese liberators, supported by the Indian National Army.
Support for the Japanese by a soldier of the Indian National Army (INA)
Airlift
Reacting to the Japanese invasion of India, Lieutenant General Slim, Commander of 14th Army, met Lord Mountbatten, Supreme Allied Commander South East Asia, on March 14th 1944 & requested a fleet of transport aircraft to transfer Indian 5th Division to Imphal from the Arakan region of Burma. This would require 260 flights by C47 Dakotas & would be the first airlift of such magnitude in history. Motor vehicles, guns & mules had to be transported, if the division was to operate effectively on arrival.
A mule being loaded onto a C47 Dakota
Ray Street remembered that the mules urinated as soon as the planes’ engines started & the urine collected under the floor amongst the electrics:
“In the heat the stench was awful. The aircrew went mad.” (6)
Indian 5th Division, “The Fighting Fifth”, was in good spirits after breaking through the Japanese to relieve the Admin Box in February, the first major victory by British & Indian troops in the Burma Campaign. The airlift began on March 17th and was complete by March 29th.
Contemporary pamphlet chronicling the excellent wartime record of 5th Indian Division
Indian 7th Division, heros of the Battle of Admin Box, were subsequently also flown up from the Arakan to meet the invasion. The rapid arrival of two entire divisions was not anticipated by the Japanese and had massive impact on the strategic situation. It was made possible by the huge increase in Allied air power in 1944.
Gurkha
Gurkhas are mercenaries from Nepal, renowned for their courage & fortitude. They have fought with the British since 1815, formerly as part of the Indian Army. A British officer of a Gurkha regiment recorded:
“Gurkhas were wonderful chaps to command. They had a lovely sense of humour. You had to prove yourself, but once they liked you they would do anything for you.” (4)
The Gurkha in the foreground is carrying a kukri, the long curved knife characteristic of these troops.
After Indian independance, Gurkhas transferred from the Indian Army to the British army, where the Gurkha Brigade continues to serve with distinction.
Indian National Army (INA)
Subhas Chandra Bose had been a leader of the radical, wing of the Indian National Congress, becoming Congress President in 1938. He was replaced in 1939 following differences with other leaders and later placed under house arrest by the British, for promoting civil unrest.
Bose escaped from India in 1941 and traveled to Berlin to appeal to Hitler for support in securing independence for India by force. A brigade was established, termed the Free India Legion, of 4,500 Indians captured by the Germans in North Africa.
Bose meeting Hitler in 1942
Bose then turned to the Japanese and, with their assistance, organised the Indian National Army. A 16,000 strong Division was assembled, composed largely of Indian soldiers of the British Indian Army who had been captured by the Japanese when Malaya & Singapore were conquered. There were executions of some Indian prisoners of war who refused to join the INA.
Photographs found on a dead Japanese soldier that are thought to show executions of Indian POWs who refused to join the INA
The INA Division supported the Japanese 15th Army when it invaded India in March 1944, urged on by Bose with the slogan “Onward to Delhi”.
Imagined rout of British troops by INA in alliance with the Japanese
An anonymous Indian corporal explained:
“I joined the INA after hearing Netaji. The Japanese were not cruel to anyone. They said the Asians should fight for their independence, and all Asians should be independent. We were fully confident that the Japanese would hand independence to India, as they had done to the Burmese, the Malays, the Thais; all the Asians. The Japanese remained in Burma because Nehru said on the radio that he didn’t need any help from outside”. (2)
There was no mention of the 14 million, mostly civilians, who died during the Japanese occupation of China. Netaji means “Respected Leader” in Bengali, a title applied to Subhas Chandra Bose.
An attempt to encourage defections from the British Indian Army
Two Million Indian Volunteers
Red Ensign of British India
Despite the civil unrest, more than 2 million Indians volunteered to join the Indian Army & fight alongside the British. It was the largest conscript army in history. Sometimes referred to as the British Indian Army, to avoid confusion with the Indian National Army (INA).
Although junior officers were often Indian, the senior offices were British. Many Indian Infantry Brigades contained one British and two Indian battalions. For example, the 161st Indian Brigade, which stopped the Japanese from taking Kohima, comprised the 4th Battalion Royal West Kents, the 1st Battalion 1st Punjab and the 4th Battalion 7th Rajputs.
By 1945, 14th Army troops were 87% Indian, 10% British & 3% African. A report produced by the British War Office, based on interrogation of prisoners, was disappointed to record that the Japanese considered that Indians & Gurkhas were better soldiers than the British.
Quit India
General Mutaguchi, who launched the Japanese invasion of India in 1944, believed that its population would rise up against the British colonial oppressor. Civil unrest in India provided grounds for this belief.
India for the Indians
Since 1858, the British Crown had ruled the Indian subcontinent. Most Indians wanted the British to leave. Aware that this was inevitable, Britain promised a gradual devolution of power to give Dominian status to India, in return for supporting her in the war against Germany, Italy and Japan. Mahatma Gandhi and the Indian Congress Party rejected this proposal and launched the Quit India Movement in 1942.
2017 Indian stamp commemorating the 1942 Freedom Movement
The British authorities arrested & jailed the Congress Party leaders, including Gandhi. Wide-scale rioting erupted across India, leading to 100,000 arrests & hundreds of fatalities. Instead of fighting the Japanese, 57 British battalions were kept for internal security in India.
March On Delhi!
March 7th 1944. Tokyo Radio proclaimed “The March on Delhi has begun. Our victorious troops will be in Imphal by March 27th.” (3)
Invasion of India!
March 6th 1944. Japanese 33rd Infantry Division began crossing Chindwin River, heading for Imphal.
A Victory of Annihilation!
Lieutenant General Mutaguchi, Commander of Japanese 15th Army, issued a proclamation:
“The Army has now reached the stage of invincibility & the day when the Rising Sun shall proclaim our victory in India is not far off.
When we strike we must be absolutely ready, reaching our objectives with the speed of wildfire … we must sweep aside the paltry opposition we encounter & add lustre to the army’s tradition of achieving a victory of annihilation.” (3)
Queen of the Nagas
The photograph & caption below is from the Bombay Chronicle, 9 September 1945, and shows the marriage of Ursula Graham-Bower, who lived with the Naga people. She led a group of Naga tribesmen to provide valuable intelligence about the strength and activities of the Japanese. Her husband was a British intelligence officer of V-force.
In her own words:
“My parents could not afford to send me to Oxford, so instead I went to live among the Naga tribes and carried out ethnographic work. When war broke out I … helped start a Watch and Ward scheme in Nagaland. My job was to collect information on the Japanese and send it back by runner. But it had problems. There was no hope I could conceal myself in the Naga village. I am too tall and light skinned. In Burma when British officers were occasionally hidden, the Japs tortured the villagers until the officer gave himself up. I fixed up with Namkia, the headman, that I wasn’t going to be taken alive. So I would shoot myself, and he would take my head in, if the pressure on the villagers became unendurable”. (2)
Forgotten Army
The 14th Army was formed in late 1943 to fight the Japanese. Thirteen infantry divisions served within it, of which eight were Indian, three African and two British.
The British referred to themselves as the Forgotten Army, because press coverage back home always focused much more on events in Europe.
Lord Louis Mountbatten, Supreme Commander South East Asia, used to get a laugh from the troops by joking:
“I know you think of yourselves as the forgotten army, well let me tell you you are not forgotten…”
(1) “Burma ’44” by James Holland (2016) Transworld Publishers.
(2) “Forgotten Voices of Burma” by Julian Thompson (2009) Ebury Press.
(3) “Japan’s Last Bid for Victory” by Robert Lyman (2011) Praetorian Press.
(4) “Nemesis. The Battle for Japan, 1944-45” by Max Hastings (2007) HarperCollins.
(5) “Tales by Japanese Soldiers of the Burma Campaign 1942-1945” by Kazuo Tamayama & John Nunneley (2000) Cassell Military Paperbacks.
(6) “The Siege of Kohima” by Robert Street (2003) Barny Books.
(7) “The Indian Arnhem” by Myles Sanderson (2024) Hermes Messenger of the Gods, digital magazine of The Parachute Regimental Association.
(8) “Road of Bones” by Fergal Keane (2010) HarperPress.
(9) “The advance toward Kohima”. The Soldier’s Burden.
(10) “The History of the Assam Regiment” by Peter Steyn (1959) Orient Longmans, India.
(11) “Kohima: The Furthest Battle” by Leslie Edwards (2009) The History Press.
(12) “The Trees Are All Young on Garrison Hill” by Gordon Graham (2005) Kohima Educational Trust.
(13) “Kohima, An Historic Village” by John McCann (1988) John McCann.
(14) “March On” by Norman Havers (1992) Square One Publications.
(15) “Burma. The Longest War 1941-45” by Louis Allen (1984) Phoenix Press.
(16) “Soldier Poets of the Second British Infantry Division” edited by Bob Cook & Robin McDermott (2018) Dragon Publications.
(17) “Conflict at Kohima” by Harry Swinson (1944) Extracts from the diary of Captain Harry Swinson, who served with 7th Battalion Worcestershire Regiment and at 5th Infantry Brigade Headquarters.